
Edit & Refine Renders
Change weather and atmosphere
Use Edit → Change Atmosphere to explore weather and season options for an exterior render, then review the building, landscape, and materials in the result.
Select an exterior render, open Edit → Change Atmosphere, and choose Weather, Season, or both. Use the arrow button labeled Apply changes, then compare the generated version with your source. This control is available for exterior scenes.
On this page
Start with an exterior render
Use Change Atmosphere to explore how weather and season affect an architectural presentation. It is useful for comparing a clear view with an overcast study, a misty setting, or a winter atmosphere while keeping the same starting composition.
Select a completed exterior scene and the version you want to change. Change Atmosphere is an exterior Edit control. For indoor lighting changes, use the Relight guide.
Change weather or season
- Open the project and select the exterior render.
- Choose Edit, then Change Atmosphere.
- Choose Weather, Season, or both. To compare weather alone, keep the season fixed and return to the same daytime version for each attempt.
- Review your choices and select the arrow button labeled Apply changes.
- Wait for the edited version, then compare it with the source before making another change.
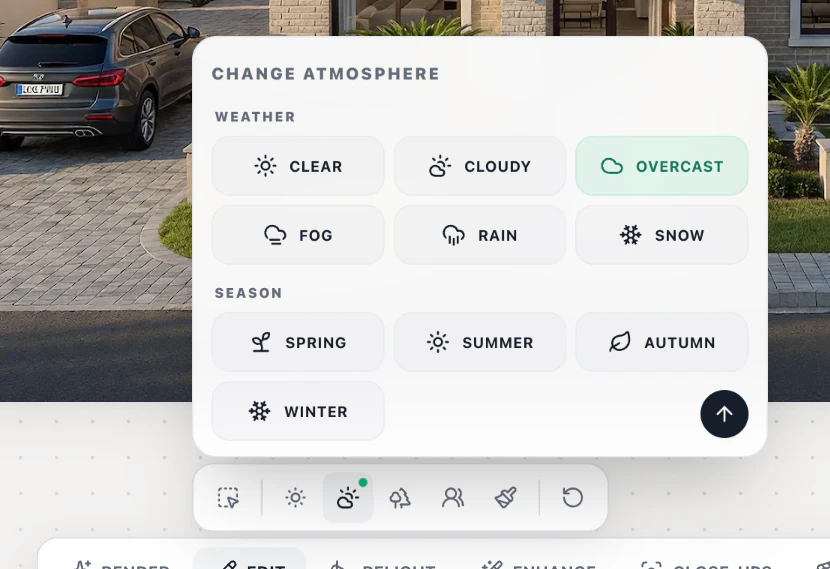
Overcast is selected here. The arrow applies the choice to the exterior.
The visible choices are:
| Control | Options |
|---|---|
| Weather | Clear, Cloudy, Overcast, Fog, Rain, Snow |
| Season | Spring, Summer, Autumn, Winter |
Choose weather and season that support the same intention. For example, a winter study can combine Winter with Snow, while an overcast summer study can combine Summer with Overcast. These are example combinations to explore, not tested outcomes for every source image.
Selecting an option prepares a change; use Apply changes to generate the result. Check any displayed credit amount before submitting. For account questions, see credits and plans.
Compare one change at a time
Begin with a weather-only or season-only adjustment when you need to understand its effect. Return to the same baseline version for the next comparison. This makes it easier to tell whether an atmosphere choice improves the presentation or hides a design detail.
Rain can change the appearance of paving and reflections. Fog can reduce background clarity, while snow and seasonal vegetation can obscure edges or surfaces. Choose an option that leaves the building's important features readable.
Combine atmosphere with lighting or surroundings
Use Edit → Change Time of Day for a quick morning, evening, or night treatment. The lighting guide explains this workflow alongside the dedicated interior Relight controls. For a complete exterior comparison, follow day and night versions.
Exterior Edit also offers Change Surroundings for a different visual setting, such as City, Coastal, Forest, or Garden. Use that control when the context itself needs to change. Review each generated result before adding another scene-wide change.
Review and keep the useful result
Check roof edges, glazing, entrances, steps, paths, planting, and material boundaries against the original. Look for unexpected surface changes or reflections that make the proposal difficult to judge.
Weather and seasonal treatments are visualization options. Keep the real site conditions and design information available when presenting them. Download the chosen version with Download → Download Image, or continue with presentations and exports.