
Architectural Workflows
SketchUp to a photorealistic render
Export a SketchUp view, render it in Vibe3D, and check materials, geometry, and composition before sharing the image with a client.
Export your SketchUp view as a PNG or JPEG, upload it to a Vibe3D project, choose Fidelity or Lumen in Render, and review the generated image against the source. This guide uses an exported image, not a native SKP upload.
On this page
Prepare the view you want to present
Start with a saved SketchUp view of the room or building. Place the camera where a person could reasonably stand, and include enough of the design to show its proportions. For an interior, make sure the opening to another room is intentional; an accidental view through unfinished geometry creates an ambiguous source.
Give important surfaces recognizable materials before exporting. You do not need to finish a traditional rendering setup, but the image should distinguish glass, timber, masonry, and upholstery. Hide selection outlines, dimensions, guides, and objects that should not appear in the presentation. Keep the model file as the authoritative design record.
Check the view at the size you expect to review it. If cabinet divisions or window frames are already unreadable, a prompt cannot reliably recover their exact construction. Reframe the camera or export a clearer view first. See preparing images for the input checklist.
Export an image from SketchUp
In SketchUp desktop, choose File → Export → 2D Graphic. Select PNG or JPEG, give the file a meaningful name, and use Options to review the image dimensions and anti-aliasing settings before exporting. SketchUp's other export formats are not interchangeable with Vibe3D's image inputs. These menu steps follow SketchUp's image-export documentation.
Open the exported file before uploading it. Verify the crop, material colors, and visibility of fine edges. A file named living-room-view-a.png is easier to recognize among later variants than an unnamed screenshot. This workflow sends the image to Vibe3D; it does not transfer SketchUp layers, measurements, or editable geometry.
Generate the first result in Vibe3D
- Sign in to Vibe3D and open a project, or use New Project. If a starting-point menu appears, choose Render 3D views.
- In the project editor, use Click to Upload Scenes to add the exported image. Wait for the upload to finish and select that scene.
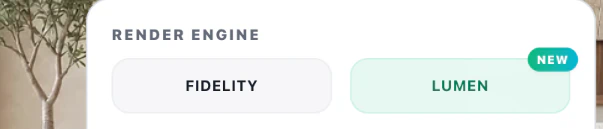
- Open Render. Under Render Engine, choose Fidelity or Lumen. Use the engine guide to understand the choices.
- Review the available lighting or atmosphere settings. For a first pass, leave Additional Instructions empty unless something in the image needs explanation.
- Check the credit amount beside Render, then run the render and wait for it to finish.
The intended outcome is a presentation image of the same view. Judge the first result before adding more directions. Adding a long description of a different room can conflict with the design already visible in the input.

This exterior is the finished example on Vibe3D’s SketchUp page. When you review your own export and result, compare the roofline, the divisions between windows, and the entrance steps from the same viewpoint.
Refine one decision at a time
Suppose the view is a living room with a light timber floor and a white ceiling. If the ceiling finish needs clarification, use a short instruction such as this starting point:
Keep the existing room layout and camera view. Use a matte white finish on the ceiling and retain the light timber flooring shown in the source.
This is an example instruction, not a tested guarantee. Check the next result for the intended finish and for unrelated changes. For a single material change in an otherwise useful result, move to editing renders instead of repeatedly changing the whole render request.
Review and download
Use Compare and inspect the source beside the result. Count window divisions, check furniture placement, follow the ceiling line, and compare material boundaries. AI rendering can alter details even when the overall composition looks convincing.
If an important wall or opening is wrong, correct or clarify the source view and render again. If the structure is satisfactory, use Download → Download Image to save the chosen result. Keep the source image with the delivered visualization so the team can trace which design revision it represents.