
Architectural Workflows
Revit to an architectural visualization
Prepare a Revit 3D view, export an image, and use Vibe3D to develop a presentation render while checking the result against the BIM design.
Prepare a clean Revit 3D view, export it as PNG or JPEG, and upload that image to Vibe3D. Generate a render, compare its architectural details with the source, and download the selected result. The image workflow does not import RVT or BIM data.
On this page
Choose a view with a clear purpose
Use this workflow when you want to communicate a Revit design through a still image: an entrance proposal, a room layout, or a façade option. Start from a 3D view that contains the design revision you intend to discuss. A visual generated from an earlier model export can look polished while communicating the wrong proposal.
Set the crop deliberately and hide annotations, reference objects, and construction information that does not belong in the visualization. Make walls, glazing, and major finish areas legible. A material-colored view provides more visual information than an undifferentiated line drawing; use the representation that best communicates the intended surfaces.
Decide what the image needs to answer. For an entrance review, show the doorway, canopy, and approach. For an interior review, show the room's circulation and furniture relationship. Avoid asking one distant overview to communicate every small detail.
Export the view as an image
In Revit, open File → Export → Images and Animations → Image. In the export dialog, choose the required view or visible portion, set the image size, and choose PNG or JPEG for the relevant view type. Review the exported file outside Revit before continuing. Autodesk documents these controls in Export a View to an Image File.
Check that the image contains the intended crop and no unwanted view tags or crop boundaries. If the export is a sheet, crop out schedules, title blocks, and other views so Vibe3D receives one clear architectural scene.
Vibe3D's Click to Upload Scenes workflow accepts supported raster images. It does not read an RVT file or preserve Revit families, object IDs, dimensions, or BIM parameters. Keep the Revit model and documentation separate from the generated visualization. See supported inputs.
Render the exported view
- Open Vibe3D, create or open the relevant project, and use Click to Upload Scenes to add your image.
- Wait for the scene upload to finish. Select it and open Render.
- Choose Fidelity or Lumen under Render Engine. Review the controls shown for your scene; interior and exterior settings differ.
- Start without extra instructions if the materials and composition are clear. Otherwise add one concise requirement in Additional Instructions.
- Review the credit amount shown on the Render action and generate the image.
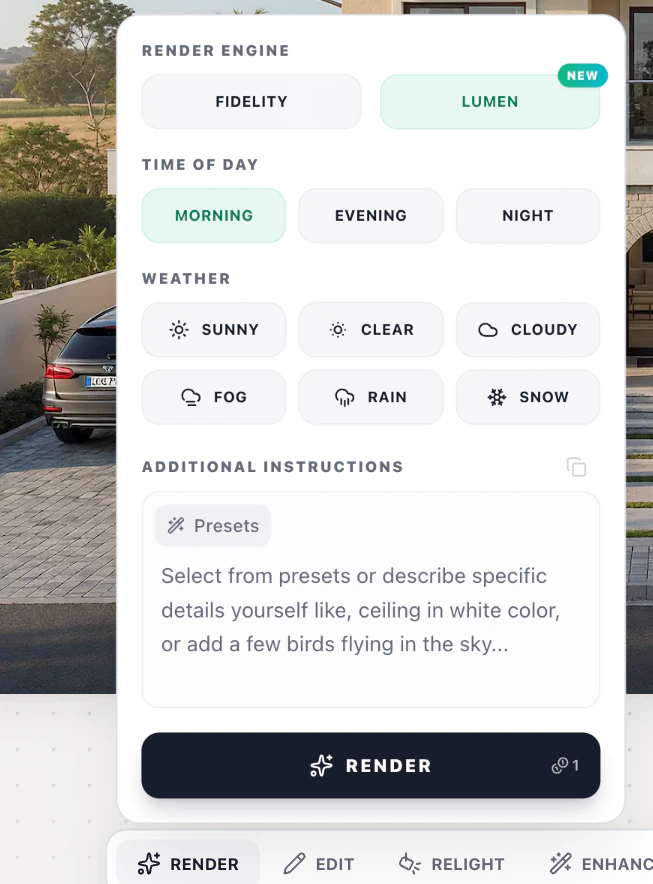
These are Vibe3D’s settings for an uploaded exterior view.
For example, a façade study may need a specific finish explained:
Retain the façade openings and camera composition. Use warm grey masonry on the main wall surfaces and dark metal frames around the glazing.
This example expresses a design intention. It cannot enforce exact dimensions or guarantee that every opening remains unchanged.
Check the result against the BIM design
Use Compare after generation. Inspect repeated elements carefully: window bays, railings, mullions, floor lines, and roof edges. Check that a visually appealing shadow has not concealed a changed opening or that a reflected surface has not become an extra doorway.
Separate presentation decisions from model changes. If a client prefers a different cladding, the visualization can help discuss it, but the Revit materials and specifications still need an intentional update. Do not treat the image as evidence that the underlying BIM design has changed.
For unwanted geometry changes, improve the clarity of the original export before another attempt. The design-preservation guide explains what to inspect and when to return to the source.
Prepare the review image
Download the approved version through Download → Download Image. Label the file with the view and design revision in your project records. If you are presenting several views, use presentations and exports to keep the chosen versions together.
A useful deliverable includes the visualization and enough context to identify the source model revision. This keeps an atmospheric image connected to the design decision it supports.