
Architectural Workflows
Explore kitchen materials with targeted edits
Change kitchen cabinet, worktop, or flooring finishes in Vibe3D using point or area annotations and optional material references, then compare the result.
Select the kitchen image, open Edit, click a surface or drag around an area, and describe the finish you want. Add a reference image if useful, then submit the edit and inspect the new version for unwanted changes.
On this page
Choose one material decision
Start with a kitchen image whose layout you are happy to discuss. Decide whether the review is about cabinet fronts, the worktop, splashback, or flooring. Editing all of them at once makes it harder to understand which change improved the proposal and which request caused an unintended result.
Use a view where the target material occupies enough of the image to judge its finish. A tiny patch of flooring behind a chair is a poor basis for evaluating plank direction. If a material is important but barely visible, export a more useful camera view from the source model first.
Keep an original version available. The aim is to compare finish options on a known design, not gradually lose track of the agreed layout.
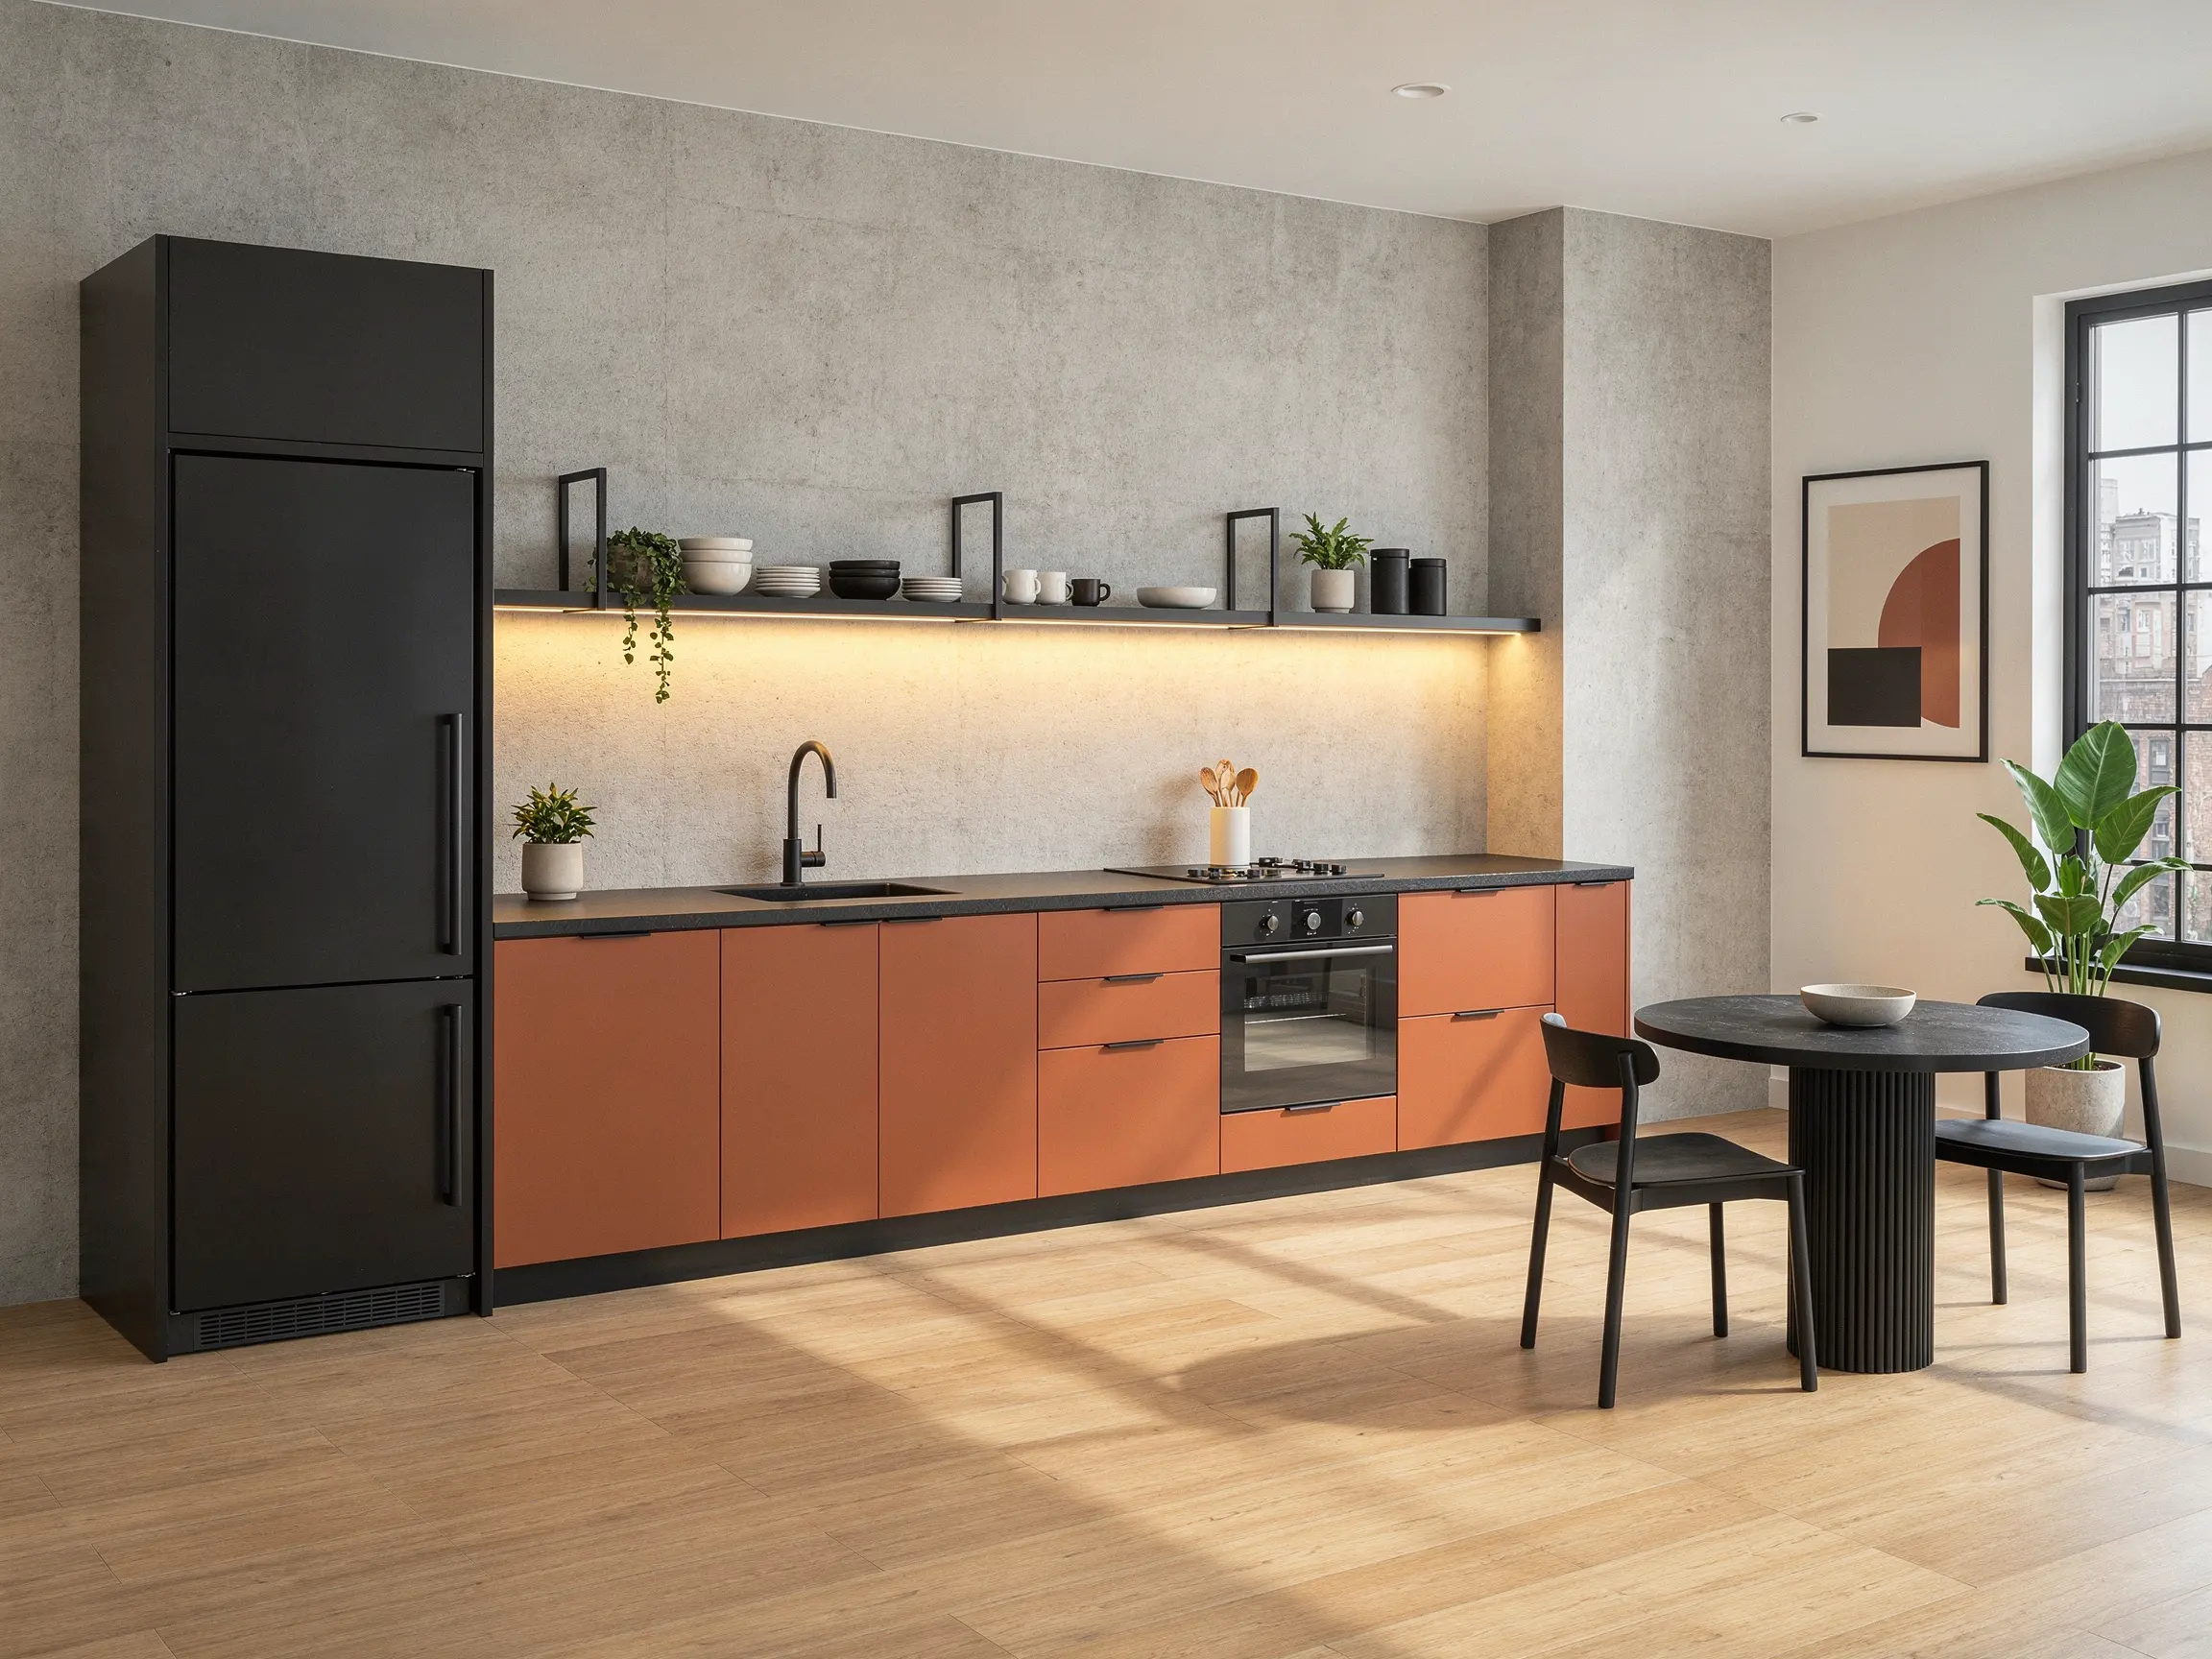
In this starting view, the terracotta cabinet fronts are a useful target. The worktop and tall dark cabinet give you two clear boundaries to check after the edit.
Select the target in Vibe3D
- Open the project and select the kitchen scene and version you want to edit.
- Choose Edit from the toolbar.
- Click the element, or drag a rectangle around the area you want changed. A comment box appears for the selected point or area.
- Describe the material and identify any features that should remain.
- Select the annotation’s Submit edit arrow, then wait for the new version.
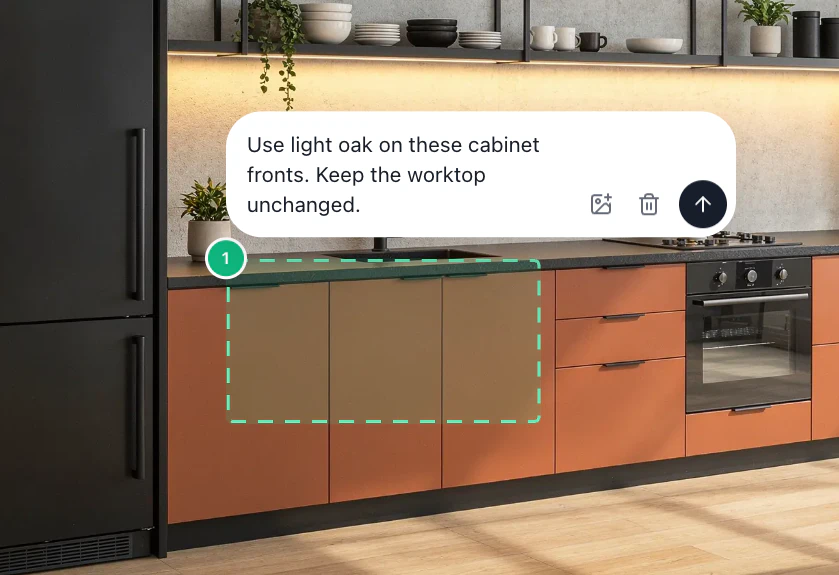
The current editing workflow uses annotations on the image. A rectangle is a way to identify the intended area; it is not a promise that every pixel outside it will remain identical. Review surrounding objects after every result. For the full control reference, see editing renders.
Example: change the cabinet fronts
Select the cabinet fronts while keeping as much of the worktop and surrounding walls outside the rectangle as practical. Use a clear instruction such as:
Change the selected kitchen cabinet fronts to natural light oak with a matte finish and vertical grain. Keep the existing cabinet divisions, handles, worktop, appliances, and camera view.
This example expresses the intended change; it has not been presented as a tested material match. Inspect the result for drawer widths, handle placement, door divisions, appliance openings, and changes to the worktop edge. If the oak extends onto surfaces you meant to keep, return to the original version and make the target and wording more specific.
For a separate flooring option, start a new targeted edit rather than combining it with unrelated cabinet instructions.
Replace the selected flooring with matte light grey stone tiles. Keep the floor plane, kitchen cabinetry, island position, and room lighting consistent with the current image.
Check tile scale and perspective after generation. A convincing image is still a visualization, not a tile-setting drawing.
Add a material reference when appearance matters
In the annotation, open Reference → Upload reference and choose an image of the intended finish. A clear, evenly lit sample is easier to interpret than a crowded supplier collage with text and several different products. Wait for the upload to finish before sending the edit.
Explain what the reference should influence: color, texture, grain, or general finish. For example, ask to use the reference's oak appearance on the selected cabinet fronts while retaining their dimensions and arrangement.
Same as model may also appear in the reference menu when a model source is available. Use it only when that source contains the material you actually want. See material references for more detail.
Compare and prepare the options
Compare each result with the same baseline. Look for unrelated changes to tapware, stools, pendant lights, splashback joints, and reflections. If the edit produces an appealing but different layout, it does not answer the original material question.
Download the useful alternatives through Download → Download Image and label them by finish. Keep the reference sample and source image alongside the visual options in your project records. Confirm the final selection using actual material samples and specifications; an AI image is not a color-calibrated product approval.