
Edit & Refine Renders
Change the style of a render
Use Edit → Change Style in Vibe3D to create White Model, Scale Model, Watercolor, Collage and other architectural presentation treatments from a render.
Select a scene and version, choose Edit → Change Style, select a treatment, then use Apply changes. Compare styles from the same baseline image so differences in presentation do not obscure changes to the underlying design.
On this page
Match the treatment to the design conversation
Architectural styles help present the same design with a different visual emphasis. A model-like treatment can support a discussion about form, while an illustrated treatment can make a concept feel less final than a photorealistic image.
Choose the treatment for the question you want the client to answer. If the decision concerns an exact material or a lighting specification, keep a more representative render and the relevant specifications available as well.
Apply a style
- Open the project and select the scene and version you want to use.
- Choose Edit, then Change Style.
- Select a style preview.
- Check the displayed amount and select the arrow button labeled Apply changes.
- Review the generated version against the original.
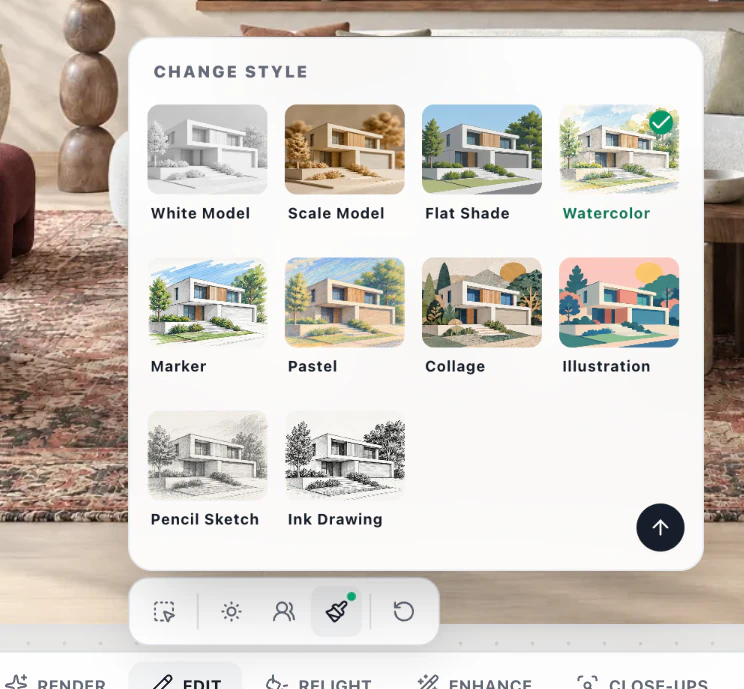
The style control lives inside Edit. You do not need to write a long style prompt or look for a separate Stylize workflow. For another comparison, return to the same baseline before choosing the next style.
This control changes the treatment of the whole image. For the appearance of generated occupants, use People style inside Add People.
Available style names
The chooser uses these labels:
| Style | Useful presentation question |
|---|---|
| White Model | Is the massing and composition easy to read? |
| Scale Model | How does the design read as a physical-model-like presentation? |
| Flat Shade | Are the main shapes and color areas clear? |
| Watercolor | Does a softer illustrated treatment suit the concept discussion? |
| Marker | Can a sketch-like treatment communicate the proposal clearly? |
| Pastel | Is a softer color treatment useful for the intended mood? |
| Collage | Would a conceptual, mixed-visual treatment support the story? |
| Illustration | Does a drawn presentation suit this stage of design? |
| Pencil Sketch | Are line, shape and composition the focus of the review? |
| Ink Drawing | Does a stronger line-based treatment communicate the design? |
These questions are ways to choose a style, not promises about an exact visual outcome. The chooser previews communicate the treatment; your source image and result still need review.
Keep comparisons consistent
Use one source view when comparing treatments. Changing the camera, materials and style together makes it difficult to see what each choice contributes.
Compare architectural openings, rooflines, furniture and material boundaries after generation. An illustrated style may simplify or reinterpret small elements. Do not treat that simplification as a change approved for the actual design.
If a treatment hides a detail the client needs to judge, include the original render next to it rather than relying on the styled image alone. Preserving your design provides a broader review checklist.
Select and export the useful versions
Use the scene's versions to revisit your options, and star the ones you want to include in the client package. The project guide explains how versions and scenes fit together.
Download the chosen images, present the project, or export it. Label each treatment so the client understands that it is a presentation option. Check credits and plans before generating additional alternatives.