
AI Rendering
Render interiors and building exteriors
Use Vibe3D to visualize interior and exterior model views, choose appropriate settings, and inspect the architectural details that matter in each scene.
Upload a clear interior or exterior view, select the scene, and open Render. Choose Fidelity or Lumen, adjust the controls offered for that scene, and generate. Review the result against the source before using it in a presentation.
On this page
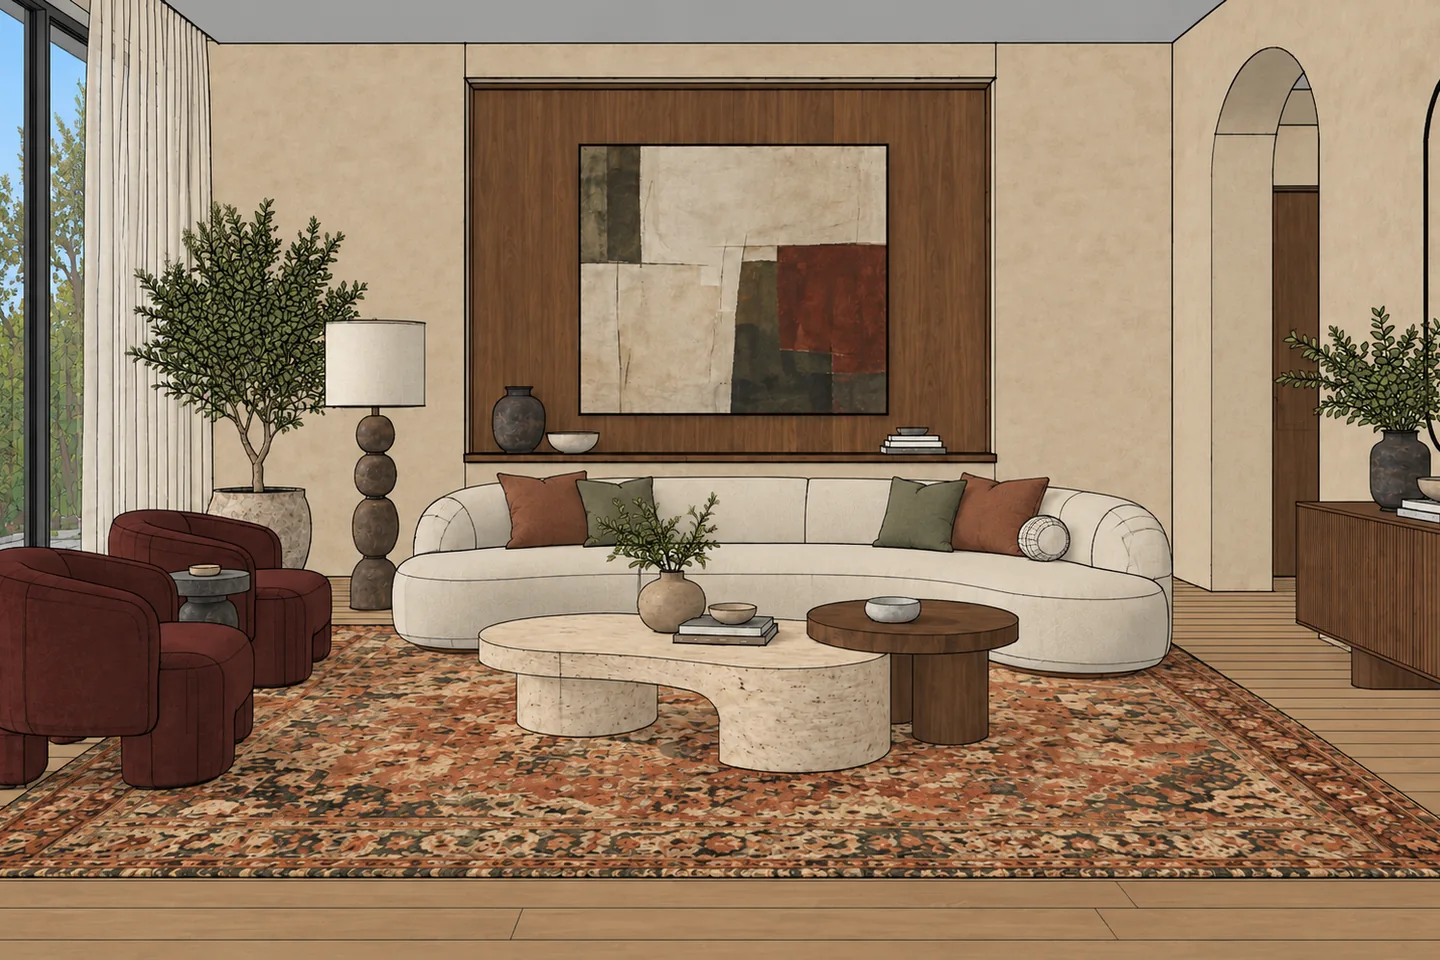 Original image
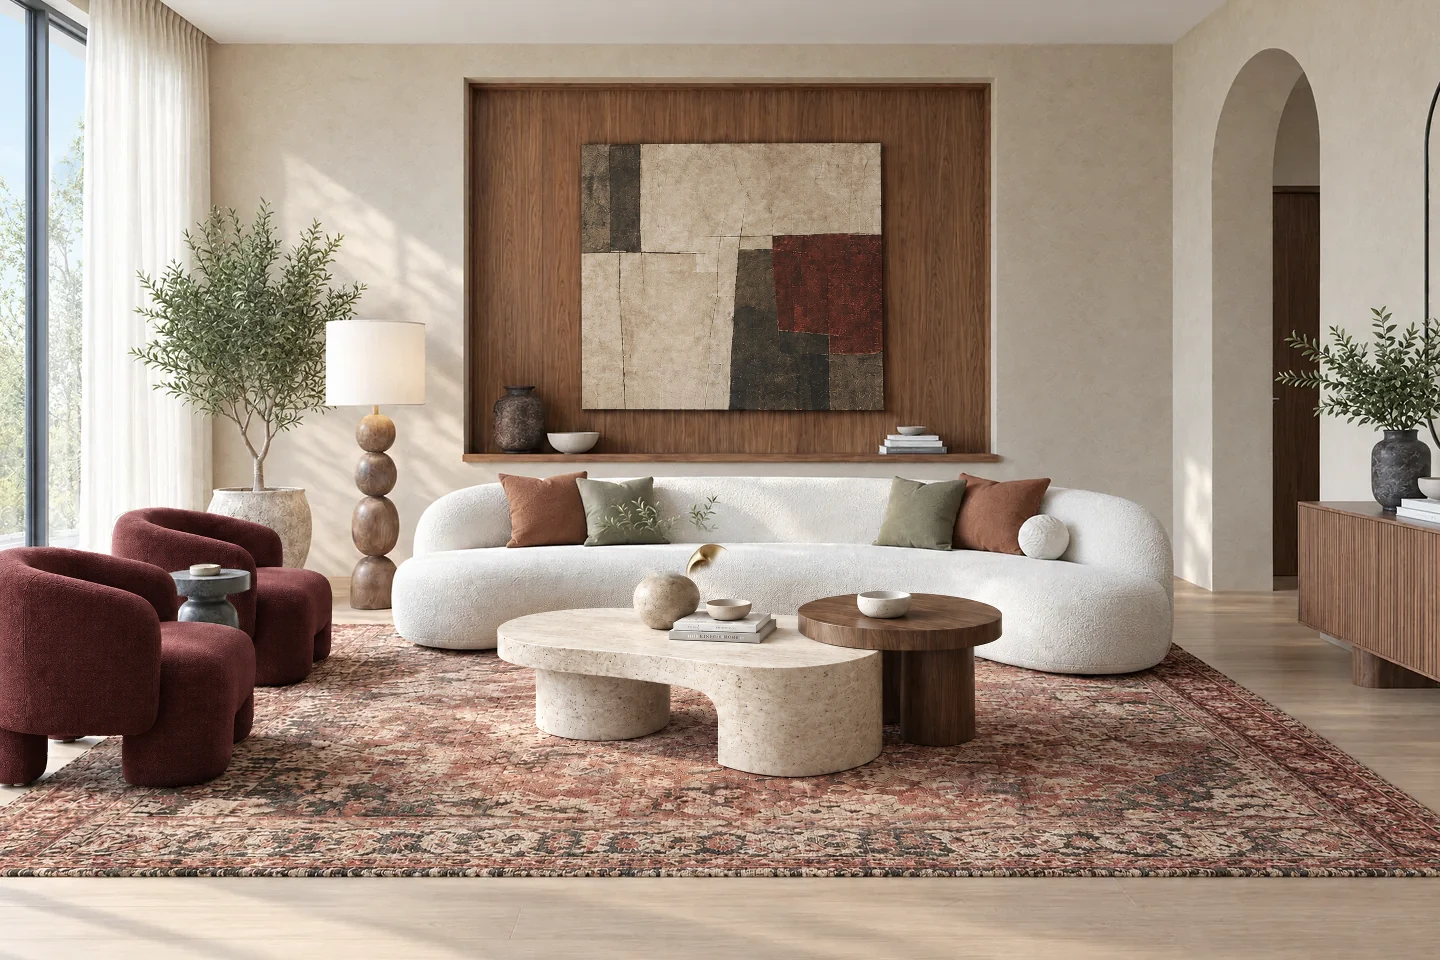 Vibe3D result
Begin with a readable view
Use one image for each composition. An interior needs enough visible room structure to explain walls, floor, ceiling, and openings. An exterior needs a clear building outline and relationship to its surroundings. Upload a supported image and wait for the scene to finish loading.
Vibe3D identifies the scene category and presents relevant settings. The available controls can differ between an interior and an exterior. Do not try to force a setting from a different scene type; first confirm that you uploaded the intended view.
Set up an interior render
- Select the interior scene and open Render.
- Choose Fidelity or Lumen in Render Engine.
- Choose a Time of Day that helps explain the room. Begin with a version where circulation, furniture, and materials are easy to see.
- Review the visible interior lighting controls. Keep changes modest for the initial design check.
- If Additional Instructions is shown, add a prompt only when a specific requirement is not clear from the image. Review the credit amount and select Render.
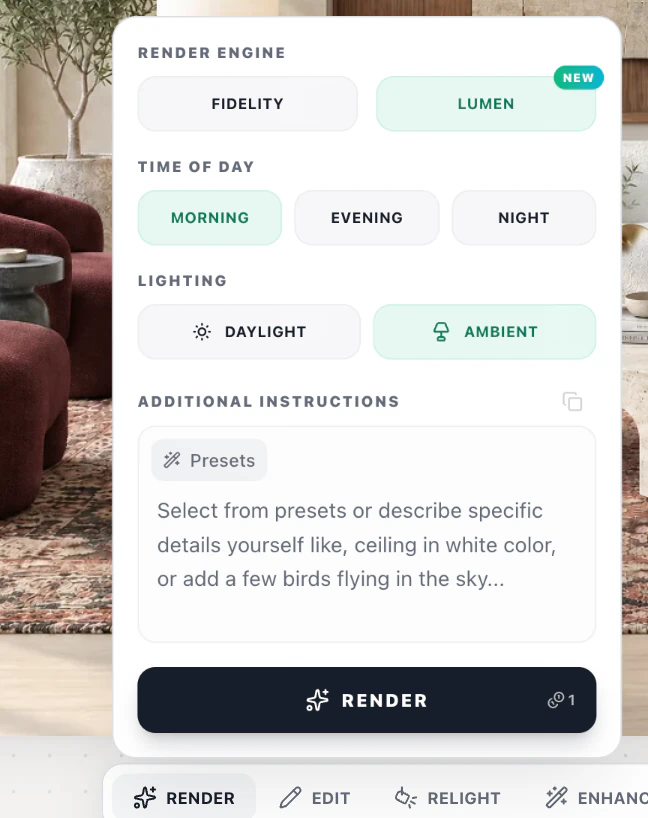
For reusable instructions, open Presets in Additional Instructions. The Presets guide covers Curated options, saving your own text, and reusing a selection across scenes.
For example, a living-room presentation may need soft daylight and readable timber grain. It does not need a long prompt listing every object already visible in the model. Follow the living room workflow for a complete example.
Set up an exterior render
Select your exterior scene and open Render. Choose an engine and time of day, then review the atmosphere controls available for the view. Choose conditions that suit the presentation's purpose: a design review usually benefits from a facade that is clearly readable.
If you need a particular context, describe it narrowly in the optional instructions. Avoid asking for a different building style while trying to preserve the original facade. For a complete sequence, see rendering a house exterior.
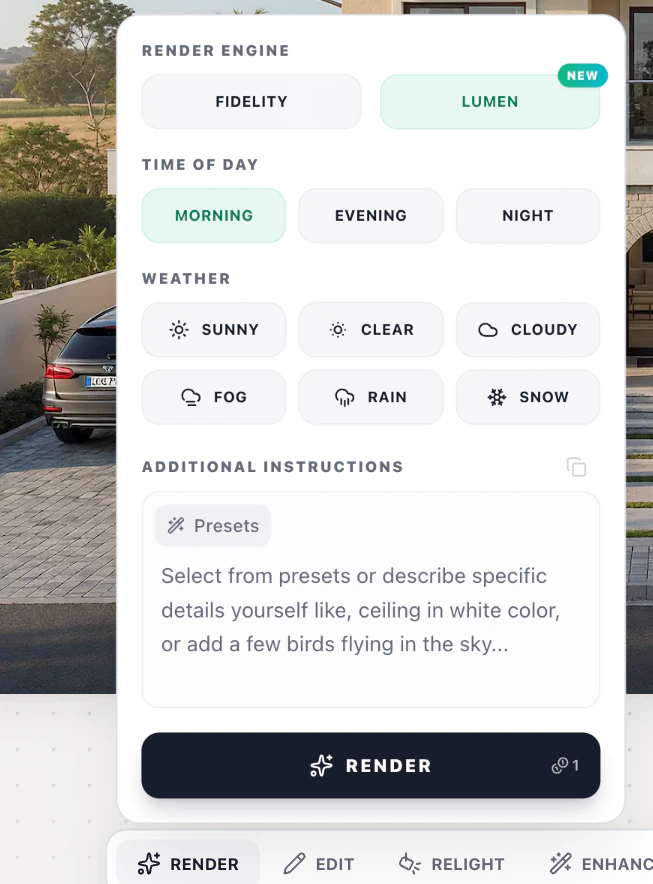
The outdoor view has Weather choices where the interior view has Lighting choices.
Inspect the details that matter
For interiors, compare furniture positions, cabinet divisions, window frames, ceiling edges, and material junctions. For exteriors, compare rooflines, facade proportions, balcony railings, glazing divisions, and terrain edges.
Reflections, vegetation, and repeated elements deserve a closer look. Check the whole image after a change, even if you only intended to alter a small area. A plausible-looking detail may still differ from the model.
Refine the selected result
Use Edit for a material, object, or environment change. For an interior lighting exploration, use Relight. For exterior day and night alternatives, use Edit → Change Time of Day as described in day-to-night.
Keep the version that best communicates the approved design and star it before preparing a presentation. Rendering supports visualization; verify dimensions and technical design decisions in the original model.