
Architectural Workflows
Turn architectural renders into a project video
Build a Vibe3D flythrough from selected renders, choose camera moves and transitions, review the credit estimate, and check the exported video for consistency.
On desktop, open Flythrough from a project scene, add your chosen images to the timeline, set camera movements and transitions, and use Generate Video. Review the completed motion before downloading; an AI flythrough does not reconstruct a physically exact camera path through the model.
On this page
Choose a short visual story
Use a desktop browser for this walkthrough. Start with a few images that describe one project coherently: an exterior establishing view, an interior overview, and a useful detail or second room. Select finished images before building the timeline. Animating a still with a distorted window or inconsistent material can make that issue more noticeable.
Decide what connects the views. Two cameras in the same room can suggest a spatial sequence; unrelated rooms may work better as separate shots. A pair of daytime and evening versions of the same exterior is suitable for a time-of-day comparison. Keep the design and finishes consistent where scenes show the same space.
This workflow starts from images. It creates AI-generated motion and transitions, not a navigation path through a native 3D model.
Add renders to the builder
- Open the project in Vibe3D and select the scene you want to animate.
- Choose Flythrough in the desktop toolbar to open Flythrough Builder.
- Review the initial scene on the timeline. Use Render Library to add other completed renders, or Uploads for your own render images.
- Drag timeline items to establish the sequence. Use Switch Version when a scene has a more suitable generated version.
- Remove unnecessary clips before spending time on their settings.
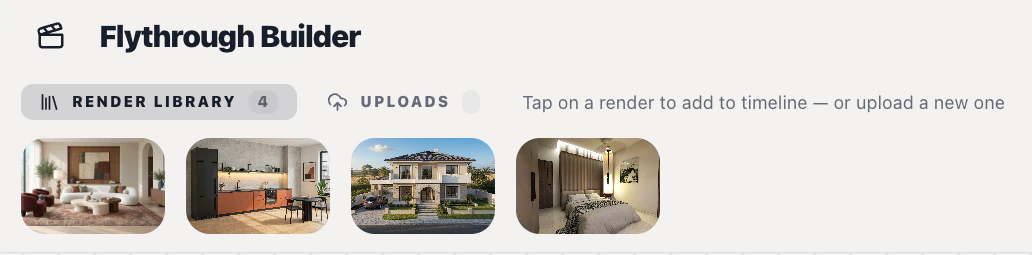
The builder's approximate length and the generation action help you review the scope. Keep the first attempt short enough to evaluate clearly rather than assembling every image in the project.
Give each image a suitable camera movement
Select a scene on the timeline and choose Camera Movement. Zoom In can emphasize depth or a material focal point; Zoom Out reveals more of the scene. Pan Left, Pan Right, Tilt Up, and Tilt Down provide other directions. Exterior-oriented options include Drone, Fly-Over, and Orbit 360°.
Choose movement that fits the information visible in the still. A large orbit asks the system to invent areas that the input does not show. A restrained movement is often easier to review for consistency.
Use the optional Motion Prompt to give a selected movement a specific subject. Choose Custom when a standard move does not describe the shot. This example is a starting instruction, not a tested result:
Slowly move forward toward the living room seating area. Keep the camera level and the movement restrained, with the existing furniture and architectural openings remaining consistent.
Connect scenes when a transition has a purpose
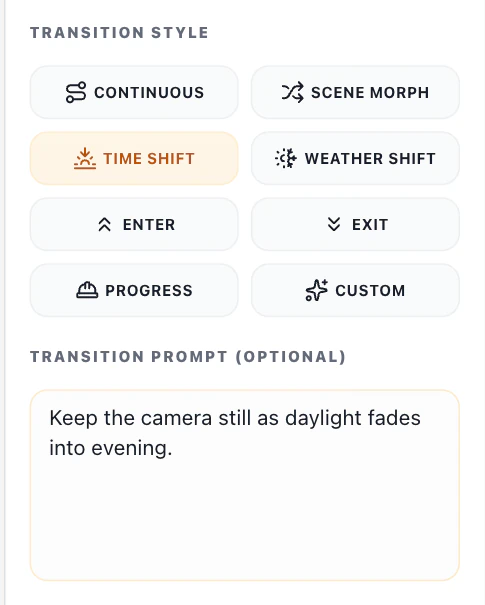
Between appropriate scenes, use Connect both the scenes and select the resulting transition. Choose a Transition Style that matches the relationship. For example, Time Shift suits daytime and evening versions of one composition; Enter expresses a move from an exterior toward an interior; Scene Morph blends between scenes.
A transition is generated interpretation. Even Continuous cannot guarantee that two views connect through the actual floor plan. If a transition invents a corridor or changes the building, separate the shots instead of presenting the movement as a faithful walkthrough.
Under Video Settings, set Background Music to On or Off. Music is a background option here; do not assume the control offers an upload or a track-selection library.
Generate, review, and export
Review the displayed credit amount beside Generate Video before starting. The cost follows the configured video, so changing scenes and transitions can change the required credits. If Upgrade appears, review the account requirement in the app and the credits guide.
Once generation finishes, play the full result. Pause at transitions and inspect window frames, furniture edges, material changes, and objects entering the frame. Check both image consistency and pacing; a smooth-looking transition can still invent geometry.
Use Download Video from the completed result when it is ready to share. Keep the source stills and inspect the downloaded file before client delivery. Present the video as an AI visualization of the project, with the model and drawings remaining the reference for exact spatial relationships.