
Flythrough Videos
Create a flythrough from architectural renders
Build a Vibe3D flythrough from still renders: add scenes, choose camera movements and transitions, set music, review the estimate and download the video.
In the desktop Flythrough Builder, add images from Render Library or Uploads, arrange the timeline, and choose camera movements or transitions. Review the duration and credit estimate before generating. Watch the finished video for geometry changes, then use Download Video.
On this page
Prepare the images and account
Flythrough turns still architectural images into motion. Start with completed renders whose materials, lighting and geometry you have already reviewed. You can use images from the project or upload your own rendered images.
Choose views that form a coherent story: an exterior approach, an entrance, then an interior, for example. Two nearby views of the same space are easier to relate than unrelated rooms with different lighting and furniture.
Video generation requires an eligible account and enough credits. Check the offer and balance in your account; credits and plans explains video costs. AI-generated motion is a visual interpretation of images, not a guaranteed camera path through the original model.
Build the timeline
- On desktop, open the project, select a completed render, and choose Flythrough to enter Flythrough Builder.
- Add finished images from Render Library, or use Uploads for your own renders.
- Drag scenes to put them in the desired order.
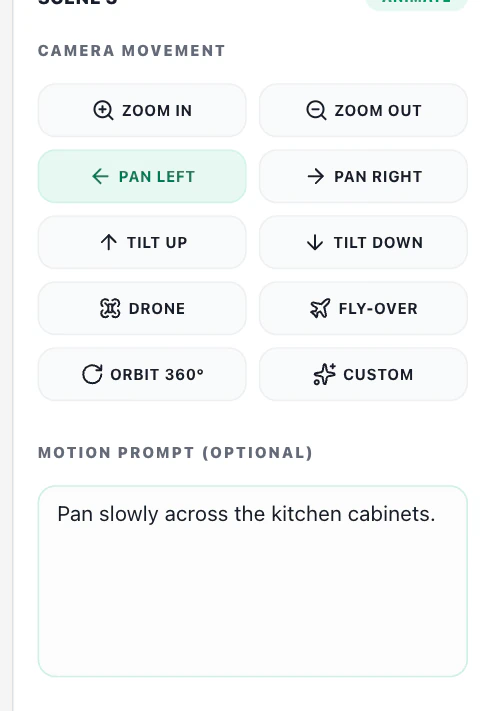
- Select a scene on the timeline to configure its Camera Movement.
- Connect related scenes when you want a transition, then select that connection's Transition Style.
- Review Video Settings, including Approx Length and Background Music.
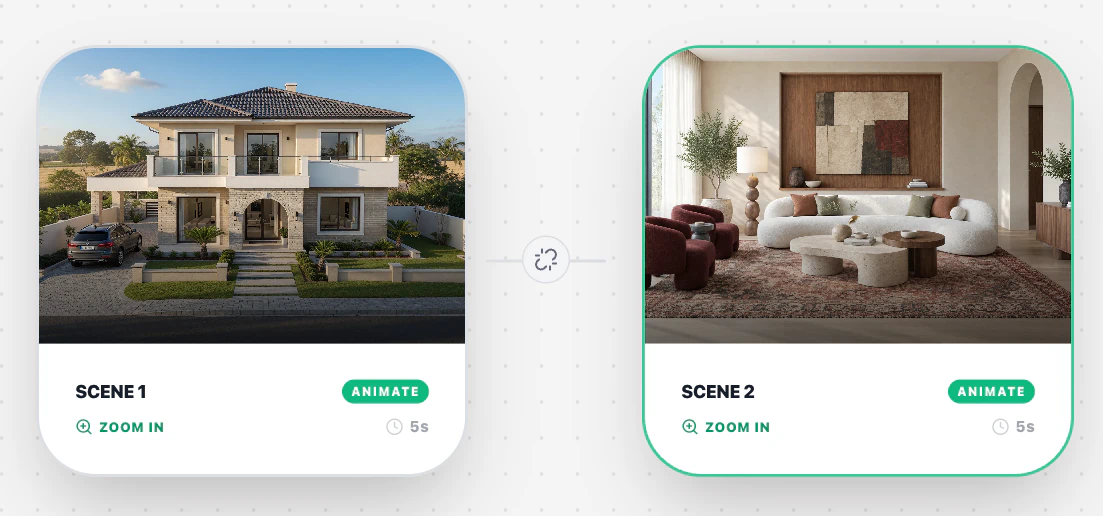
Use the link between two cards when you want to connect their views.
Start with a short sequence. The timeline allows up to 75 seconds. Each additional scene or transition should explain something about the design; adding more motion does not necessarily improve the presentation.
Choose a camera movement
The current choices include Zoom In, Zoom Out, Pan Left, Pan Right, Tilt Up, Tilt Down, Drone, Fly-Over, Orbit 360°, and Custom. For a scene immediately after a transition, choose None if you want the transition to end on that image without a separate movement clip.
Use a restrained zoom or pan when the aim is to show materials or room composition. Drone and Fly-Over can suit exterior views, but movement that reveals unseen sides of a building requires careful checking. Orbit 360° does not establish that the full unseen building has been modeled accurately.
Use Motion Prompt for a specific direction when needed. For example:
Move slowly forward toward the seating area with a steady camera. Keep the movement subtle so the furniture arrangement and main architectural features remain easy to read.
This describes an intention, not a guaranteed motion result.
Connect scenes with an appropriate transition
Available transition choices include Continuous, Scene Morph, Time Shift, Weather Shift, Enter, Exit, Progress, and Custom. Continuous is the short label for a continuous movement between views.
Use Time Shift for consistent day/evening versions of the same composition. Use Enter or Exit only when the views make that spatial relationship plausible. Transition Prompt lets you explain the intended change when necessary.
The Background Music setting offers On or Off. When enabled, music is selected for the video; do not plan around uploading a custom track through this control.
Generate, inspect and download
Review the timeline, displayed duration and credit estimate, then select Generate Video. For a new sequence, two five-second movement clips joined by one five-second transition make a 15-second video. Choosing None for the last movement leaves the transition as the final shot. Check the new estimate after each change. Wait for the result rather than submitting the same sequence repeatedly. If generation fails, see troubleshooting.
Watch the entire video, including each transition. Check windows, railings, furniture, reflections and changes at frame edges. If the motion invents an unacceptable part of the design, simplify it or choose more suitable source images.
Use Download Video for the finished MP4. The render-to-video workflow walks through a complete architectural sequence and final review.