
Edit & Refine Renders
Create close-ups and detail shots
Mark up to four details in a Vibe3D render to create a single close-up or a detail collage, add focus instructions and review the result for your presentation.
Select a render, choose Close-Ups, and click a detail or drag a rectangle around an area. Add focus instructions if useful, then Generate. One target creates a detail shot; multiple targets create a collage. You can mark up to four targets.
On this page
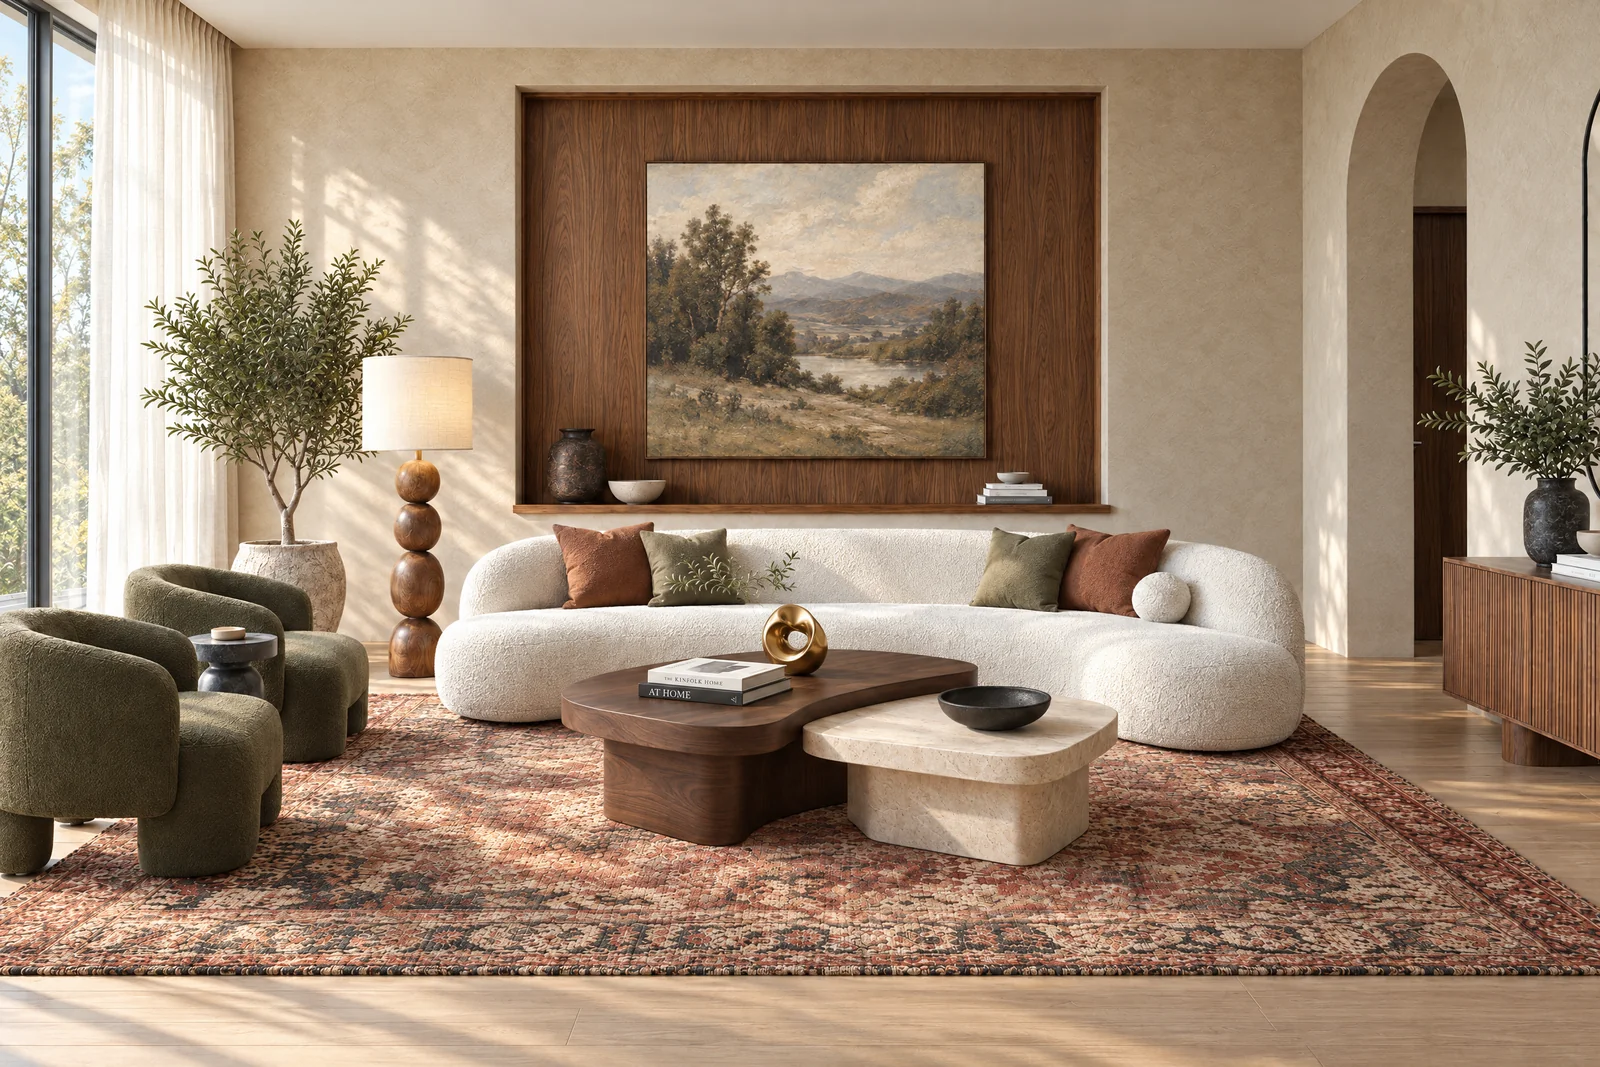 Original image
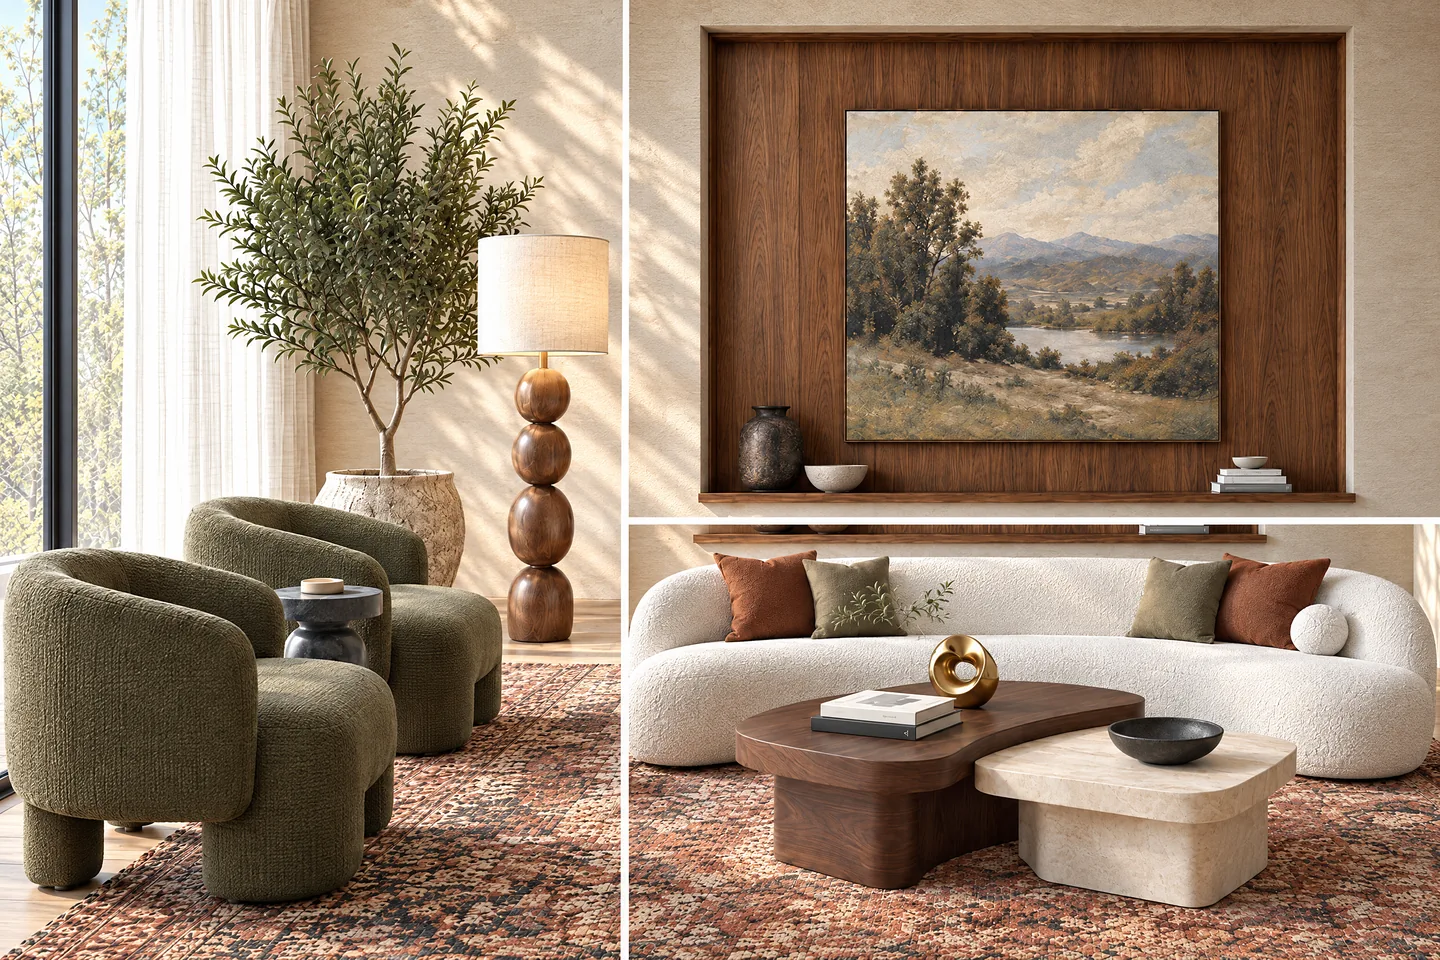 Vibe3D result
Choose a detail worth explaining
Close-Ups helps turn a wider architectural image into focused views for a client discussion. Good subjects include a seating arrangement, a joinery detail, a material junction or a visible façade element.
Start from a render where the subject is clear. A detail hidden behind furniture or reduced to a few indistinct pixels gives little visual information to work with. If the detail is central to the design, consider exporting a closer source view first.
These are generated visualizations. They are not measured crops, construction details or a way to recover information that the original image never showed.
Mark and generate the detail
- Open the project and select the source scene and version.
- Choose Close-Ups in the scene toolbar.
- Click the detail, or drag a rectangle around the area you want to feature.
- If a target needs clarification, enter Detail shot instructions and select its Save instructions checkmark. That saves the note for the target. Generate starts the request.
- Review the target and the displayed cost, then choose Generate.
- Wait for the resulting detail scene and compare it with the source.
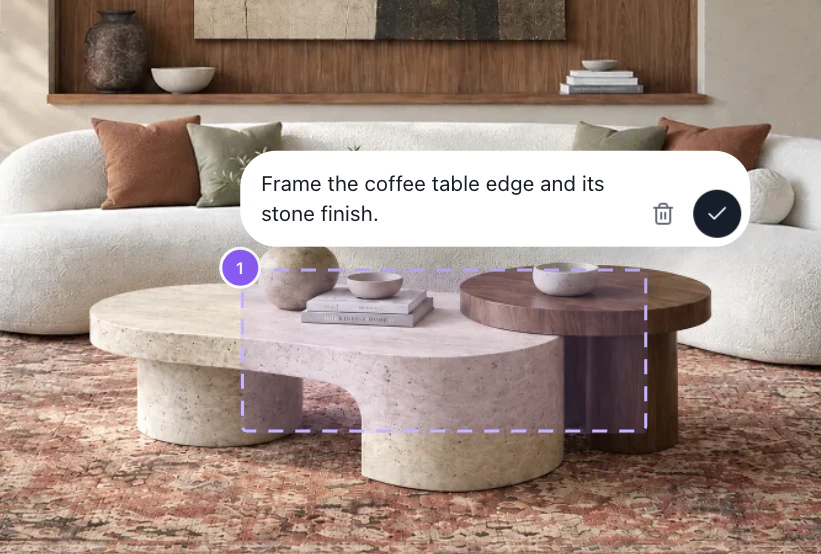
The checkmark saves the coffee-table note. Use Generate when your targets are ready.
Use Remove to delete an individual target, or Clear to reset your selection before generating. The credit guide explains the current charge for a close-up request.
Use one target or a small collage
One target produces a single detail shot. Two to four targets produce a multi-panel collage, with a detail for each target. For the living room shown above, the wider view gives context to the green chair fabric, sculptural coffee tables, and framed landscape. Pick only the details that belong in the client’s review.
A collage can be useful for a material review, but it may be less readable than a single image when each detail needs close inspection. Choose the output format through the number of targets you mark; the image download does not create a separate file for each panel of the collage.
Add a short focus instruction
For a selected coffee table, an example is:
Focus on the coffee table's stone surface and rounded edge. Keep its shape and material consistent with the source, with enough surrounding context to understand its position.
Ask for what matters in the visible design. Avoid adding a new material instruction unless changing that material is actually the task; targeted editing is the clearer starting point for that change.
Review and use the result
Check proportions, material patterns, joins and nearby objects. A convincing close-up can still introduce details that were not specified. Use the original design and real material references when discussing exact construction or product choices.
Close-up output does not offer the same Render, Edit, Relight and Enhance workflow as an ordinary scene. Return to the original render for those changes, then create a new detail from the updated source.
Download the selected result or include it in a client presentation. Keep the wider view nearby so the client can see where the detail belongs.