
Architectural Workflows
Enhance an Enscape draft render
Prepare an Enscape image for Vibe3D HyperReal Enhance, compare the result with the original, and deliver a reviewed visualization of the same design.
Export an Enscape still as PNG or JPEG, upload it to a Vibe3D project, and use Enhance on the image when the tool is available. Review the result against the original before downloading: enhancement can reinterpret materials and small architectural details.
On this page
 Original image
 Vibe3D result
Start from a useful draft
Use enhancement when the source already communicates the room or building and you want to explore richer visual detail. The composition, material locations, and major design decisions should be settled enough to evaluate the result. A draft with broken geometry, missing furniture, or unreadable shadows needs attention in the original software first.
For example, an interior may already have the correct cabinetry and furniture but need a more convincing presentation of stone, timber, and fabric. HyperReal enhancement can develop the image's appearance. It does not replace the need to verify those materials against the actual specification.
Keep the unmodified Enscape output. It is the comparison reference and lets you restart from the same design rather than enhancing an already altered image repeatedly.
Export the Enscape image
Use Enscape's Screenshot command to save a still image. Choose PNG or JPG for this workflow and review the export resolution in Enscape's Visual Settings. These options are described in Chaos's Enscape export guide.
Open the saved image and inspect it at full size. Look for heavy compression, blurry edges, overexposed windows, or black areas that hide the design. Export a cleaner version if necessary; apparent detail in a later AI result may be invented where the source contains little information.
Enscape can export other formats, but Vibe3D's image workflow accepts JPG, PNG, and WebP. Convert a different format properly instead of renaming the extension. This is an exported-image workflow, not a native Enscape project import. The same principle applies to still images from V-Ray, D5, Lumion, and other renderers.
The bedroom comparison above is a general enhancement example. For a comparison specific to your project, keep your own Enscape export and place it beside the enhanced version.
Apply HyperReal enhancement
- Sign in to Vibe3D and open the project for this design.
- Use Click to Upload Scenes to upload the Enscape image. Wait until it is available, then select it.
- Open Enhance in the editor toolbar. The panel identifies the operation as HyperReal Enhance.
- Review the access and credit information shown on the action. If the app displays Upgrade to Enhance, resolve that requirement before proceeding.
- Choose Enhance, then wait for the generated version to finish.
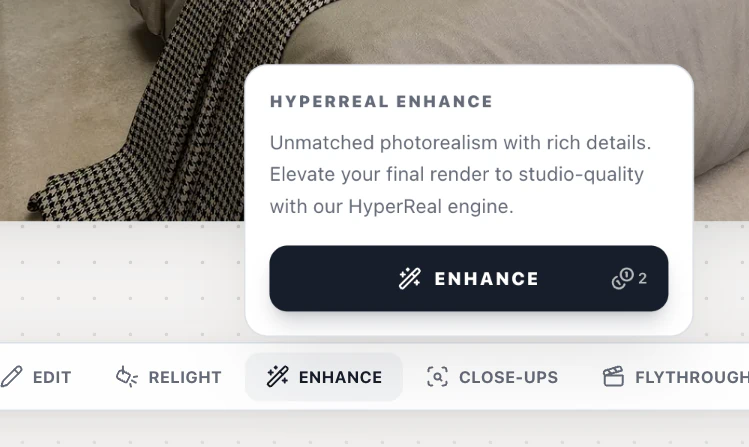
The panel is shown on a sample bedroom. Select your own Enscape draft before choosing Enhance.
You do not need to write a long realism prompt for this action. The enhancement panel is a focused operation rather than the Fidelity/Lumen choice in Render. See enhancing renders for the distinction between rendering and enhancement.
Compare the surfaces that matter
Use Compare, and then inspect the image at full size. Start with the details a client will rely on: cabinetry divisions, tile joints, stone edges, glazing frames, and furniture proportions. Compare them to the original Enscape image rather than judging only whether the result looks more photographic.
Check reflective and textured materials separately. A richer reflection may introduce an object that is not in the design, and an attractive timber texture may have a different grain scale or direction from the specified finish. Fine patterns and signage need particular scrutiny.
If the enhancement changes an essential feature, keep the original or choose another suitable version. Avoid treating successive enhancement passes as a guaranteed quality improvement. An already enhanced version can show Already Enhanced!, so return to the source version when evaluating a different starting point.
Deliver the reviewed version
Use Download → Download Image to save the selected result. Keep a clearly named original and enhanced file together, and record which one is intended for the client presentation.
Use targeted editing for an intentional material change after reviewing the enhancement. If you need to fix geometry or improve a completely unreadable source, return to the model and renderer. Enhancement is most useful when the team can clearly separate the existing design from the visual interpretation being proposed.