
Edit & Refine Renders
Edit renders with instructions
Use point or rectangle annotations in Vibe3D to describe a change to an object or area, attach a reference if useful, and review the edited render.
Select a completed render and open Edit. Click an element or drag a rectangle around an area, describe the change in the annotation, and select the annotation’s Submit edit arrow. Review the new version against your source before making another edit.
On this page
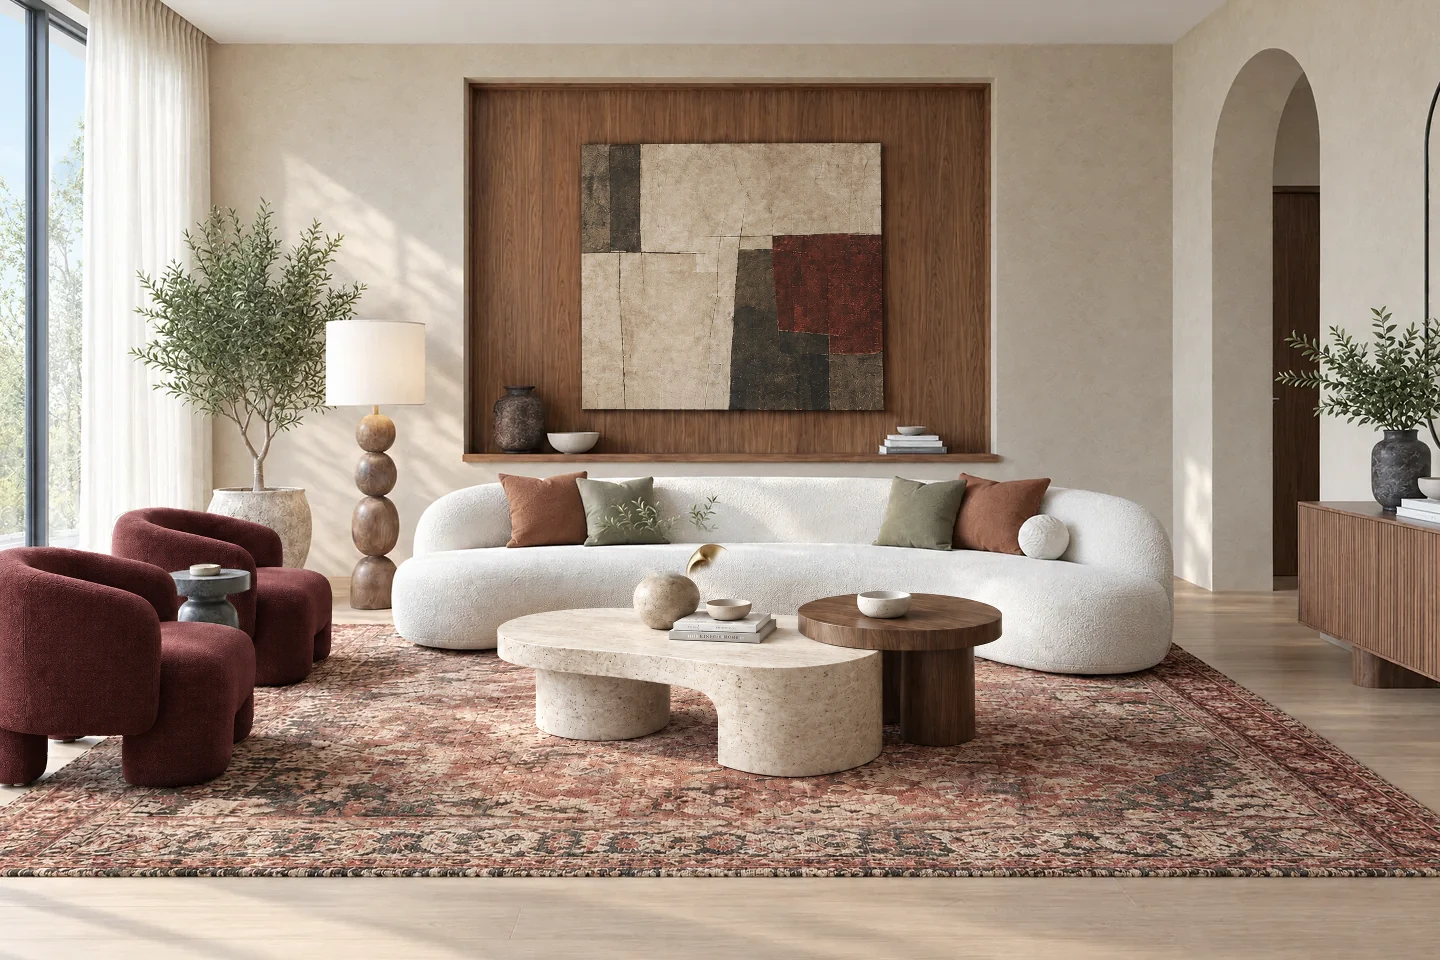 Original image
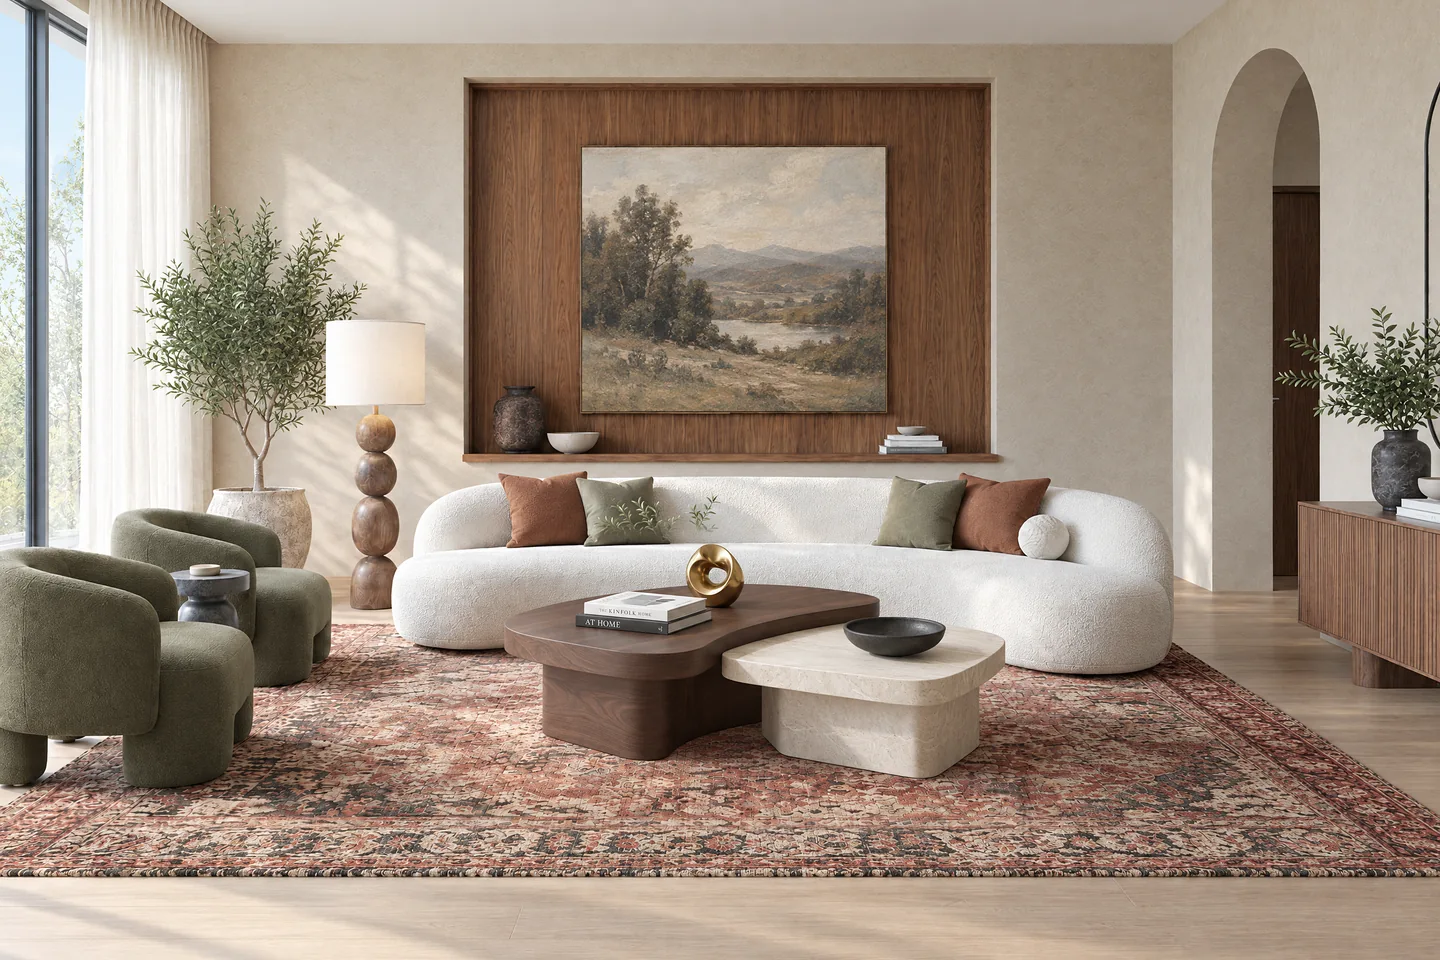 Vibe3D result
Choose the version you want to change
Use Edit when the overall composition is useful and you want to change a specific part of it: a wall finish, a sofa color, an unwanted object or a planting arrangement. Open the project and select the scene and version that should be the starting point. Keep a useful baseline available for comparison.
If the camera angle or major geometry is wrong, correct the source view and render again. A sequence of small edits is a poor substitute for a source that clearly represents the design.
Make a targeted edit
- Choose Edit in the scene toolbar.
- Click the object you want to change, or drag a rectangle around an area. The annotation opens a comment box.
- Write what should change and what should remain. Identify the intended material, object or finish in ordinary language.
- If useful, add a material reference through Reference.
- Select the arrow in the comment box labeled Submit edit. It submits the prepared annotations together. Wait for the new version before comparing it with the original.
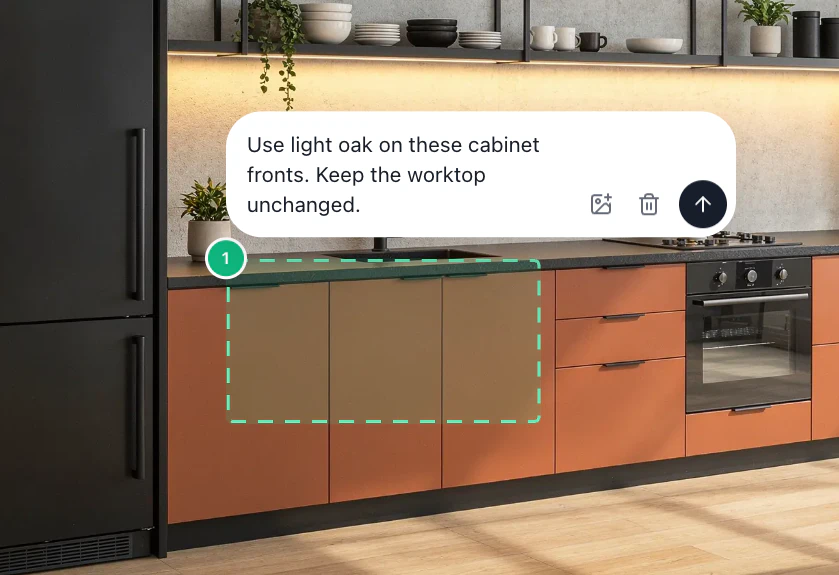
The rectangle covers the cabinet fronts. The note identifies the worktop as a finish to keep.
You can mark up to five targets. Before you submit, give each target either a written instruction or a reference. An empty mark is skipped. For a complicated change, starting with one target usually makes the result easier to assess. Use Remove to delete an unwanted annotation or Reset edits to clear the current selections.
The current selection tools identify a point or rectangle. An area selection communicates intent; it does not guarantee that every pixel outside it stays identical.
Write a specific instruction
The comparison above shows a coordinated change to the chairs, coffee tables, and artwork. To try a smaller edit of your own, start from the original version, select just one armchair, and give that mark a single instruction:
Change the selected armchair upholstery to muted olive-green fabric with a matte woven texture. Keep its shape, position, legs and surrounding furniture.
To remove an object, identify both the object and the intended replacement background. “Remove the small vase on the coffee table and leave the tabletop clear” gives more direction than “clean this up.” These are example instructions; inspect your own result before relying on it.
Choose a scene-wide workflow
Use annotations for a selected object or area. Edit also has dedicated controls for changes across the scene:
- Change Time of Day for a morning, evening, or night alternative.
- Change Atmosphere for weather and season options on exterior scenes.
- Add People to populate the image with a chosen crowd level, people style, and activity.
- Change Style for a different presentation treatment of the whole render.
Exterior scenes also offer Change Surroundings for a different visual setting. Open the relevant control, make your choice, and use the arrow button labeled Apply changes. Review one generated result before starting another.
Scene changes and targeted annotations are separate actions. Finish or clear your selected-area work before switching to a scene-wide adjustment.
Review before making another change
Compare openings, furniture placement, edges and surrounding materials with the baseline. For a material edit, check adjacent surfaces for color spill or unintended texture changes. For object removal, check that the revealed background is plausible.
If the result changes an important design element, return to the baseline and narrow the selection or instruction. Check the displayed credit amount before another submission; credits and plans explains the current tool costs.