
Architectural Workflows
Render a modern house exterior
Turn a house model view into a Vibe3D exterior render, refine materials and atmosphere, and review architectural details before client delivery.
Start with a clear exterior model image, choose a rendering engine and atmosphere in Vibe3D, and compare the result with the source. Use targeted edits for materials and scene controls for time of day or surroundings.
On this page
Decide what the exterior image should explain
A house exterior can communicate the entrance, façade materials, massing, or relationship to the site. Choose one primary purpose before setting the camera. A very wide shot may show the garden but make the entrance too small to review; a close façade view may conceal the roof form.
Prepare an image where the main building is readable and the roof, openings, and ground contact are clear. Include modeled context where it affects the design. Remove temporary scaffolding, selection outlines, dimensions, and unrelated objects unless they are part of the intended presentation.
This guide works from an image of the model. If you use SketchUp, follow SketchUp to a render for the export steps. A native model file is not the input to this image-upload workflow.
Render the first exterior view
- Create or open a project in Vibe3D, then choose Click to Upload Scenes and add the view as JPG, PNG, or WebP.
- Wait for the upload to finish, select the scene, and open Render.
- Choose Fidelity or Lumen under Render Engine.
- Review the exterior Time of Day and Weather controls. Choose a readable starting atmosphere before experimenting with dramatic conditions.
- Add a short requirement in Additional Instructions only if necessary. Check the amount shown beside Render, then generate the image.
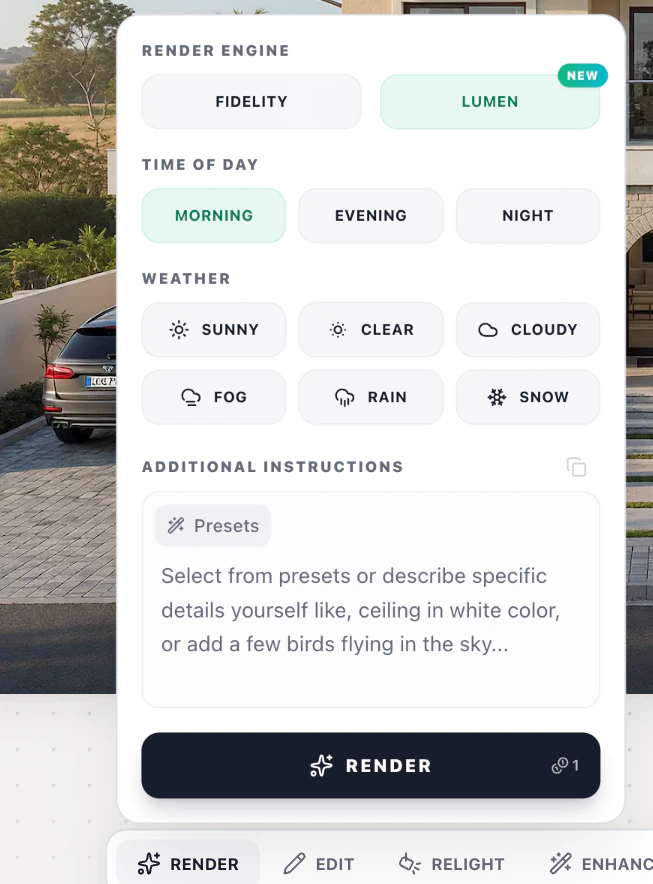
For a house with already defined materials, the source should do most of the explaining. An optional instruction might clarify a finish that appears ambiguous:
Retain the existing house form, roofline, window arrangement, and camera view. Use light mineral render on the main walls and dark bronze metal on the window frames.
The intended effect is a material interpretation of the supplied design. Inspect the result rather than assuming that the preservation instruction guarantees exact geometry.
Check the architectural details first
Use Compare and follow the outline of the roof, balcony edges, window divisions, and entrance canopy. Inspect repeated façade elements individually. Reflections and shadows can make a changed opening less obvious at thumbnail size.
Check the base of the building too: steps should still meet doors, paths should connect sensibly, and planting should not cover an access route. AI-generated context can look plausible without representing the actual site. Keep the site plan as the reference for boundaries, levels, and landscape decisions.
If the building itself is wrong, improve the original view or choose a better result before spending time on atmosphere. See preserving the design.
Refine finishes and surroundings separately
For one cladding area, choose Edit, click or drag around the target, add a precise material instruction, and use Submit edit. Inspect both the edited surface and nearby windows or trim.
For the whole scene, Edit offers Change Time of Day, and exterior scenes also have Change Atmosphere and Change Surroundings. Choose the relevant option and use Apply changes. Change one scene decision at a time so you can identify why the result changed.
A surroundings preset is a visual direction. It should not be presented as a reconstruction of the actual neighboring properties or local landscape. If accurate context is essential, include it clearly in the source and verify the generated result against it.
Create a useful presentation pair
Once the daytime view is satisfactory, create an evening or night option using the day-to-night workflow. Keep the same source view so the comparison is about atmosphere rather than a new camera position.
Download the selected images using Download → Download Image. Before sending them, inspect façade textures, glazing, vegetation, and roof edges at full size. Label the images as visualizations of the proposal, and retain the source view alongside them for the next design review.