One render, four Add People settings
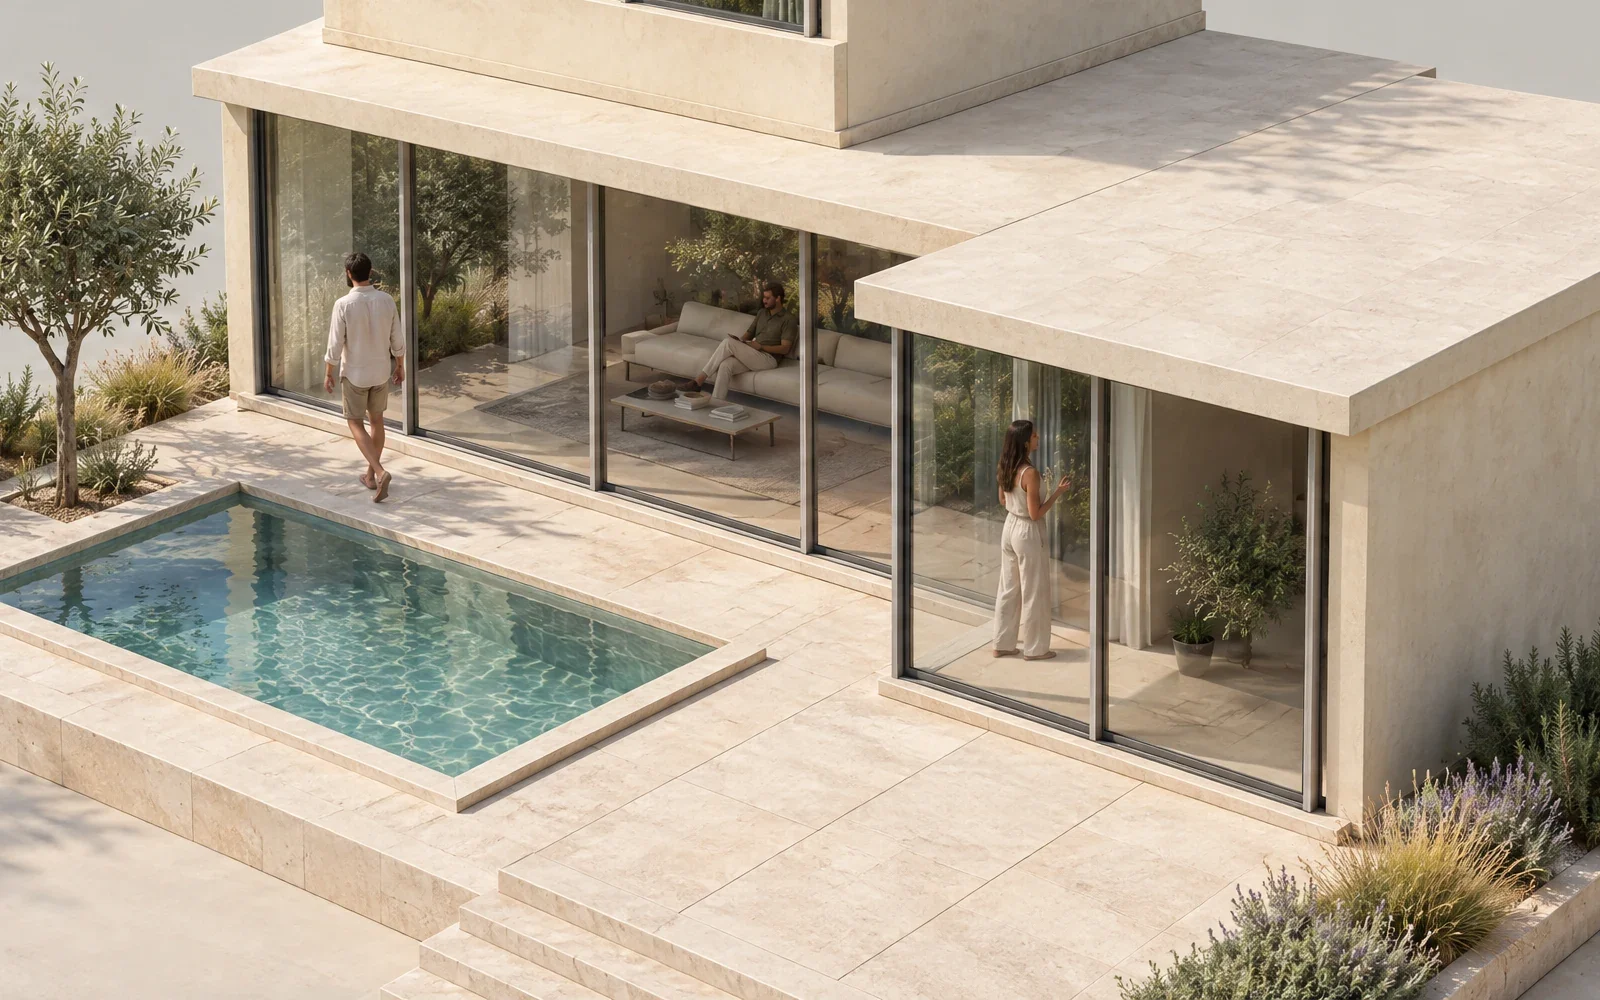
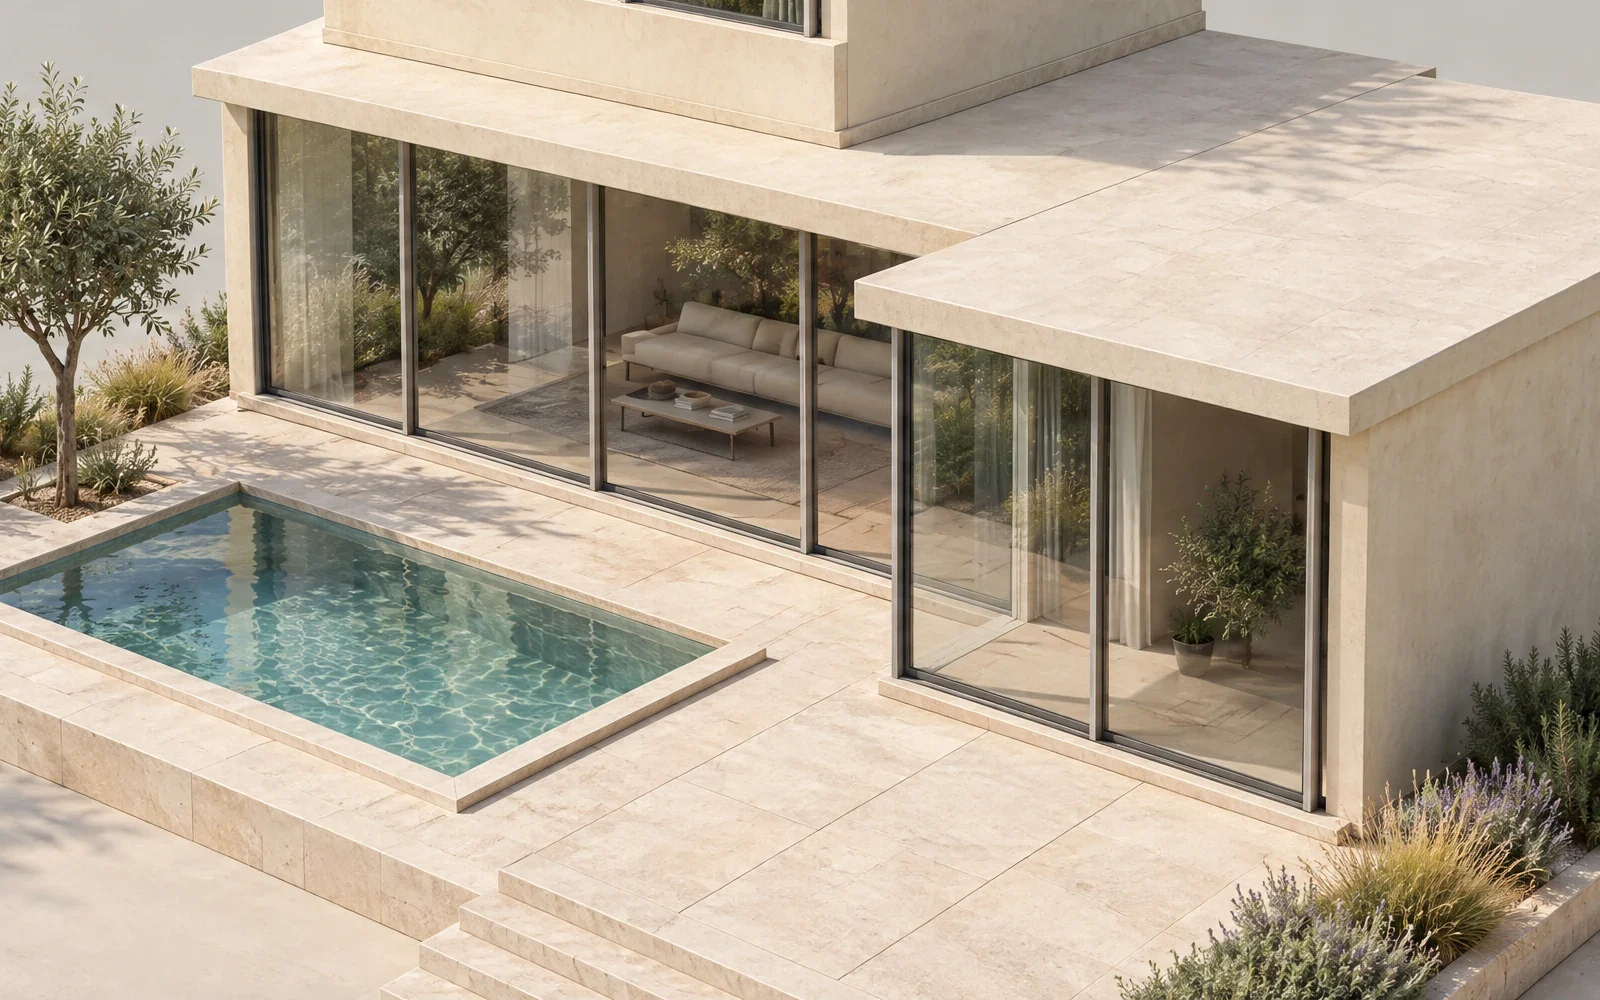
Drag across the image to compare. Use the arrow keys, or Home and End, to adjust the divider with a keyboard.
Few, Natural. Three people: one walking beside the pool, one on the sofa and one standing inside behind the glazing.
Actual Vibe3D results on our own unbuilt courtyard concept, cropped to the terrace. Each starts from the same render; only the crowd level and people style changed. Drag left to right to compare edges and glazing with the version without people.
Three ways to add people, and when each fits
Add people last, once the camera and the design are settled. People show scale, show how a space is used and make an image feel lived in. In architectural visualization they are part of the entourage, with planting, cars and furniture.
| Method | When it fits |
|---|---|
| 2D cutouts: transparent PNG people placed in an image editor | Best for quick stills and collages; you pick every figure. Watch for light, shadow and perspective, which you must match by hand. Check the licence before commercial use. |
| 3D people from your renderer's library | Best for animations and walkthroughs; figures cast real shadows in the scene. Watch for extra scene setup. Libraries differ: Twinmotion, for example, has animated humans, 3D-scanned posed humans and 2D cutouts (Epic Games). |
| AI population of a finished render | Best for several options from one image, with light that follows the scene. Watch for variation: each run gives different figures. Inspect scale, placement and small details at full size, and keep the version without people. |
Check the scale of every figure.
- Eye-level views: if the camera is at standing eye height, the horizon line crosses every standing adult at about the same point on the body, at any distance (James Gurney). A figure that breaks this pattern is the wrong size.
- High or aerial views, such as the examples above: compare each figure with the nearest door, step or sofa instead.
- Interiors: a seated person's head is lower than a standing person's. Check seated figures against the furniture they use.
A common mistake is to add many people to make a render look lively. A crowd can hide the architecture and turn a design image into an advertisement. Start with one figure for scale. Then add only the activity that the space is designed for, such as one person at the pool or two people talking at a table.
Add people to a render in Vibe3D
- Render or upload the view. Keep this version as your baseline without people (render a model view).
- Select the version, open Edit, then choose Add People.
- Choose a Crowd level: One, Couple, Few or Busy.
- Choose a People style: Natural, Motion blur or Silhouette.
- If useful, add a short Custom direction, for example: "Two people talking on the terrace. Keep the entrance clear."
- Select Apply changes. Each submission is one credit (credit costs). Compare the result with the baseline before you try another setting.
| People style | Use it when |
|---|---|
| Natural | The image should show everyday use of the space. |
| Motion blur | The image should suggest movement, as in a lobby or a busy path. |
| Silhouette | The architecture should carry the detail, and the people only give scale. |
The four comparison examples above are actual Vibe3D results from our own unbuilt courtyard concept. Each one starts from the same render; only the crowd level and the style changed. In these four results, the camera, roof, glazing and pool stayed the same. One added a single walker, Few added three people inside and outside, Busy added five, and Couple with Silhouette added two dark figures. The choices guide the result; the actual number and position of people can differ from one run to the next.
To place one person at an exact point, use an annotation edit instead. For all controls, see Add People step by step. To make the rest of the image read as a photograph, see what makes a render photorealistic.
A few useful answers
How many people should an architectural render have?
Use as few as the message needs. One person shows scale. Two or three show how a space is used. Use a busy scene only for spaces that are designed for crowds, such as a lobby, a station or a public square.
Where can I get people for architectural renders?
There are three sources: cutout PNG libraries for image editors, the 3D people in your renderer's asset library, and AI tools that add people to a finished image. Check the licence of any cutout or 3D asset before you use it in client or marketing work.
How do I make people the right size in a render?
In an eye-level view, the horizon line crosses all standing adults at about the same height on the body. In a high or aerial view, compare each figure with a door, a step or furniture next to it. Fix a figure that is too large or too small before you present the image.
Should people in renders be blurred or shown as silhouettes?
It depends on the message. Motion blur suggests movement and keeps attention off individual faces. Silhouettes keep the focus on the architecture. Natural figures suit images that show everyday life in the space.
Does Vibe3D change the building when it adds people?
Add People generates a new version of the image. In the four comparison examples above, the building stayed the same, but you should always compare the result with your baseline. Check door positions, glazing and edges before you share it.