At its heart, 3D visualization architecture is all about turning flat, technical blueprints into living, breathing, three-dimensional images of a building. It's the magic that lets a client truly feel a space long before a single brick is ever laid.
Bringing Blueprints to Life in 3D
Ever tried to sell a dream home using just a floor plan? You’re showing someone lines and numbers, but they can't imagine the morning sun pouring through the kitchen window or feel the expansive height of the living room ceiling. That's the exact problem 3D architectural visualisation solves.

Think of it like building with digital Lego, but with the incredible ability to add lifelike sunlight, realistic wood grain, and even the perfect sofa. This technology closes the gap between an architect’s technical vision and a client’s emotional experience. It’s a powerful communication tool that gets everyone on the same page, excited about the project.
Key facts at a glance: 3D architectural visualisation converts 2D blueprints into photorealistic images or walkthroughs. The core workflow has four stages — modelling, texturing, lighting, and rendering. Industry-standard tools include SketchUp, 3ds Max, Revit, V-Ray, and Corona Renderer. Real-time engines (Unreal Engine, Lumion) enable interactive VR walkthroughs. India’s archviz market is growing from USD 171.1M (2024) to an estimated USD 1,025.8M by 2033. Approximately 78% of Indian developers now consider 3D rendering a non-negotiable part of project presentations.
This isn’t just a fleeting trend. Moving from 2D drawings to 3D visuals marks a fundamental change in how projects are pitched, refined, and approved, especially in fast-paced property markets.
The Rise of 3D in Indian Architecture
In India, the use of 3D visualisation has exploded right alongside the country's booming real estate sector. What was once seen as a high-end extra is now a standard part of any serious project presentation.
In fact, it's estimated that by 2025, a whopping 78% of developers and architects in India will see 3D rendering as a non-negotiable part of their project toolkit. This huge shift away from old-school blueprints towards immersive digital experiences speaks volumes. To get a better handle on the process, you can dive into our guide on creating exceptional 3D house renders. This focus on realism simply helps everyone involved make better, faster decisions.
At its core, 3D visualization architecture translates complex ideas into a universal visual language. It ensures that the client, architect, and builder are all seeing the exact same future building, eliminating costly misunderstandings down the line.
At the end of the day, this is about more than just making pretty pictures. It's about building a clear, shared vision that aligns everyone’s expectations and smooths out the journey from a simple idea to a finished reality.
Why 3D Visualisation Is a Game Changer
Let's be clear: 3D visualisation architecture isn't just a fancy presentation tool anymore. It has become an essential part of the modern architect's toolkit. Why? Because it transforms an abstract idea on a page into a tangible, walkable space, and that changes everything from the first client pitch to the final nail being hammered in.
The most practical benefit is catching mistakes before they become expensive problems. A 2D blueprint might show a door, but it won't tell you that it's going to smack right into a kitchen counter when it opens. These kinds of spatial clashes are almost impossible to spot on paper but become painfully obvious in a 3D model.
Fixing these issues during the design phase is as simple as a few clicks. Fixing them after the walls are up? That means demolition, delays, and a blown budget.
Creating a Real Connection
Beyond just the technical side of things, 3D visuals build a powerful emotional bridge. When clients can virtually wander through their future home or office, they’re no longer just looking at lines on a screen—they’re experiencing a place.
They can get a real sense of the flow from one room to another or see how the morning sun will pour into the living room. This isn't just a gimmick; it lets them connect with the design on a personal level, turning a blueprint into a space they can already see themselves living or working in.
This emotional buy-in is the secret sauce. It gives clients the confidence to make quick, clear decisions, which helps speed up approvals and keeps the whole project moving forward.
This shared understanding creates a truly collaborative atmosphere. Instead of trying to decipher complicated technical drawings, everyone—the client, the designer, the builder—is looking at the same realistic picture. It gets everyone on the same page, fast.
Gaining a Clear Competitive Edge
At the end of the day, using 3D visualisation architecture is more than just good communication; it’s a smart business move. It lowers financial risk by catching costly errors early and tightens project timelines by making the approval process smoother.
To really see the difference, it helps to put the old way and the new way side-by-side.
3D Visualisation vs Traditional 2D Blueprints
| Aspect | Traditional 2D Blueprints | 3D Visualisation Architecture |
|---|---|---|
| Client Understanding | Hard for non-experts to interpret, often leading to confusion. | Intuitive and easy for anyone to understand, no technical background needed. |
| Error Detection | Design flaws and spatial conflicts often go unnoticed until construction. | Flaws are spotted early in the digital phase, saving a huge amount of time and money. |
| Emotional Impact | Very low; it’s difficult to get a feel for the atmosphere or scale of a space. | High; it creates an immersive experience that helps clients truly connect with the design. |
| Approval Speed | Slow. Client uncertainty often leads to endless revisions and delays. | Fast. Clear visuals lead to confident clients and much quicker sign-offs. |
In a competitive industry, firms that can bring their vision to life with this kind of clarity simply have an advantage. They build trust faster and deliver a much better client experience right from the start.
The Creative Journey from Concept to Render
So, how does a simple, flat floor plan get turned into a stunning, lifelike image you could almost step into? The whole process behind 3D architectural visualisation is a fantastic mix of technical know-how and artistic flair. It’s a journey that takes simple lines and shapes and builds them into a compelling digital reality.
Think of it as a structured workflow, moving step-by-step from a basic skeleton to a fully realised, emotive space.
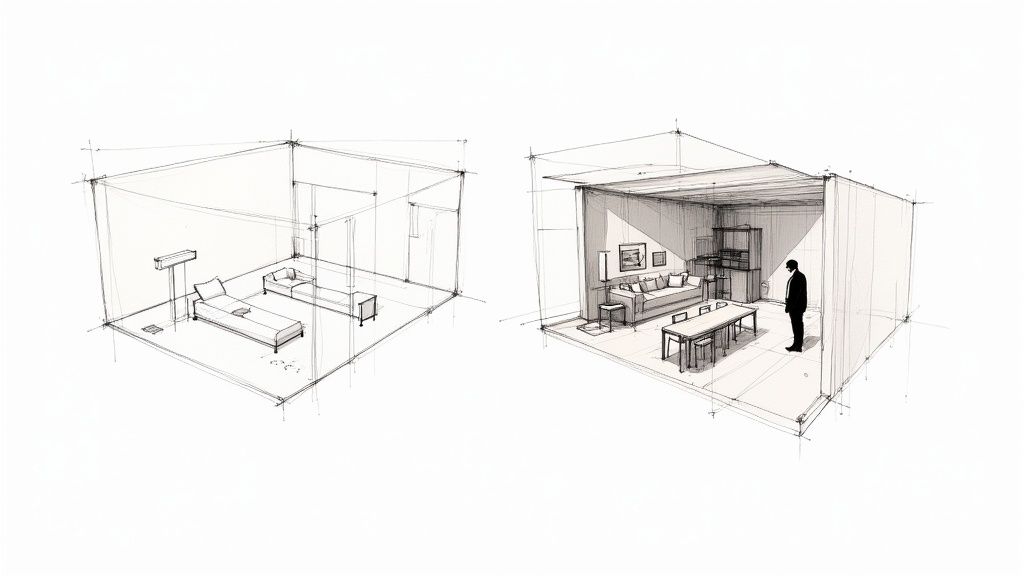
It all starts with 3D modelling. This is where the magic really begins. A 3D artist takes the architect's 2D drawings—the floor plans, elevations, and sections—and uses them as a blueprint to build a digital wireframe of the building. It’s a bit like building the structural frame of a house, but instead of wood and steel, they use vertices and polygons in software like SketchUp or 3ds Max. Every wall, window, door, and roofline is painstakingly constructed to scale, creating the project's digital twin.
Breathing Life into the Model
Once that digital skeleton is up, it's time to add the skin. The next step is texturing, which is where the model starts to look and feel real. This is the art of wrapping digital materials around every surface.
Suddenly, a simple grey plane becomes a warm, oak-wood floor. A flat wall transforms into textured plaster, and a transparent surface gets the subtle reflections of real glass.
Artists use textures, often called ‘maps’, to define everything about a surface:
- Colour and Pattern: The visible design, like the grain in a piece of wood or the unique veins in a marble slab.
- Reflectivity: How much light a surface bounces back, from a completely matte wall to a highly polished countertop.
- Bump and Displacement: This creates the illusion of physical texture, like the grout lines between tiles or the rugged surface of an exposed brick wall.
This stage is absolutely critical for photorealism and plays a huge role in nailing the right design concept for architecture. The right textures can completely shift the mood and feel of a room.
The Magic of Light and Shadow
With a fully textured model in place, the focus shifts to lighting—arguably the most artistic part of the whole process. Just like a photographer uses light to shape a scene and create a mood, a 3D artist places digital light sources to build atmosphere and highlight the best architectural features.
This could mean placing a digital sun in the sky to simulate a specific time of day, or carefully arranging interior lights to craft a cosy, inviting evening scene.
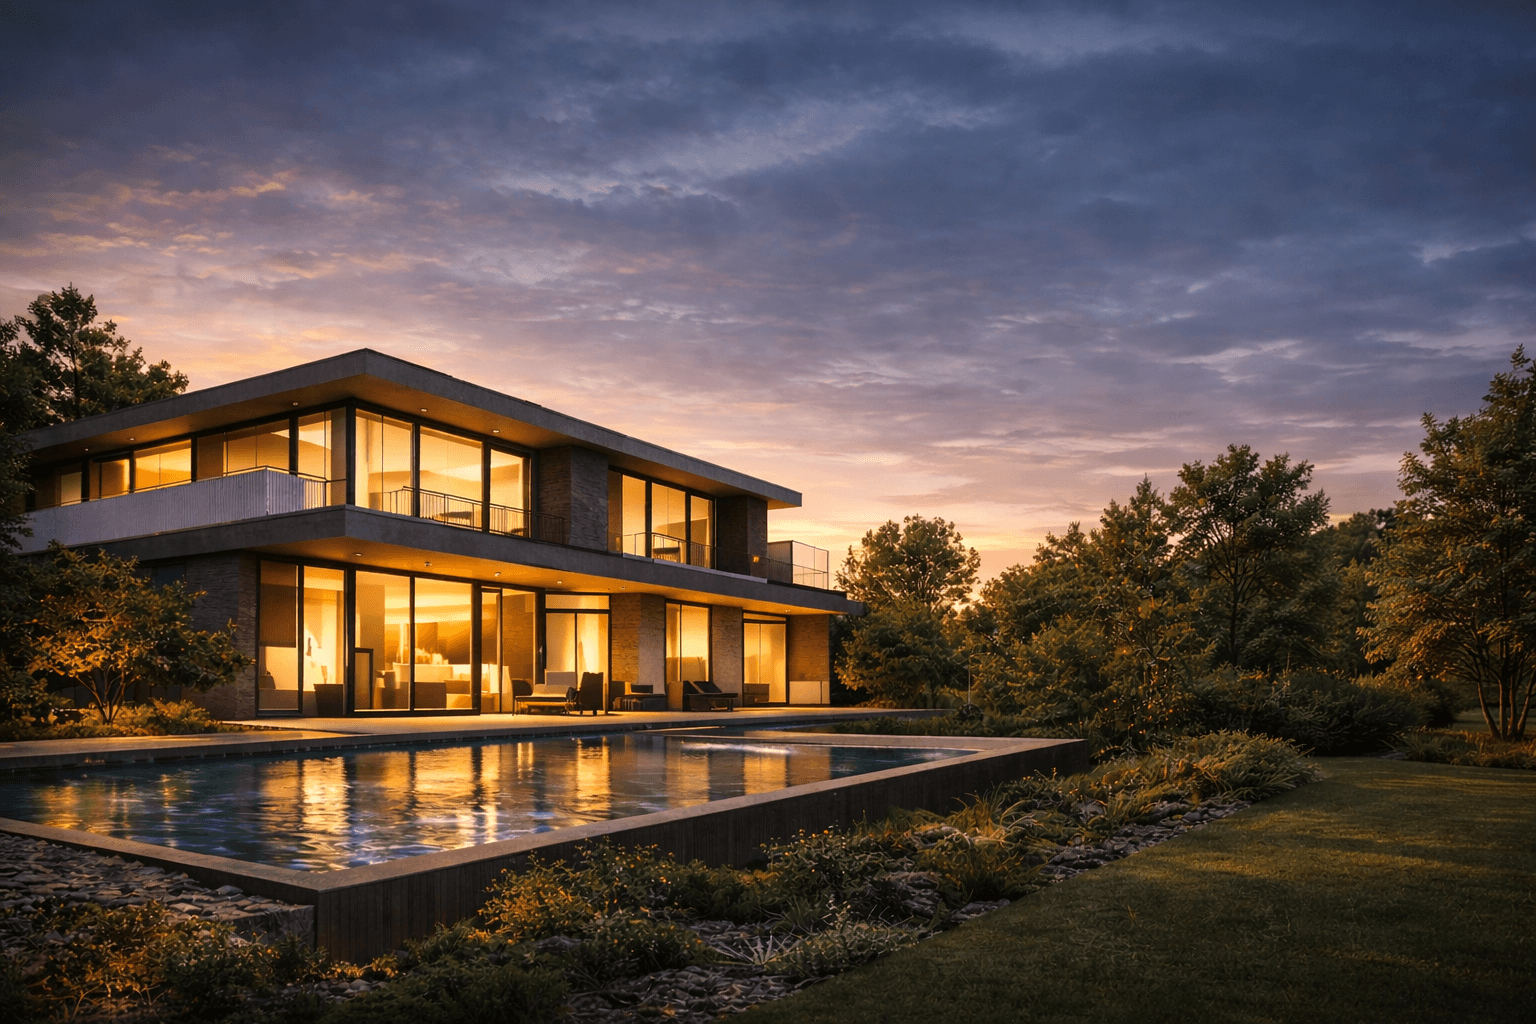
What truly sells the illusion is the way light interacts with all those textures—casting soft shadows, creating bright highlights, and bouncing off reflective surfaces. This complex interplay is all calculated during the rendering phase, where the computer crunches all the data to generate the final image.
The final render is more than just a picture; it’s a story told through light, shadow, and texture. It captures a specific moment in time, showing not just what the space contains, but how it will actually feel.
Finally, a touch of post-production adds that last layer of polish. Using tools a lot like photo-editing software, artists can fine-tune colours, adjust the contrast, and add subtle effects like a lens flare or a bit of atmospheric haze. It's this last 5% of effort that elevates a great render into a truly breathtaking one, turning a technical model into a piece of art.
The Essential Toolkit for Modern Archviz
Behind every jaw-dropping render is a powerhouse of digital tools working together. You can think of this as an artist’s studio, but instead of clay and chisels, we have software. Each program has a specific job, and they all come together to turn a simple idea into a stunning piece of 3d visualization architecture.
It all starts with building a solid digital foundation, and for that, we turn to 3D modelling software.
Foundational Modelling Software
This is where you build the digital skeleton of your project. Think of it as the digital version of pouring the foundation and framing a house. Industry-standard tools like SketchUp and Autodesk 3ds Max are the workhorses here, letting artists take flat, 2D plans and build them out into precise, scalable 3D models.
This is what the inside of a complex modelling program like Autodesk 3ds Max looks like:

As you can see, artists have incredible control over every single point and polygon, which is absolutely vital for getting architectural shapes just right.
Of course, once the model is built, it’s basically a blank, colourless shell. The next step is where the magic really happens—breathing life and realism into it with a rendering engine.
Rendering Engines: The Digital Paintbrush
If modelling software builds the structure, then rendering engines paint the final picture. These are incredibly sophisticated programs, like V-Ray or Corona Renderer, that figure out exactly how light should behave in a digital scene. They add realistic materials, create accurate shadows, and craft believable reflections to produce that final, photorealistic image.
The journey from a basic model to a fully lit scene is a layered process.
Knowing which architectural rendering software is right for the job is key to a smooth workflow. And just like a great photo, the final image often gets a little touch-up. In fact, many of the techniques used in real estate photography editing software can be applied to add that extra polish to a render.
The Rise of Real-Time Engines
Lately, a whole new category of tools has been shaking things up. Real-time engines such as Unreal Engine and Lumion don't just make static images; they create entire interactive worlds. Originally built for video games, these tools let clients literally walk through a digital building in real time, exploring the space as if they were already there.
Real-time visualisation is the closest we can get to experiencing an unbuilt space. It’s a powerful tool for conveying scale, atmosphere, and spatial relationships in a way that static images simply cannot match.
This is the tech that powers those incredible virtual reality (VR) experiences that are quickly becoming the gold standard for presenting high-end projects. It offers a level of client engagement and design feedback that was once unimaginable.
Navigating Challenges in the Indian Market
While the demand for 3D architectural visualisation is booming across India, it's not always a straightforward path for studios and artists. The industry here bumps up against a unique set of local hurdles, creating a market that’s as challenging as it is exciting. Most of these obstacles boil down to two things: getting the right gear and finding the right people.
For smaller firms or a freelancer just starting out, the cost of a high-performance computer is a huge barrier. Photorealistic renders demand serious horsepower, and the price tag on a powerful workstation can be a real showstopper. Then you have the ongoing costs of software licences, which can squeeze budgets and lock people out of the tools everyone else is using.
Bridging the Skill and Technology Gap
Even if you have the money, there's another problem. There’s a noticeable gap between the massive demand for skilled 3D artists and the number of pros actually available. It’s a classic supply-and-demand issue.
In fact, a report on the 3D rendering software market found that over 61% of businesses in the Asia-Pacific region are struggling with visualisation simply because they lack the technical know-how. This means that even companies with the best equipment can't find artists capable of producing top-tier work.
But the Indian archviz community is nothing if not resourceful. They’re already finding smart ways to work around these limitations.
The industry isn't just waiting for solutions; it's actively creating them. Adaptability is key, with studios embracing new workflows and technologies to stay competitive and deliver exceptional quality.
Innovative Solutions Driving Growth
To get around these challenges, people are getting creative. For example, cloud-based rendering services are becoming a game-changer. Instead of building an expensive in-house render farm, smaller studios can essentially 'rent' computing power online, paying only for what they use.
At the same time, we're seeing a huge rise in accessible online training, which is helping to build up a new wave of talent. Aspiring artists can now find amazing educational content, like this detailed Revit architecture tutorial, which helps close the skill gap one person at a time.
Specialised archviz studios are also popping up, offering their high-end visualisation skills as a dedicated service. This makes incredible results accessible to architectural firms of all sizes, ensuring that even a small practice without an in-house team can make their projects look amazing.
The Future Is Here with AI and Virtual Reality
The world of 3D visualisation in architecture is moving at lightning speed, and it’s being pushed forward by Artificial Intelligence (AI) and Virtual Reality (VR). These aren't just buzzwords for some distant future; they are real tools that are changing how architects and designers get their work done, right now.
Think about it: AI can handle the monotonous stuff, like scattering a variety of realistic trees across a landscape model or figuring out the best lighting for a room. This frees up the artists to pour their energy into the creative side of things.
Generative AI is also a massive game-changer. It can spit out dozens of design options in minutes, letting you explore different layouts, materials, and styles at a pace that was unthinkable just a few years ago. As these tools get smarter, getting good at writing prompts is key to getting photorealistic results. It's worth looking into tips for enhancing AI-generated image realism to really make your work stand out.
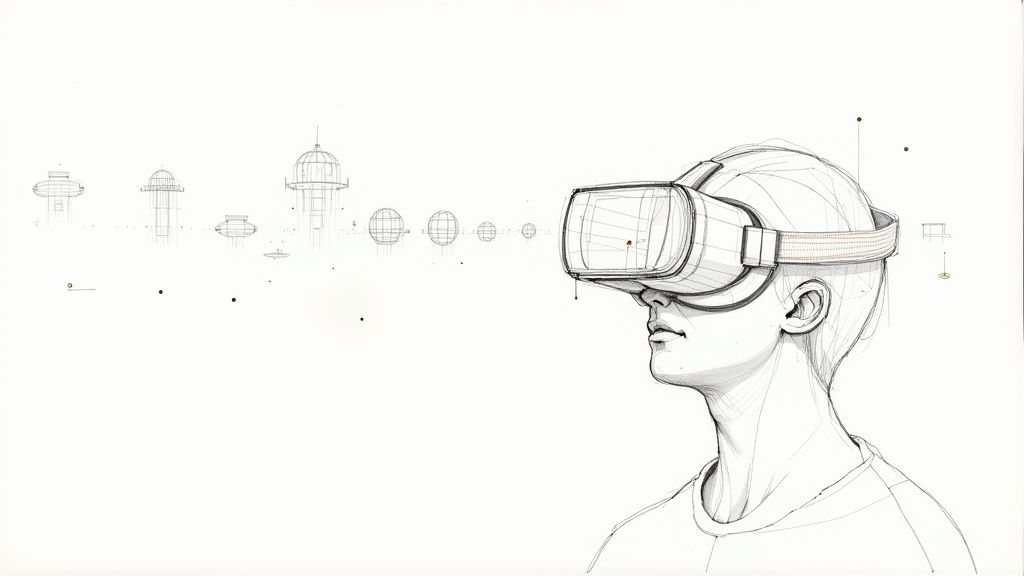
Stepping Inside Your Design with VR
So, while AI is shaking up how designs are created, Virtual Reality is completely changing how they’re experienced. VR isn't about looking at a flat image on a screen; it’s about letting clients and stakeholders literally step inside a building before a single brick has been laid.
This kind of immersive walkthrough gives you a true sense of scale, depth, and how a space actually feels. A client can physically turn their head to see the view from a window or walk from the kitchen island to the sink. They make decisions with a confidence that a 2D drawing could never provide. We dive deeper into this topic in our guide to virtual reality in interior design.
By letting clients experience a space firsthand, VR closes that final gap between imagination and reality. It makes sure the final build is exactly what they envisioned.
This combination of AI and VR isn't just a fleeting trend. It's quickly becoming the new standard for making powerful presentations and designing more intelligently. The numbers back this up, too. The global 3D rendering service market, which includes India, was valued at around USD 9.9 billion in 2023 and is only expected to climb. This growth is fuelled by India's booming real estate and architecture sectors, where these advanced visualisation tools are crucial for lowering project risks and helping clients make better, faster decisions.
Got Questions? We've Got Answers
If you're wondering about the nuts and bolts of 3D architectural visualisation, you're in the right place. We get these questions all the time from clients and new designers, so we’ve put together some straight-to-the-point answers to clear things up.
Let's dive into the common queries about costs, timelines, and some of the lingo you’ll hear.
How Much Does 3D Architectural Visualisation Cost in India?
There’s really no single price tag. The final cost comes down to how complex your project is and the level of detail you're after.
For a ballpark figure, a single, polished render of a simple room might start at around ₹5,000. On the other end, a highly detailed exterior view of a big commercial project could push past ₹1,00,000. And if you want a full animated walkthrough, that's a whole different level of investment.
The best way to figure it out? Send a clear brief to a few different studios and compare their quotes.
What's the Difference Between Rendering and 3D Modelling?
It helps to think of it like building a clay model and then taking a professional photo of it.
- 3D Modelling is the 'building' part. An artist uses special software to construct the digital skeleton of the building, the furniture, the landscape—everything. It’s all about creating the form and structure.
- Rendering is the 'photography' part. This is where the magic happens. We add realistic materials, lighting, and shadows to the model to generate that final, stunningly photorealistic image you see.
So, simply put: modelling is the construction, and rendering is bringing it to life with light and texture.
How Long Does It Take to Create a 3D Architectural Render?
As you might guess, this completely depends on the project's size and complexity. A straightforward interior shot could be turned around in just a few days. But for a complex exterior render with intricate landscaping and a lot of detail, you’re probably looking at a one-to-two-week timeline.
A full animated walkthrough is a significantly larger task, potentially taking several weeks or even months to complete from start to finish. Providing clear, detailed plans upfront is the best way to speed up the process.
Good, clear communication with your visualisation team is key. It helps keep everything moving smoothly and ensures the final images are exactly what you envisioned, without any frustrating delays.
What Is the Difference Between Archviz and Regular 3D Rendering?
Archviz (architectural visualisation) specifically targets the architecture and real estate industries, focusing on buildings and spaces. It prioritises accuracy (real-world scale, correct proportions, realistic materials) over artistic stylisation. General 3D rendering can be used for any purpose — products, animation, VFX — and may prioritise aesthetics over technical precision.
What Are the Most Used Rendering Engines in Archviz?
V-Ray (Chaos Group) and Corona Renderer are the two dominant photorealistic rendering engines in archviz. V-Ray is known for its versatility across software (3ds Max, SketchUp, Rhino, Revit). Corona is known for faster setup and unbiased rendering quality. Both use global illumination algorithms for realistic light behaviour.
Is VR Part of 3D Architectural Visualisation?
Yes. Real-time engines like Unreal Engine and Lumion enable clients to walk through a virtual building in real time using VR headsets. This is increasingly used for high-end client presentations as VR hardware becomes more affordable. Static renders remain the standard for marketing materials due to their photorealistic quality.
Ready to transform your models into stunning, client-ready visuals in seconds? Vibe3D uses AI to create photorealistic renders that capture your vision perfectly. Cut down your revision time and impress your clients with breathtaking quality. See how Vibe3D works.