Ever tried to explain a design idea, only to be met with a blank stare? You can talk about textures, light, and atmosphere all day, but words can only go so far. That’s where interior rendering comes in—it’s like hiring a professional photographer for a room that doesn’t even exist yet.
This technique is how we turn a blueprint or a 3D model into a stunning, photorealistic image that clients can actually connect with emotionally.
What Is Interior Rendering, Really?
Think about trying to describe a beautiful sunset to someone who's never seen one. It’s tough, right? That’s the exact challenge interior designers face. Interior rendering closes that gap, turning abstract concepts into tangible, almost touchable, visuals. This isn't just about making a pretty picture; it's a fundamental communication tool.
The real magic happens when a designer’s vision aligns perfectly with a client’s expectations—long before a single tin of paint is opened. By showing precisely how morning light will spill across a wooden floor or how a sofa will anchor a living room, rendering cuts out the guesswork. It stops costly mistakes and last-minute changes dead in their tracks. We move the conversation from, "I think it will look something like this," to, "This is exactly how it's going to feel."
The Power of Visual Communication
For any designer, high-quality renders are more than just a nice-to-have; they’re a professional superpower. They're workhorses that serve a few crucial roles.
- Winning Client Presentations: A jaw-dropping render can be the one thing that gets a project over the line. It gives clients the confidence and excitement they need to say "yes."
- Marketing and Portfolios: Let's be honest, stunning visuals are your best marketing asset. They fill your website, social media, and portfolio with work that grabs attention and brings in new business.
- Design Refinement: Rendering is your digital sandbox. It’s where you can experiment with different materials, play with colour palettes, and test lighting setups until every last detail is just right.
The industry certainly backs this up. The global 3D rendering market was valued at around USD 4.21 billion in 2024 and is expected to rocket to USD 19.82 billion by 2033** (CAGR: 18.7%). We’re seeing this boom firsthand, especially in places like India, where the buzzing real estate and architecture scenes have created a massive demand for top-tier visualisation.
Key facts at a glance: The interior rendering workflow has six stages — modelling, texturing, lighting, camera setup, rendering, and post-production. Photorealism depends on three pillars: light (natural, artificial, ambient), materials (bump, reflection, glossiness), and composition (rule of thirds, leading lines, human touches). A single high-res interior render can take 4–24 hours on a powerful workstation. Cloud rendering can reduce this to under 1 hour. The most-used industry rendering engines are V-Ray and Corona Renderer.
Delving into interior rendering shows you just how 3D rendering enhances interior design and makes a vision real. It’s not just tech; it’s the art of making the unbuilt believable, letting clients step inside their future space before construction even starts.
At the end of the day, the goal of a great 3D architectural visualizer is to create an image that isn't just seen but is truly felt. When you master this tool, you can tell a much more compelling story, work more efficiently, and deliver results that blow your clients' expectations out of the water.
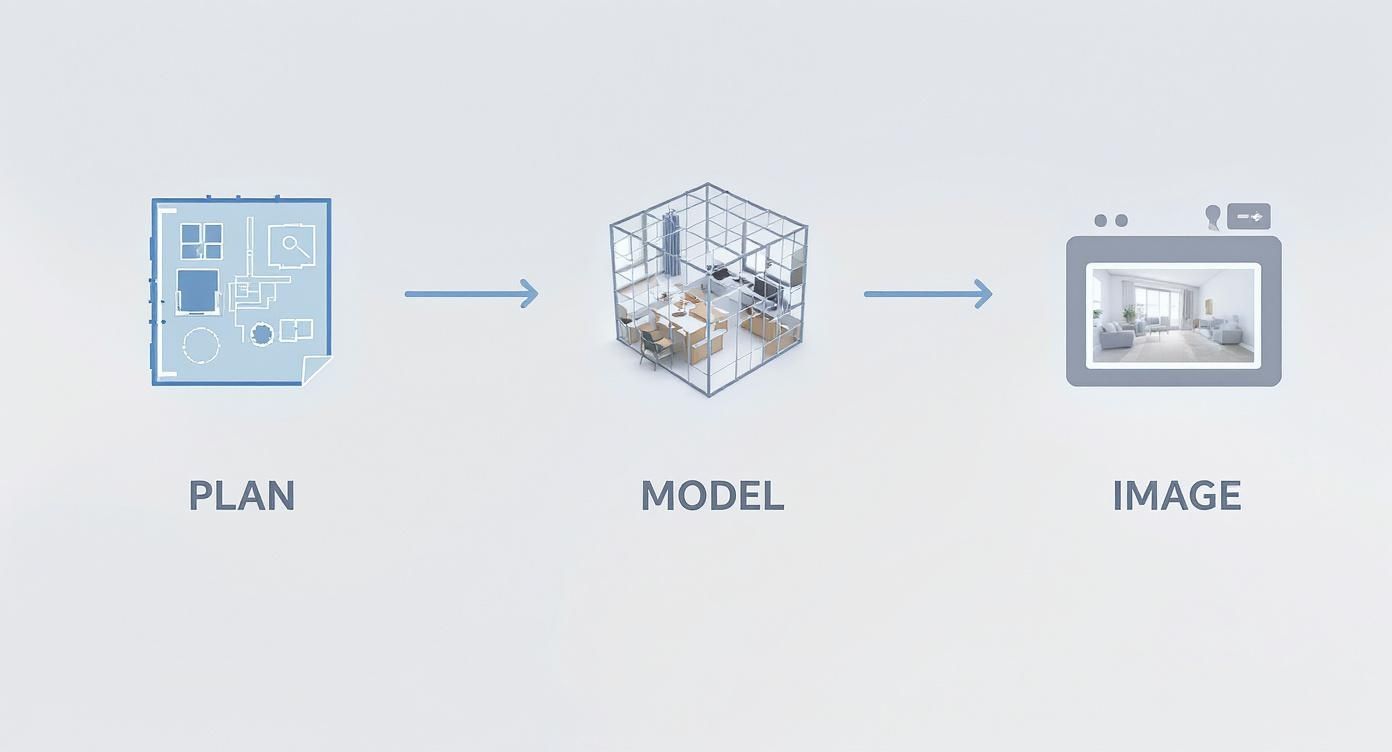
The Journey from Digital Model to Final Image
Turning a blank digital canvas into a photorealistic interior isn't magic—it's a methodical, creative process. Think of it like building and decorating a room in the digital realm, where each step layers on more detail and realism. This is how we transform abstract floor plans into something tangible a client can actually see and get excited about.
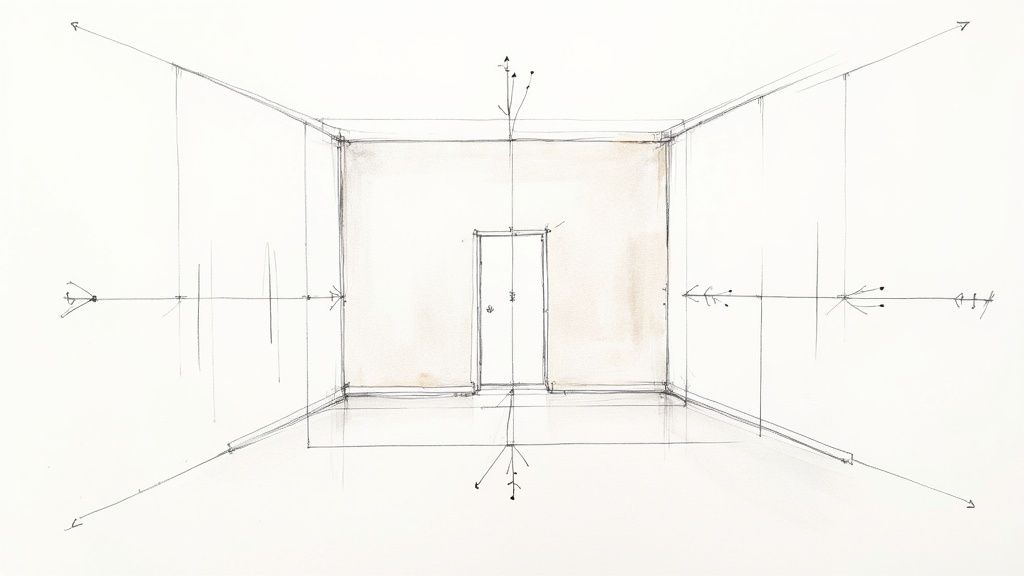
It all starts with the 3D model, the digital skeleton of the entire space. First, you build the architecture—walls, floors, windows, doors—and then you start filling it with furniture, fixtures, and all the little decor pieces. A clean, well-organised model at this stage is absolutely crucial; messy geometry here is just asking for a world of pain later on.
This short infographic breaks down the core stages of the interior rendering workflow, taking you from the initial concept to the final, polished image.
As you can see, the process is broken down into three clear phases. Sticking to a structured approach like this is the secret to getting a high-quality render every single time.
To give you a clearer picture, here’s a quick rundown of how we get from A to B.
The Interior Rendering Workflow at a Glance
| Stage | Objective | Key Activities |
|---|---|---|
| 1. Modelling | Create the digital foundation. | Building room architecture, adding furniture, props, and ensuring clean geometry. |
| 2. Texturing | Apply realistic surface properties. | Assigning materials like wood, fabric, and metal; adjusting reflection, roughness, and bump. |
| 3. Lighting | Sculpt the mood and create depth. | Setting up natural light (sun/sky), placing artificial lights, and balancing shadows. |
| 4. Camera Setup | Frame the perfect shot. | Choosing the camera angle, focal length, and composition to best showcase the design. |
| 5. Rendering | Generate the final image. | The computer calculates all the data (light, materials, geometry) to create the pixel-based image. |
| 6. Post-Production | Add the final polish. | Making minor tweaks to colour, contrast, and sharpness in an image editor. |
Each stage builds directly on the one before it, forming a chain that leads to a convincing and beautiful final image.
Applying Digital Surfaces and Textures
With the digital framework in place, we move on to texturing. This is where we breathe life into the scene, applying the digital equivalents of paint, fabric, and wood to every surface. But it's so much more than just slapping a colour on something. Realistic materials need properties like reflection, roughness, and even subtle imperfections to look believable.
A wooden floor, for example, isn't just a flat brown image. It has a specific grain, a soft sheen that catches the light, and tiny bumps and scuffs that tell a story. Nailing these details is what starts to trick the eye into seeing a photograph instead of a computer-generated image. It’s a meticulous process of mapping these textures onto each object, making sure they don’t look stretched or fake.
Sculpting the Scene with Light
Next up is lighting, which is arguably where the real artistry comes in. Here, we place digital light sources to sculpt the mood and atmosphere of the space. Just like in real-world photography, light dictates everything—from the overall vibe to how shadows curve around an object and give it form.
The lighting setup is usually a mix of different sources:
- Natural Light: This is often created with a digital 'sun and sky' system that realistically simulates daylight pouring through the windows.
- Artificial Lights: These are the digital twins of your lamps, spotlights, and pendant lights, adding warmth and highlighting key features.
- Ambient Light: This is the subtle, indirect light that bounces around the room, filling in the shadows so they aren't just pure black. It makes everything feel much more natural.
Balancing these lights is what separates a good render from a great one. It’s what creates those soft shadows, bright highlights, and gentle gradients that give a scene its depth and emotional punch.
Framing the View and Capturing the Image
Once the scene is fully lit and textured, it's time to find the perfect camera angle. This part is pure photography. We carefully consider the camera's position, the type of lens, and the overall composition to showcase the design in the best possible way. A wide-angle lens can make a tight space feel airy, while a zoomed-in shot can focus attention on a beautiful piece of furniture.
When the perfect shot is framed, we hit the 'render' button. The computer then takes all the information we've given it—the model, the materials, the lighting—and crunches the numbers to produce the final image. This can take anywhere from a few minutes to several hours, all depending on the scene’s complexity.
The final, crucial step is post-production. This is where we take the raw render into a program like Photoshop and add the final polish. Tiny adjustments to contrast, colour balance, and sharpness can make the image truly pop, turning a great render into an absolutely exceptional one.
Every stage of this workflow is linked. A solid model makes texturing easier, good textures make the lighting look better, and fantastic lighting is the key to a stunning final image. A well-thought-out interior design concept sheet usually acts as the roadmap for all these decisions, making sure the end result is perfectly aligned with the original vision.
Mastering the Art of Photorealism
What’s the secret sauce that separates a good interior rendering from a truly jaw-dropping one? It's that tiny gap between "almost real" and "wait, is that a photograph?" Closing that gap isn't about one magic button; it's about mastering the subtle details where art and science collide.
The magic of photorealism really boils down to three things: light, materials, and composition. Nail these, and you'll transform a sterile digital model into a space that feels alive, authentic, and full of atmosphere. It’s time to move beyond the default settings and start thinking like a photographer.
The Art of Believable Lighting
Light is the soul of an image. It sets the mood, carves out shapes, and creates the depth that tricks our eyes into believing a scene is real. Nothing screams "computer-generated" louder than flat, even lighting. To get that photorealistic look, you have to think in layers.
Your first job is to mimic how light works in the real world—it bounces, it scatters, it casts soft shadows. I always start with a strong base of natural light. This usually means using a digital sky or an HDRI (High Dynamic Range Image) to simulate realistic daylight pouring through the windows, giving you that soft, ambient light that fills the room.
Once that's in place, it’s time to add the artificial lights. These are your digital table lamps, spotlights, and under-cabinet LEDs. Every single light needs a purpose. Maybe it's creating a warm, cosy pool of light over a reading chair or highlighting a piece of art. The key is to find a balance where these lights support the natural light, not fight against it.
And finally, you have to obsess over the shadows. Real shadows are rarely crisp and jet-black. They have soft, blurry edges and pick up subtle colours from the light bouncing off surrounding surfaces. Getting these little details right is what sells the illusion of depth.
Crafting Materials with Realistic Imperfections
Here's a simple truth: in the real world, nothing is perfect. Surfaces have tiny bumps, microscopic scratches, and slight changes in sheen. These little imperfections are absolutely essential for making materials look believable in a render. A perfectly smooth, flawless surface is an instant giveaway that it’s fake.
A great material is about way more than just its colour. You need to think about:
- Texture and Bump: This is all about the physical feel of the surface. Think about the grooves in wood grain, the slightly rough texture of concrete, or the weave of a fabric. Using bump maps is how you add these fine details and make a surface look like you could reach out and touch it.
- Reflection and Glossiness: How does light play off the surface? A polished marble floor will have sharp, mirror-like reflections, while a matte-painted wall will just have a soft, diffused sheen. Tweaking the glossiness value is critical.
- Subtle Flaws: This is my favourite part—adding a bit of chaos. Faint scuff marks on a wooden floor, slight smudges on a glass tabletop, or tiny variations in a rug’s pattern. These details tell a story and ground the entire scene in reality.
Creating convincing materials is really an art of observation. Just spend some time looking at surfaces in your own home. See how they reflect light and show signs of wear and tear. If you can recreate those subtle cues, your rendering will go from good to incredible.
Tools like 3ds Max have amazing features for building these complex materials from scratch. If you want to go deeper, our guide on 3ds Max for interior design is a great place to start learning professional techniques.
Composition and Storytelling Through Details
The final piece of the puzzle is composition. This is all about how you frame the shot and what you decide to put in it. You can have a technically perfect render that still feels cold and lifeless because it’s missing a human touch. This is where you need to borrow a few tricks from photography and interior styling to tell a story.
Start with the basics, like the rule of thirds. Instead of dead-centring your main subject, place it off to one side to create a more dynamic and interesting image. Look for leading lines—the edge of a rug, a beam on the ceiling—that can naturally guide the viewer's eye through the space.
Most importantly, make the space feel lived-in. A room that’s too tidy looks more like a furniture showroom than a home. It's the small details that bring it to life:
- A throw blanket casually draped over the sofa.
- A stack of books on the coffee table.
- A pair of shoes left by the door.
- A steaming cup of coffee on the counter.
These little things make the space relatable and real. To really get a feel for this, spend some time studying inspiring interior visuals. Seeing how professional photographers and stylists compose their shots will give you tons of ideas for lighting, materials, and composition that you can bring back to your own work. It's how you turn a simple image into a compelling story.
Common Rendering Mistakes and How to Fix Them
Every artist, from beginner to seasoned pro, has been there. You've spent hours on an interior render, but something just feels… off. It’s a frustrating moment, but it’s a totally normal part of the process. The good news? Most of these issues boil down to a few common mistakes that are surprisingly easy to fix once you know what to look for.
Instead of getting discouraged, think of these roadblocks as chances to seriously level up your skills. Let’s dive into the most frequent rendering pitfalls and talk about real, practical ways to turn them into photorealistic wins. This isn't about chasing some impossible standard of perfection; it's about learning to see your scene like a photographer and a stylist rolled into one.
Uninspired or Flat Lighting
You can spot a novice render a mile away by its lighting. If a scene is evenly blasted with light from every angle, with no real shadows or highlights, it will always scream "fake." This usually happens when you rely on a single, overpowering light source to do all the heavy lifting.
What Went Wrong: The lighting has no story. It lacks direction, mood, and depth, flattening the entire scene and erasing all the subtle interplay of light and shadow our eyes expect to see in the real world.
How to Make It Right: Think in layers. Start with your main light source, like a digital sun or an HDRI sky, to establish where the light is coming from. Then, bring in your secondary, artificial lights—think lamps, under-cabinet LEDs—to create cosy pools of warmth and highlight key features. The final touch is making sure your render engine is calculating global illumination to get those soft, bounced light fills that make shadows feel natural, not like stark black holes.
The Uncanny Valley of Perfection
In real life, nothing is perfectly clean, perfectly aligned, or perfectly smooth. When your render is too pristine, it sets off our brain’s "this isn't real" alarm. Welcome to the uncanny valley of 3D, where a scene is almost photorealistic but the lack of tiny imperfections makes it feel strangely unsettling.
A common trap for artists is creating a scene that looks more like a sterile furniture catalogue than a lived-in space. The secret to breaking free is to introduce a little bit of intentional chaos—subtle details that tell a story of human presence.
What Went Wrong: The surfaces are flawless, the objects are lined up with military precision, and there's no sign of daily life. This hyper-perfection makes the space feel cold, uninviting, and ultimately, unbelievable.
How to Make It Right: Get messy! Add subtle imperfections. Use texture maps to introduce faint smudges on glass, minor scuffs on a wooden floor, or slight wrinkles in fabric. Place objects with a human touch—a casually draped throw blanket, a stack of books that aren't perfectly straight, or a half-empty coffee mug.
Stretched or Repetitive Textures
Incorrectly applied textures are another dead giveaway of a CG image. When a wood grain looks like it’s been stretched like taffy across a tabletop, or a tile pattern repeats in an obvious grid, the illusion of reality is shattered. It’s a technical problem with a huge artistic impact.
What Went Wrong: The UV mapping—which is just the process of wrapping a 2D texture around a 3D object—is distorted, or the texture itself is tiling too visibly. You’ll really notice this on big surfaces like floors, walls, and rugs.
How to Make It Right: Proper UV unwrapping is your best friend here. It’s worth taking the time to make sure your texture coordinates are laid out correctly so patterns wrap realistically around objects without looking stretched. For large areas, use high-resolution, seamless textures or even blend multiple maps together to break up that repetitive look. Many software solutions can help with this; you can explore related workflow principles in our guide on how to render in SketchUp.
How New Technology Is Changing the Game
The world of **interior rendering** is moving at an incredible pace. It wasn’t that long ago that kicking off a render meant your computer was basically a brick for the next day. Today, a new wave of tools is completely rewriting the rules, making the whole process faster, smarter, and way more creative.
I like to think of traditional rendering as trying to cook a massive holiday dinner on a single camping stove. You’ll get there eventually, but it’s going to take forever and tie up your only heat source. The new tech we have now? It’s like being handed the keys to a fully staffed professional kitchen.
The Power of Cloud Rendering
One of the biggest game-changers has been the shift to cloud rendering. Instead of your own computer chugging away trying to process all that complex light and material data, you just send the job off to a massive network of super-powerful remote servers. It’s like outsourcing the most painful part of the project.
This changes everything in a few key ways:
- Sheer Speed: A render that might take your local machine a whopping 12-24 hours can often be done and dusted in under an hour on the cloud. That kind of time-saving is a lifesaver when deadlines are looming.
- Freedom to Work: While the cloud is doing its thing, your computer is totally free. You can get on with designing the next scene, tweaking a model, or just catching up on emails instead of watching a progress bar crawl across the screen.
- Accessibility for All: You no longer need to drop thousands on a beast of a workstation just to produce stunning renders. If you can build the 3D model, the cloud can handle the final output.
This has really opened up the world of high-quality visualisation. Freelancers, small studios, and even students who could never afford the hardware can now produce work that rivals the big firms. It’s levelled the playing field in a huge way.
AI Is Your New Creative Partner
Even more exciting is how Artificial Intelligence is weaving its way into the design process. AI isn't some far-off sci-fi concept anymore; it's a real, practical tool that’s fast becoming a designer's best creative partner. And no, it’s not here to replace designers—it’s here to supercharge their abilities.
Picture this: you’ve modelled a gorgeous living room, but you're stuck on the final vibe. In the old days, mocking up different versions with new materials, furniture, and lighting schemes would have been a soul-crushing, multi-day task. With AI-powered tools, it’s almost instantaneous.
AI lets designers explore hundreds of creative directions in the time it used to take to produce one. You can literally prompt it to "make this room feel more Scandinavian" or "show me this sofa in five different fabrics," and get visual results back in seconds.
This is so much more than a speed boost. It fundamentally changes how you design. It encourages you to experiment and get bold with your ideas because the "cost" of trying something new is virtually zero. You can explore more options, make better decisions, and show clients a whole spectrum of possibilities, all while slashing those painful review cycles.
Where Does This Lead Us?
All this tech is coming together to create a design experience that's far more fluid and interactive. The principles behind generating quick visuals, for instance, are the same ones that power immersive walkthroughs. To get a sense of how this goes beyond static images, check out our guide on virtual reality interior design.
At the end of the day, cloud rendering and AI are finally demolishing the technical roadblocks that have held designers back for years. They take care of the slow, tedious tasks, freeing up professionals to do what they actually love: solving problems, thinking creatively, and bringing beautiful, functional spaces to life. The future of rendering is less about technical wrangling and more about pure, unblocked creativity.
Got Questions About Interior Rendering? We’ve Got Answers.
Jumping into the world of interior rendering can feel a bit like learning a new language. It’s a space where creativity and serious tech collide, so it's only natural to have a few questions, whether you're a designer, a student, or a client trying to make sense of it all.
To make things easier, we've rounded up some of the most common questions we get asked. Let’s clear the air and get you the straightforward answers you need.
How Long Does an Interior Render Actually Take?
Ah, the classic "how long is a piece of string?" question. The truth is, it completely depends on the project. A pro could probably knock out a simple, well-defined room with ready-made furniture in just a few hours from start to finish.
But what about a sprawling commercial space with custom millwork, complex architectural features, and a very specific vibe? That could easily soak up a week, or even more. The final rendering part—when the computer does all the heavy lifting to create the image—is the real wild card. A quick, low-quality draft might pop out in minutes, but a single, high-res, photorealistic shot can lock up a powerful computer for over 24 hours. This is exactly why cloud rendering platforms have become so essential; they slash that final waiting time to a fraction.
What’s the Go-To Software for Interior Rendering?
There's no single "best" program. Most professionals use a whole toolkit, picking the right tool for each stage of the job. Think of it like a workshop—you wouldn't build a whole cabinet with just a hammer.
Here’s how the workflow usually breaks down:
- 3D Modelling: This is the foundation, where the room and all its objects are digitally built. The big players here are tools like 3ds Max, SketchUp, Cinema 4D, and Revit.
- Rendering Engines: These are the magic wands. They're specialised plugins or programs that take the 3D model and calculate all the light, shadows, and materials to make it look real. V-Ray, Corona Renderer, and Unreal Engine are industry titans, famous for their stunning realism.
- Post-Production: No render is truly finished until it’s had a little TLC. This is where Adobe Photoshop comes in to tweak colours, sharpen details, and add that final layer of artistic polish.
Is Getting a Pro Render an Expensive Job?
The cost can swing pretty wildly. A single image might set you back anywhere from a few hundred to several thousand pounds. It all boils down to the complexity of the scene, how much detail you need, and the final image size.
But here’s the thing: while it's an upfront cost, it’s almost always a bargain compared to the alternative. Imagine the cost of ripping out a newly built kitchen island because the client hates the finish. Finalising the design digitally saves a fortune in real-world labour and material costs by catching those expensive mistakes before a single nail is hammered.
Think of it this way: a £1,000 render that prevents a £10,000 construction mistake is an incredible return on investment. It provides peace of mind and financial certainty for everyone involved.
Can I Bring My Own 3D Models to the Party?
Absolutely! In fact, it’s a super common and smart way to work. Many architects and designers build their own models in programs like Revit, ArchiCAD, or SketchUp. They then hand these files over to a visualisation artist who focuses purely on the texturing, lighting, and rendering.
Providing a clean, well-made model can speed up the whole process and might even bring down the final price. It also guarantees the architectural details are spot-on from the get-go, freeing up the artist to focus on what they do best: making your design look incredible.
What Software Is Used for Interior Rendering?
Professional interior rendering typically uses a three-stage pipeline: 3D modelling (SketchUp, 3ds Max, Revit, Cinema 4D), rendering engines (V-Ray, Corona Renderer, Unreal Engine), and post-production (Adobe Photoshop). V-Ray and Corona are the industry-standard rendering engines for photorealistic interior visuals, known for their accurate light simulation and material libraries.
What Is the Difference Between a Render and a Visualisation?
A render is the raw output of a rendering engine — a calculated image based on geometry, materials, and lighting. Visualisation is the broader practice of using these renders to communicate a design concept. A single project may produce dozens of renders for different rooms, times of day, or material options, which are then curated into a visualisation presentation.
How Do I Make My Interior Render Look Photorealistic?
Three pillars: lighting, materials, and composition. Light must be layered (natural base + artificial sources + ambient fill) with soft, colored shadows. Materials need bump maps, accurate glossiness values, and intentional imperfections (micro-scratches, dust, wear). Composition should follow the rule of thirds with human-scale details (books, cups, throws) to make the space feel lived-in.
How Much Does Professional Interior Rendering Cost?
A single photorealistic interior render typically costs £200–£2,000+ depending on complexity, detail level, and output resolution. Animated walkthroughs or full-exterior packages cost significantly more. The investment is justified: a £1,000 render that prevents a £10,000 construction mistake delivers exceptional ROI.
Ready to transform your 3D models into stunning visuals without the wait? Vibe3D uses AI to deliver photorealistic interior renderings in seconds, not hours. Streamline your client reviews and bring your creative vision to life faster than ever before. Explore the future of interior rendering at Vibe3D.