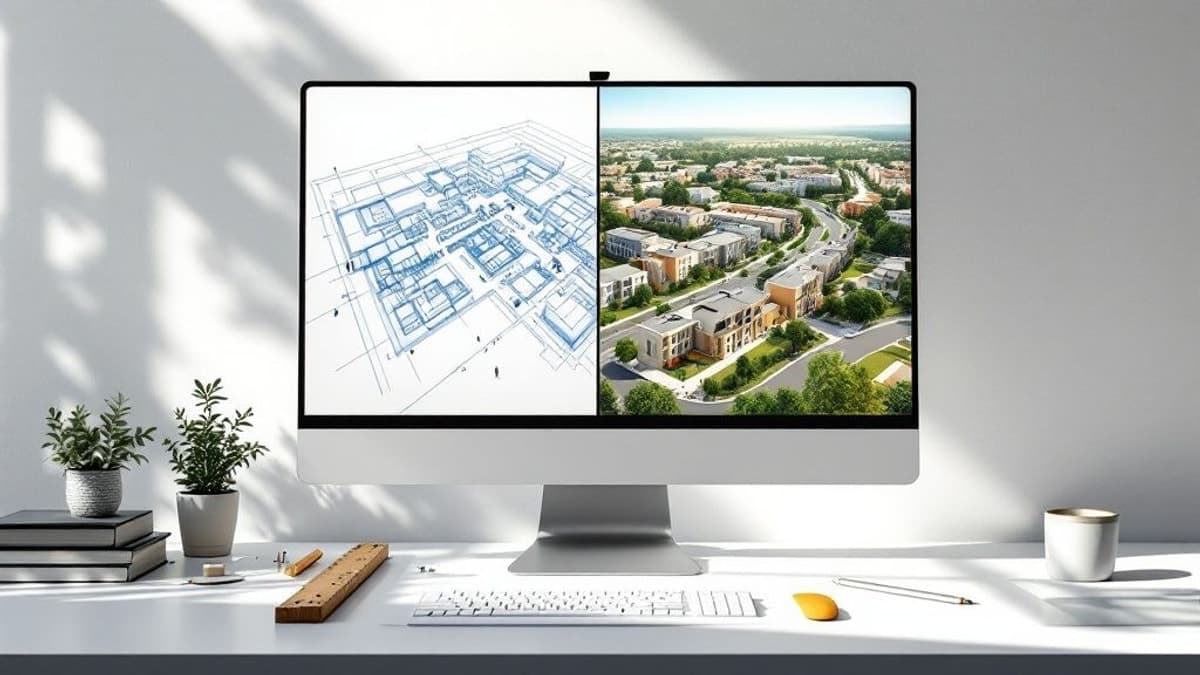
A site plan can be rendered in three main ways: directly in 2D, from a 3D site model, or with AI using a plan image as the visual reference. The right workflow depends on what you need to communicate.
If the goal is a clear top-down presentation, a 2D or AI-assisted workflow is often enough. If you need a new aerial perspective or eye-level view, build or use a 3D model first and render the camera view you need.
This guide explains how to choose the right workflow, prepare the source plan, add materials and landscape without losing legibility, and turn a technical drawing into a visual that clients and stakeholders can understand quickly.
Key takeaways
- Start with a clean site plan where buildings, roads, paths and open spaces are easy to distinguish.
- Choose the rendering workflow based on the final view you need, not simply on the software available.
- A good rendered site plan adds visual hierarchy without hiding the underlying site organization.
- AI is useful for quickly adding depth, materials, planting and atmosphere to an existing plan view.
- A rendered site plan is a communication visual. CAD or BIM documentation should remain the source for dimensions and statutory information.
What does it mean to render a site plan?
Rendering a site plan means taking a technical drawing of a site and adding enough visual information to make the proposal easier to understand.
The source plan may show building footprints, roads, parking, paths, landscape areas, boundaries and other site information as linework or flat colors. A rendered version can introduce materials, planting, surface differences, shadow and depth so those relationships are easier to read.
The objective is not always photorealism.
For an early concept, a restrained diagrammatic plan may communicate the idea better than a highly detailed image. For a residential development or marketing presentation, a more realistic rendered plan may help viewers understand the character of streets, open spaces and landscape.
If you want to create this type of visual directly from a plan image, Vibe3D's site plan rendering tool is designed for that workflow.
Start by deciding what the render needs to communicate
Before adding materials or trees, decide what the image is for. This determines almost every visual decision that follows.
Client design review
For a client review, prioritize clarity. The viewer should quickly understand:
- where the buildings sit
- how vehicles enter and move through the site
- how pedestrians move between buildings
- where the main landscaped and shared spaces are
- how different parts of the development relate to one another
The render can be attractive, but it should not become so decorative that the site organization disappears.
Planning or stakeholder review
For planning discussions and stakeholder presentations, keep the visual closely tied to the source plan.
Use materials and planting to clarify the proposal, but avoid implying that a visualization is a measured or approved technical drawing. Setbacks, boundaries, dimensions and statutory information should still be read from the project documentation.
Property marketing
For property marketing, you can usually introduce more atmosphere. Planting, vehicles, active outdoor areas and warmer lighting can help a residential or mixed-use development feel inhabited.
The same underlying masterplan may therefore need a different visual treatment depending on who is looking at it.
Four ways to render a site plan
There is no single correct site plan rendering workflow. In practice, architects tend to use one of four approaches.
1. Render the plan directly in 2D
This is the traditional graphic approach.
Start with a CAD or vector plan and build the presentation in Photoshop, Illustrator, Affinity Photo or similar software. Add fills, surface textures, trees, shadows, water, people and other graphic elements directly over the plan.
This workflow works particularly well for:
- competition boards
- concept presentations
- planning diagrams
- landscape plans
- projects where a clean top-down graphic is more useful than photorealism
Its biggest advantage is control. Every element can be positioned deliberately and the drawing can stay very precise.
The trade-off is time. Creating realistic landscape, material variation and shadow manually can become labor-intensive, especially when several design options are needed.
2. Render from a 3D site model
If the project already exists as a detailed SketchUp, Revit, Rhino, Archicad, Vectorworks or other 3D model, you can create the site visualization from that model.
This approach is the better choice when you need:
- an oblique aerial view
- a perspective view across the site
- eye-level exterior views
- consistent shadows based on actual 3D massing
- several cameras from the same model
Set the camera, add the required site context, then use your preferred rendering workflow.
A 3D model is especially valuable when the relationship between building height, terrain and surrounding context matters.
However, a documentation model is not automatically a presentation-ready model. It may still need simplified landscape, terrain, context buildings and surface information before the view communicates well.
3. Render a 2D site plan with AI
AI offers another route when you already have a readable plan image and want to develop it into a more visual presentation quickly.
Instead of manually painting every tree, material and shadow, you provide the plan image as the visual reference and describe the treatment you want.
For example:
Keep the building footprints, roads and paths clearly readable. Add restrained landscape planting, lawns, light concrete paving and subtle depth. Clean architectural presentation, daytime.
This can be useful for:
- exploring different landscape directions
- turning flat CAD graphics into more visual client material
- trying realistic versus illustrative treatments
- creating early rendered masterplan options
- producing variations without rebuilding the drawing each time
The important limitation is the source view.
If you upload a flat top-down site plan, the AI should be treated as a way to develop that visual rather than as a verified 3D model generator. If you need a completely new aerial camera angle, create that view in your 3D software first and render the exported image.
4. Use a hybrid workflow
For many architectural teams, the strongest workflow is a combination of the approaches above.
You might:
- prepare the plan accurately in CAD or BIM
- export a clean presentation view
- use AI to develop materials, landscape and atmosphere
- refine important details manually
- add labels, dimensions or graphic overlays separately
This keeps the technical information under the control of the design software while using faster visualization tools for the presentation layer.
How to render a site plan with AI
If you are starting from a 2D plan or masterplan image, the following workflow keeps the result useful rather than simply decorative.
Step 1: Export a clean source plan
Export the site plan as a clear PNG or JPG.
Before exporting, simplify anything that does not need to influence the visual. A rendering tool does not need every construction annotation, reference tag or dimension string.
The source should make these elements easy to distinguish:
- building footprints
- roads and parking
- pedestrian paths
- landscape zones
- water
- major open spaces
- site boundaries where relevant
Higher visual clarity at this stage usually produces a more coherent result later.
Step 2: Keep the first render simple
Do not try to solve every visual decision in one instruction.
Start by establishing the broad reading of the site:
Preserve the site organization. Add realistic grass, low planting, light paving and asphalt roads. Keep building footprints and circulation clearly readable. Bright daytime architectural presentation.
Review the result primarily for hierarchy rather than detail.
Can you still understand the plan immediately?
If not, adding more trees, people and texture will usually make the problem worse.
Step 3: Develop the landscape
Once the basic plan reads well, add landscape with a purpose.
Use trees to reinforce streets, entries and public spaces rather than distributing them randomly. Keep dense planting away from important circulation or building edges if it makes the plan harder to read.
For more detailed landscape exploration, use an AI landscape design workflow alongside the broader site plan study.
Useful landscape directions include:
- structured avenue planting
- informal native planting
- courtyard landscape
- low-maintenance residential landscape
- urban plaza planting
- resort-style landscape
- restrained campus landscape
The objective is to make the open-space strategy clearer, not simply greener.
Step 4: Give surfaces a visual hierarchy
A rendered site plan becomes much easier to understand when surfaces are differentiated consistently.
For example:
- roads: darker asphalt
- pedestrian paths: lighter paving
- plazas: larger-format stone or concrete
- lawns: muted green
- planting beds: denser texture
- water: restrained reflective surface
- buildings: one controlled material family
Avoid giving every surface the same amount of contrast.
The most important project elements should read first.
Step 5: Add entourage carefully
Cars, people and street furniture can communicate scale and make a site feel active, but they are easy to overuse.
A few vehicles can explain road width and parking. Small groups of people can make plazas or shared spaces feel occupied. Too much entourage can obscure exactly the information the site plan is supposed to explain.
Treat entourage as scale information, not decoration.
Step 6: Compare presentation styles
The same site plan can support more than one visual language.
Try:
- clean architectural
- photorealistic
- soft illustrative
- watercolor
- muted competition-board style
- warm evening masterplan
Different styles are useful at different stages.
A competition board may benefit from a restrained illustrative treatment. A development brochure may need more atmosphere. An internal design review may need a very clear, neutral image.
With Vibe3D, you can use the AI site plan rendering tool to test these directions from the same source plan rather than rebuilding each presentation manually.
What makes a rendered site plan easy to read?
The best site plan renderings have a clear visual hierarchy.
A viewer should not have to study the image to figure out where the road ends and the landscape begins.
Keep circulation distinct
Roads, parking, pedestrian routes and entries should be immediately recognizable.
Use surface contrast, edge definition and planting carefully so circulation does not disappear beneath texture.
Make buildings visually stable
Buildings usually need to remain among the strongest forms in the composition.
If roofs, shadows and landscape all have similar contrast, the site can become visually noisy. Keep the building massing clear enough that the overall development pattern remains obvious.
Use landscape to explain space
Landscape can reveal how open spaces are intended to work.
Trees can define a boulevard. Lawn can identify a communal green. Denser planting can create a buffer. Paving can signal a plaza or shared courtyard.
This is much more useful than adding generic vegetation simply to make the render appear realistic.
Preserve the logic of the source plan
A rendered site plan is successful only if the source plan is still understandable underneath the visual treatment.
If a road changes position, an open space disappears or a building footprint becomes ambiguous, the image may look attractive but become less useful as an architectural communication tool.
Top-down plan, aerial view or eye-level render?
These are related visualizations, but they answer different questions.
Top-down rendered site plan
Best for:
- overall site organization
- circulation
- building relationships
- open-space hierarchy
- masterplan comparison
It stays closest to the technical plan and is generally the easiest format for comparing design options.
Oblique aerial view
Best for:
- building massing
- terrain
- height relationships
- a more spatial understanding of the whole development
If you need an oblique aerial view, create or export that camera from a 3D model rather than expecting a flat plan image to define a new verified perspective.
Eye-level exterior view
Best for:
- entrances
- streetscapes
- courtyards
- public spaces
- marketing and experiential presentations
An eye-level render explains what it feels like to occupy the site, while the site plan explains how the project is organized.
For a deeper look at larger developments, see our guide to master plan rendering.
Common site plan rendering mistakes
Making the image too realistic
More detail is not automatically better.
If individual trees, people, cars and material textures dominate the image, the viewer may lose the overall planning idea.
Letting landscape hide circulation
Landscape should reinforce the plan. Avoid planting that visually blocks important access, paths or building edges.
Using inconsistent surface treatments
If paving, roads and plazas all have similar tones and textures, the circulation hierarchy becomes difficult to understand.
Inventing a new perspective from a flat plan
A rendered top-down plan and an aerial perspective are different outputs.
If the project needs a new camera angle, establish that angle in a 3D model first.
Treating the render as technical documentation
A visualization can support a planning review or stakeholder discussion, but it should not replace the drawings used to verify boundaries, setbacks, dimensions or compliance.
Site plan rendering vs. master plan rendering
The terms overlap, but scale is usually the main difference.
A site plan may cover a single building, residential property, campus parcel or individual development site.
A masterplan often deals with a larger network of buildings, infrastructure, public space, zoning and landscape across a district or multi-phase development.
The visual principles are similar, but the larger the project becomes, the more important hierarchy is. At masterplan scale, the viewer needs to understand districts, movement networks and open-space systems before individual architectural details.
For large schemes, read Master Plan Rendering: Process, Tools & Examples.
Site plan vs. floor plan rendering
A site plan explains what happens around and between buildings. A floor plan explains what happens inside a building on a particular level.
If your goal is to make rooms, furniture and internal circulation easier to understand, use a 3D floor plan rendering workflow instead.
Frequently asked questions
How do architects render site plans?
Architects typically render site plans in 2D graphics software, from a 3D site model, with an AI rendering tool, or through a hybrid of these methods. The right option depends on whether the final output needs to stay top-down or show a new perspective.
Can I render an AutoCAD site plan without building a 3D model?
Yes. Export a clean PNG or JPG from AutoCAD and render the plan directly in 2D or use an AI tool to add materials, landscape and visual depth. You only need a 3D model if you want a new spatial camera view or geometry-dependent perspective.
Can AI turn a 2D site plan into a 3D render?
AI can make a flat site plan look more dimensional by adding materials, landscape, shadow and depth. It should not be treated as a substitute for a verified 3D model. If you need a new aerial perspective with controlled geometry, create that view in 3D software first.
Do I need Photoshop to render a site plan?
No. Photoshop is useful for manual control and post-production, but it is not the only workflow. Architects can also render from 3D software or use AI-assisted tools to develop a plan image more quickly.
What is the best software for site plan rendering?
It depends on the output. Photoshop or Illustrator work well for controlled 2D graphics; SketchUp, Revit, Rhino and similar tools are useful when a 3D model and new camera views are required; traditional rendering engines offer detailed control; and AI tools are useful for quickly developing visual variations from an exported plan or model view.
For a broader comparison, see our guide to the best architectural rendering software.
Can I use a rendered site plan for a planning submission?
A rendered site plan can support planning reviews, consultation and communication of design intent. It should not replace measured CAD or BIM drawings where exact dimensions, boundaries, setbacks or statutory information are required.
A practical way to think about the workflow
The source drawing should own the geometry and site organization. The rendering workflow should make that information easier to see.
That distinction keeps the process simple.
Use CAD or BIM for technical accuracy. Use a 3D model when the camera or geometry needs to change. Use rendering and AI for the presentation layer: materials, landscape, lighting, atmosphere and visual hierarchy.
If you already have a readable site plan or masterplan, you can try Vibe3D's site plan rendering tool to create and compare rendered directions from the same source image.