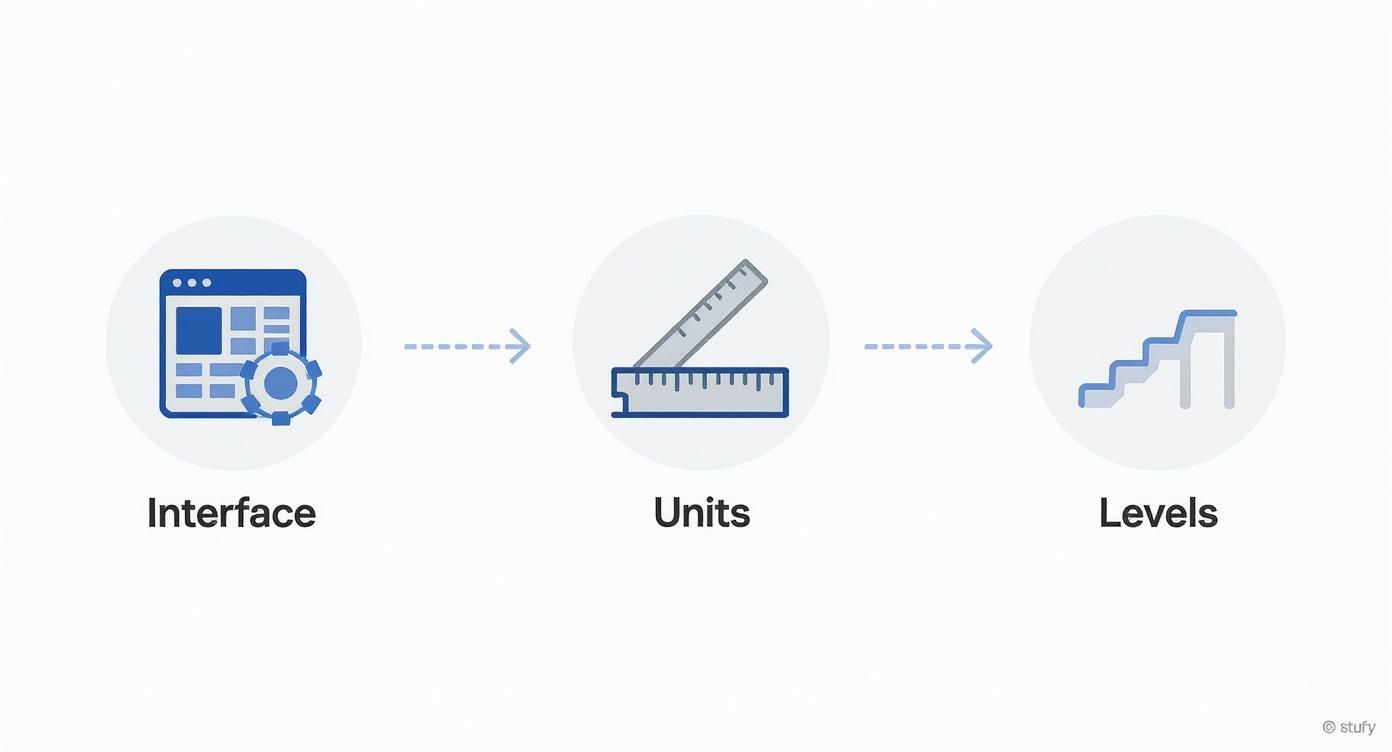
Diving headfirst into a Revit architecture tutorial can feel a bit overwhelming, I get it. But trust me, getting the hang of the basics is easier than it looks. This guide is all about getting you comfortable with Revit's interface and core functions without the fluff. We'll start with the essentials: finding your way around the screen, setting up your project units, and creating your initial building levels.
Finding Your Way Around Your First Revit Project
Opening Revit for the first time throws a lot at you, but don't let the busy interface intimidate you. You don't need to memorise every single button right now. Instead, just focus on the big three that will become your best friends: the Ribbon, the Properties Palette, and the Project Browser. Honestly, mastering how these three panels work together is the secret to a smooth workflow.
Think of the Ribbon stretched across the top of your screen as your main toolbox. It's neatly organised into tabs like 'Architecture', 'Structure', and 'Annotate', each one holding the specific tools you'll need for different jobs. Whenever you need to draw a wall or pop in a window, this is where you'll start.
Your Control Panels
Now, glance over to the left side of your screen. That panel is the Properties Palette, and it’s your command centre for anything you select. Click on a wall, and this palette instantly shows you its height, material, and structural details. Every single tweak and adjustment you make to an object happens right here. This is where a generic wall gets its personality and becomes a specific part of your building.
On the other side, you'll find the Project Browser. This is basically your project's table of contents. It keeps every single view—floor plans, 3D views, elevations, schedules, and sheets—organised in a neat, logical tree. Need to quickly jump from the ground floor plan to the north elevation? The Project Browser is how you do it. Keeping this organised from the start will save you massive headaches later on.
Here’s what that standard layout looks like in action.
You can see how the Ribbon, Properties Palette, and Project Browser frame your main drawing window, creating a really efficient space to work in.
To help you get comfortable, I've put together a quick reference table. Keep this handy as you start poking around the interface.
Your Revit Interface Cheat Sheet
| Component | What It Does For You | A Quick Tip to Get Started |
|---|---|---|
| Ribbon | This is your main toolbox, holding all the commands you need to create and modify your model. It’s organised by discipline (Architecture, Structure, etc.). | Hover over any tool to see a tooltip explaining what it does. Don’t be afraid to click through the different tabs to see what's available. |
| Properties Palette | It’s your control panel for every element. When you select an object, this is where you change its parameters, like size, material, or type. | Try drawing a simple wall. Select it, and watch how the Properties Palette changes. Play around with the 'Base Constraint' and 'Top Constraint' options. |
| Project Browser | This is the map of your entire project. It lists all your views (plans, elevations, 3D), schedules, sheets, and families in a tree structure. | Get into the habit of double-clicking on a view name in the Browser to open it. It's the fastest way to navigate your model. |
Learning to glance between these three areas will soon become second nature, I promise.
Setting Up Your Project For Success
Okay, before you draw a single line, there’s a crucial first step: setting your project units. Go to the 'Manage' tab and find 'Project Units' (or just use the keyboard shortcut 'UN'). For any projects based in India, you'll want to set the length to millimetres or metres, depending on how large your project is. Getting this right from the very beginning saves you from a world of pain with scaling issues down the road.
This isn't just a random tip; it aligns with local practices. In fact, Autodesk has seen huge adoption in India, partly because they've tailored versions for our standards. Back in 2022, they even released the ‘BIM Package for Viksit Bharat,’ which included toolsets that align with Indian regulations like the Delhi Schedule of Rates (DSR), making life much easier for local professionals.
Your 3D model is only as good as the data within it. By setting up levels and units correctly at the beginning, you ensure every element you add—from a foundation slab to the roof—is positioned accurately in 3D space.
Last but not least, you need to establish your building levels. In the Project Browser, open up an elevation view (the 'South' view is a good place to start). This is where you'll define critical heights like 'Ground Floor', 'First Floor', and 'Roof Level'. These levels are like the horizontal datums that all your walls, floors, and other components will attach to. For a deeper dive on how these fundamental decisions shape your design, check out this guide on architectural design concepts. It might seem like a small setup task, but it’s the absolute foundation for a well-structured and logical building model.
Bringing Your Model to Life: Core Architectural Elements
Alright, with the project set up and our levels in place, it's time to get to the good stuff—the part where your design actually starts looking like a building. We're moving from the abstract setup to the tangible building blocks you'll use every single day. Let's get our hands dirty with the absolute essentials: walls, doors, windows, floors, and roofs.
First things first, let's lay down the foundation of any structure.

Laying Down Your First Walls
In Revit, walls aren't just lines on a drawing. They're smart objects with real properties like height, thickness, and materials. To start, head over to the 'Architecture' tab on the Ribbon and click the 'Wall' tool.
Before you even think about clicking in your drawing area, glance over at the Properties Palette. This is your command centre. Pick a wall type—for now, something simple like a 'Generic - 200mm' is perfect.
Now for a crucial step. Look for the Constraints section in the Properties Palette. You want to set the 'Base Constraint' to your 'Ground Floor' level and the 'Top Constraint' to your 'First Floor' level. This little move is a game-changer; it means your wall is locked to the correct height and will automatically update if you ever change your floor-to-floor heights down the line. Now you're ready to click and drag to draw your building's perimeter.
Pro Tip: Don't stress about getting every dimension perfect right away. Revit is built for iteration. Just get your walls roughly in place. Once they're drawn, click on one, and you'll see temporary dimensions pop up. You can click right on those blue numbers and type in the exact length you need. It’s incredibly intuitive.
Building Up Wall Layers
A generic wall gets the massing right, but real-world walls are made of layers—brick, insulation, plasterboard, you name it. To build your own, select a wall, pop over to the Properties Palette, and hit 'Edit Type'.
Crucially, always hit 'Duplicate' first. Give your new wall a descriptive name, like 'Exterior Brick on Block - 270mm'. This is a non-negotiable habit to get into, as it stops you from accidentally messing up the default wall types for your whole project.
In the dialogue box, find the 'Structure' parameter and click 'Edit'. This opens up the Edit Assembly window, which is where the magic happens. Here you can define the real-world composition of your wall.
-
Function: Tell Revit what each layer does (e.g., Structure, Substrate, Finish).
-
Material: Assign a material to each layer, which affects everything from how it looks to its thermal properties.
-
Thickness: Set the thickness for each individual layer. Revit will automatically calculate the total for you.
This isn't just drawing; this is the "I" in BIM (Building Information Modelling). You're creating a digital twin of a real assembly.
Placing Doors and Windows
Doors and windows are what we call 'hosted' components, which is just a fancy way of saying they need a wall to live in. Grab the 'Door' or 'Window' tool from the Architecture tab. As you move your mouse over a wall, you'll see a preview of the component appear. A simple click is all it takes to place it.
But what if the default options are a bit... boring? Revit ships with a starter library, but there's a world of other options. With the Door or Window tool active, look for the 'Load Family' button on the Ribbon. This opens up Revit’s default library, where you can browse through tons of different styles.
Once you load a family, it becomes available in your Type Selector to use throughout the project. The web is full of components, and if you're ever curious about what other tools offer, you can always explore some of the best free 3D modeling software to broaden your horizons.
Adding Floors, Ceilings, and Roofs
With your walls up, dropping in a floor is a piece of cake. Select the 'Floor' tool, and Revit will switch into 'Sketch Mode'—you'll know because the Ribbon turns green. Your only job is to draw the boundary of the floor.
The 'Pick Walls' tool is your best friend here. It’s incredibly fast; just click on your exterior walls, and Revit automatically creates the boundary sketch by tracing their inside faces. Hit the green tick, and you're done.
Roofs work in a similar way, but they've got a few more tricks up their sleeve. The 'Roof by Footprint' method is the go-to for most common shapes.
-
Pick a Level: First, Revit will ask which level the roof should be built on (you'll probably choose your 'Roof Level').
-
Sketch the Outline: Just like with floors, you'll use tools like 'Pick Walls' to draw the roof's footprint.
-
Define the Slope: This is the key part. Each line in your sketch has a 'Defines Slope' checkbox. For a standard hip roof, you'd leave this checked on all sides. For a simple gable roof, you'd uncheck it on two opposite sides.
The best way to get a feel for this is to just play around. See what happens when you change which lines have a slope. This hands-on tinkering is what really solidifies the concepts and turns you from a beginner into someone who truly understands how the tool thinks.
Working with Smart Components and Families
If you've followed along and built your basic walls and floors, you've already been dipping your toes into Revit Families, maybe without even realising it. Now, let’s properly pull back the curtain on what they are. Honestly, getting your head around Families is the secret to unlocking what Revit can really do.
They're the intelligent, parametric bits and pieces that make a Revit model so much more than a dumb collection of 3D shapes.
System Families vs Component Families
First things first, you need to get the two main types straight in your mind. It’s pretty simple when you think about it this way:
-
System Families: These are the big, fundamental elements that can only be built inside your project file. You can't just save a wall or a floor to your desktop. We’re talking about walls, floors, roofs, and ceilings. You can duplicate them and tweak their properties, but you always create them from scratch within your model.
-
Component Families: These are the individual, loadable files (you'll recognise them by the
.rfaextension) that you can save, share, and load into any project you're working on. This covers almost everything else: doors, windows, furniture, light fittings—you name it.
This distinction really matters because it dictates how you customise things. You’ll tweak a system family in place, but for everything else, you’ll be finding and loading component families from your libraries.
Finding and Loading the Right Families
When you first install Revit, it comes with a decent library of component families to get you started. To get to it, just head over to the 'Insert' tab on the Ribbon and click 'Load Family'. A browser window will pop up, letting you dig through folders of pre-made components.
Let's imagine you're laying out an office and need a specific desk. Here’s what you’d do:
-
Navigate to the 'Furniture' folder.
-
Find the 'Tables' or 'Desks' subfolder.
-
Pick a desk family file that looks right and click 'Open'.
-
That family is now loaded into your project. You can start placing it right away using the 'Component' tool under the 'Architecture' tab.
The power of families is a massive reason why Revit is catching on so fast in India's AEC industry. Around 250 companies in India now use Autodesk Revit for its powerful design capabilities. While AutoCAD is still the 2D workhorse for over 7,000 companies, Revit's parametric modelling is becoming non-negotiable for modern BIM workflows. That said, challenges like a shortage of skilled professionals mean about 60% of construction projects still hit delays. You can find more on BIM software trends in India here.
Pro Tip: A well-organised family library will save you an incredible amount of time. I always recommend creating a custom folder on your computer or a shared network drive for your favourite or most-used families, all neatly organised by category. It stops you from having to hunt for the same window or chair on every single project.
Making Simple Tweaks in the Family Editor
So, what happens when a pre-made family is almost perfect, but not quite? This is where you can start making your own edits. Let’s say you’ve loaded a window, but you want to change its default frame material from wood to aluminium.
It's easier than you think. Just right-click on the window in your project and select 'Edit Family'. This opens the component in its own special workspace, the Family Editor, which is built specifically for creating and modifying these components.
Inside the editor, you can select parts of the window's geometry and look over at the Properties Palette. Find the 'Material' parameter for the frame and simply assign a different material from your project's library. When you're happy with the change, click 'Load into Project and Close'. Revit will then ask if you want to overwrite the existing version. Say yes, and just like that, every single instance of that window in your project updates to the new material.
This is a really simple example, but it shows how you can adapt existing content to fit your exact design needs without having to start from zero. For more complex interior elements, you might even find yourself modelling them in other software first. If that sounds interesting, you can check out our guide on creating detailed objects for interior design using 3ds Max.
Getting comfortable with families is what transforms Revit from a simple modelling tool into a truly powerful design system.
Creating Schedules and Construction Documents
A stunning 3D model is great for getting everyone excited about a project, but it's the construction documents that actually get the thing built. This is where you'll really see the magic of Building Information Modelling (BIM) come to life. All that data you’ve so carefully packed into your walls, doors, and windows is about to become your biggest time-saver.
We’re shifting gears now, moving beyond just pure modelling and into information management. This is the bit where your digital creation gets turned into practical, buildable instructions for the team on site. Honestly, it’s one of the most crucial steps in any professional project.
Generating Smart Schedules from Your Model
Can you imagine having to manually count every single door in a multi-storey building? Noting its size, type, and hardware, then typing it all into a spreadsheet? Now, picture doing it all over again because the client decided to swap out a few door styles at the last minute. It’s a nightmare. With Revit, that whole headache just disappears.
Schedules are basically live reports pulled directly from your model's components. To make one, just head over to the View tab, hit Schedules, and then select Schedule/Quantities.
A pop-up will appear, asking you what category you want to schedule—let's say, Doors. Revit will then ask you what bits of information (or 'fields') you want to see in your report.
You'll probably want to grab fields like:
-
Family and Type: This tells you the specific door style.
-
Width: For the actual door opening size.
-
Height: Obvious enough, right?
-
Level: This shows which floor the door is on, which is incredibly useful.
Once you click OK, that’s it. Revit instantly generates a perfect, accurate table of every single door in your project. But here's the best part: if you delete a door from a floor plan or change its size, the schedule updates itself in real-time. This live link between the model and the documentation is precisely what makes Revit so powerful.
Assembling Your Construction Sheets
With your floor plans looking good and your schedules ready to go, the next logical step is to pull them all together onto professional document sheets. This is how you create the final drawing set that goes out to the contractor.
To get started, go back to the View tab and select Sheet. Revit will ask you to choose a title block. Think of a title block as a special family that holds all your project info—like the project name, address, drawing number, and your company logo.
After you create a new sheet, you'll see it pop up in your Project Browser under the ‘Sheets’ category. Now for the easy part: you just drag and drop your views onto it.
Find the floor plan, elevation, or schedule you want in the Project Browser, then simply click and drag it right onto your open sheet. Revit will place it with a viewport title, which you can move around or customise as you see fit.
This whole process really shows how efficient a good digital workflow can be. Top firms lean on this connectivity hard. For instance, India’s largest EPC firm, Larsen & Toubro (L&T), used Revit’s data-rich models on a massive $420 million airport project to create 5D BIM dashboards. This integrated approach synced up their workflows and documents, slashing manual errors and seriously improving project management. You can learn more about how L&T is revolutionising project management with BIM.
Tips for Clean and Organised Documents
Putting together professional-looking sheets is a bit of an art form. A messy, disorganised set of drawings doesn't just look bad; it can cause real confusion and costly mistakes on site.
Here are a few quick tips I've picked up over the years to keep your documents looking sharp:
-
Consistent Alignment: Revit has handy alignment guides that appear when you drag viewports. Use them to line things up across different sheets. Having your ground floor plan in the exact same spot on Sheet A-101 as your first floor plan is on Sheet A-102 makes the whole set a hundred times easier to flip through and understand.
-
Manage Viewport Titles: That little title with a line under your view? You can click on the viewport to activate it, then grab the blue dot to shorten or lengthen the title line. This keeps your titles tidy and stops them from crashing into other drawing info.
-
Customise Your Schedules: Don't just dump the raw schedule onto a sheet and call it a day. Jump into the schedule view and use the formatting options to tweak fonts, column widths, and even add a bit of shading. Making it readable and consistent with your firm’s graphic standards makes a huge difference.
Getting good at schedules and sheets is what really separates a casual modeller from a pro. You're taking all the smarts you’ve built into your model and presenting it in a clear, concise, and buildable format. At the end of the day, this is the real output of a successful project.
Visualizing Your Design with Renders
You’ve put in the hours modelling your building, but let's be honest, a stack of floor plans doesn't always get a client's heart racing. This is where the magic happens. We’re going to turn that technical model into a stunning, photorealistic image that sells your vision and helps everyone see what's in your head.
It all starts with framing the perfect shot.
Setting Up Your Camera Views
Before you can render a single pixel, you need to decide what you’re looking at. In Revit, this means placing a camera inside your model.
Jump into a floor plan view, pop over to the View tab, click the 3D View dropdown, and choose Camera.
Your cursor will magically transform into a little camera icon. The first click plants the camera's position, and the second click sets its target—what it’s looking at. The moment you place it, Revit whisks you away to a brand new 3D perspective, showing you exactly what that camera sees.
Now for the fun part. Notice that blue frame around the view? You can grab the little blue dots and drag them to adjust your crop, essentially changing your field of vision. This is how you compose your shot. You can get right up close to a key detail or pull way back to capture the grandeur of the entire facade.
Applying Realistic Materials and Textures
A render is only as believable as its materials. A plain grey wall just looks flat and boring. But add a subtle plaster texture or a realistic brick pattern? The whole scene just comes alive. You’ve already assigned basic materials to your walls, but now we need to focus on how they look for the render.
Head over to the Manage tab and open up the Materials browser. This is your library for every single material in the project.
Go ahead and pick a material, like 'Brick, Common', and then find the Appearance tab. Think of this as your control centre for all things visual. Here, you can tweak settings like:
-
Colour: The basic tint of the material.
-
Image: This is the important one. You can apply a texture map—basically a JPG or PNG of a real material—to give it that realistic surface.
-
Reflectivity: Controls how shiny the surface is. Is it matte, or does it have a glossy sheen?
-
Bump: This is a neat trick that adds a fake sense of depth and texture, making surfaces like rough-sawn timber or cast concrete feel much more tactile and real.
My Two Cents: Go easy on the bump maps. A little bit goes a long, long way. The goal is subtle realism, not some over-the-top, cartoonish effect. I always start with a really low value and nudge it up slowly until it just feels right.
The Rendering Process Inside Revit
Okay, your camera is perfectly placed and your materials are looking sharp. It's time to create the final image.
From your 3D camera view, go back to the View tab and hit the Render button (it's the one that looks like a little teapot). This opens the main Rendering dialogue box, where all the pre-flight checks happen.
Before you get click-happy on the big 'Render' button, you’ll want to dial in a few key settings.
Choosing Your Revit Rendering Method
Deciding how to render depends entirely on what you need the image for. Are you just testing an idea, or is this the final shot for the client? Here's a quick rundown of your options inside Revit to help you choose the right tool for the job.
| Rendering Option | Best Used For | Typical Speed | Visual Quality |
|---|---|---|---|
| On Computer (Draft) | Quick checks and lighting tests to see if your setup is working. | Very Fast (Seconds to Minutes) | Low |
| On Computer (Medium/High) | Decent quality images for internal reviews or when you're on a tight deadline. | Slow (Minutes to Hours) | Medium-High |
| Cloud Rendering | Final, high-quality client presentations that need the best look possible. | Fast (Depends on queue) | High to Best |
Ultimately, Cloud Rendering is fantastic for freeing up your computer for those big, final images, but for everyday work and quick tests, rendering locally is perfectly fine.
For your first few attempts, I'd stick with a Draft or Medium quality setting. This gives you a quick preview without having to wait around for ages. You’ll also need to set up your lighting. You can choose from options like 'Sun only' for crisp exterior daylight shots or 'Interior: Sun and Artificial' to flip on the lights you’ve placed inside.
Once the render is finished, you can use the Adjust Exposure button to make little post-production tweaks to brightness, contrast, and colour saturation without ever leaving Revit. If you're curious about different rendering engines and workflows, our guide to the best architectural rendering software has some great insights.
It's also worth looking at how professional architectural photography captures completed buildings. It's a great way to train your eye for composition and lighting from a real-world perspective.
Creating a Simple Walkthrough
Static images are great, but sometimes you need to give people a real tour of the space. Revit lets you create simple walkthrough animations that do just that.
Back on the View tab, select Walkthrough from the 3D View dropdown. In a plan view, you’ll click to place keyframes along the path you want your 'camera' to follow. Once the path is set, Revit generates the walkthrough. You can then open it up and edit the camera at each keyframe, tweaking its direction and what it's looking at. It takes a bit of practice to get smooth, but it’s a seriously powerful tool for communicating the flow and feel of a design.
Got Questions About Learning Revit?
As you start diving into any Revit tutorial, you're bound to have some questions. It's totally normal. I've pulled together some of the most common ones I hear to help you get unstuck and feel more confident as you learn.
What’s the Real Difference Between Revit and AutoCAD?
This is a classic. Think of AutoCAD as a sophisticated digital drawing board where you’re essentially creating lines that represent objects. It's fantastic for 2D drafting.
Revit, however, is a full-on Building Information Modelling (BIM) tool. You’re not just drawing lines; you’re building a 3D model with smart, data-rich components like walls, doors, and windows.
Change a window in your 3D Revit model, and it automatically updates everywhere—floor plans, elevations, schedules, the works. AutoCAD just can't do that. That live connection makes Revit a powerhouse for keeping your entire project coordinated. Of course, different tools have different strengths; our /blog/tutorial-on-sketchup highlights how SketchUp fits into the mix, too.
Is Revit Any Good for Interior Design?
Absolutely! Revit is a fantastic tool for interior designers. You can model everything from interior partitions and custom casework to placing furniture and testing out different materials and finishes.
The real magic is in its rendering capabilities. You can create photorealistic images of your designs to show clients exactly what they're getting. It’s an end-to-end solution, taking you from initial space planning all the way to a stunning final presentation.
You're not just drawing a floor plan; you're building a virtual prototype of the interior. This lets you accurately test finishes, furniture layouts, and even lighting schemes before a single thing is built.
How Long Until I’m Actually Good at Revit?
The honest answer? It depends. With consistent practice, you can get a handle on the basics and put together a simple project in a few weeks.
But to become truly proficient—we're talking managing complex projects and confidently building your own custom families from scratch—you're probably looking at several months to a year of regular, hands-on use.
The best way to speed things up is to use it on real projects. Nothing beats practical application. And hey, once you get the hang of it, you might even want to share what you've learned. There are some great guides on how to make engaging tutorial videos that can help you teach others.
Ready to turn your Revit models into incredible, client-ready visuals without the endless waiting? Vibe3D uses AI to generate photorealistic renders in seconds, keeping all your materials and textures intact. Try Vibe3D today and reclaim hours from your rendering workflow.