For years, any of us who've worked in architectural visualisation know the drill: getting a photorealistic render out of 3ds Max was a waiting game. It meant tying up your best machine, wrestling with the intricate settings in V-Ray or Corona, and hoping for the best. This old-school workflow, while capable of amazing results, often killed creative flow. Hours, sometimes even days, would evaporate just to produce one set of images.
Moving Beyond Traditional 3ds Max Rendering
The classic approach is something every seasoned 3D artist has burned into their memory. You'd spend ages meticulously setting up materials, tweaking lighting rigs down to the last bounce, and navigating a labyrinth of render settings. It’s a process that absolutely hammers your hardware, leaving your main workstation out of action and making quick changes a nightmare.
Let's be honest, the frustrations are universal:
-
The Render Time Black Hole: A single high-resolution still could easily take hours. An animation? Forget about using that computer for the rest of the week.
-
The Complexity Barrier: Getting true realism demanded a deep, almost academic understanding of your render engine, from global illumination quirks to the nuances of material shaders.
-
The Agony of Iteration: Nothing was more painful than a client asking for a simple colour change, knowing it meant starting the whole render process over again. It was a massive bottleneck.
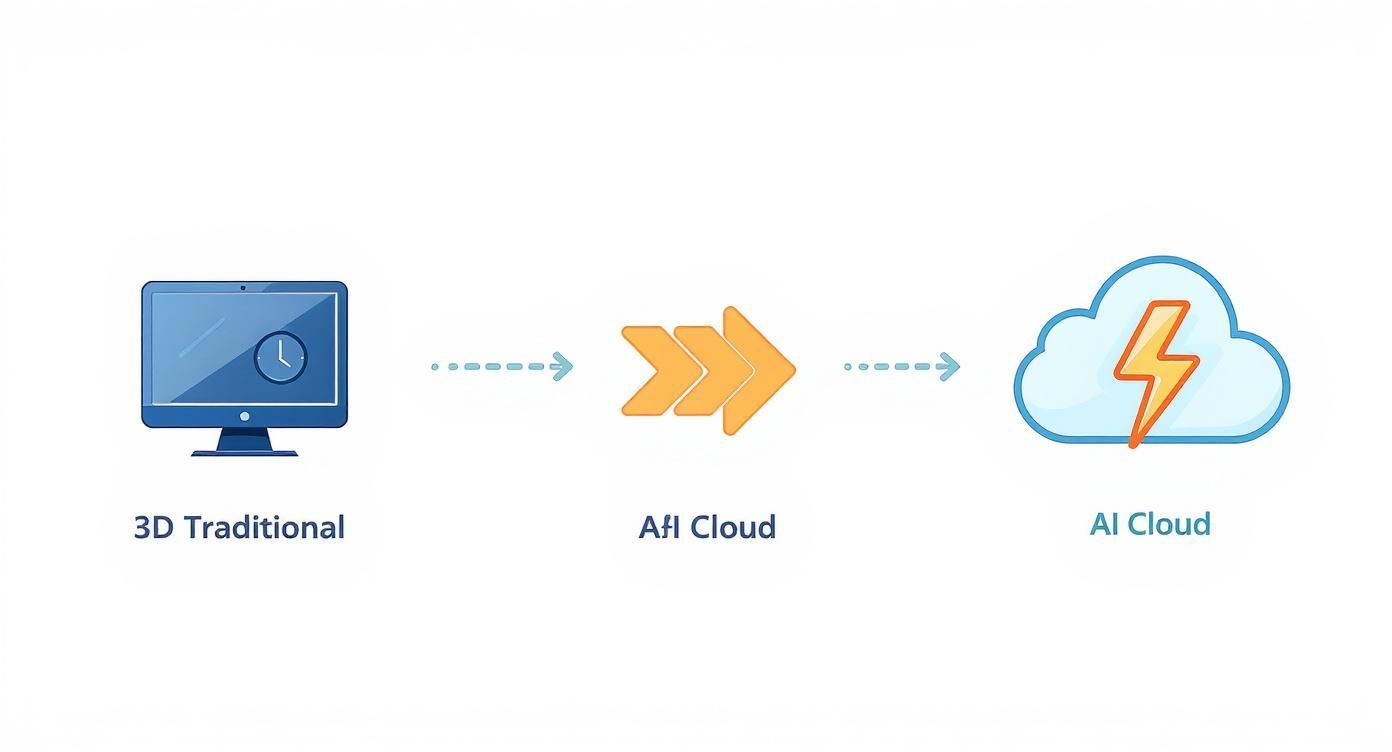
But that whole paradigm is finally starting to crack. Cloud-based platforms are completely rewriting the rules of the game by taking all that heavy lifting off your local machine.
The New AI-Powered Workflow
Instead of being chained to your desk, modern solutions like Vibe3D offer a much faster, more fluid way of working. This is a real game-changer, letting architects and designers get back to what they do best: designing. You can produce incredible visuals in a tiny fraction of the time, shifting the focus from technical problem-solving to actual creative exploration.
Here’s a quick look at how the Vibe3D interface makes this possible.
What you see is a straightforward project dashboard where you can upload your scenes and manage different render versions without the clutter. It's a world away from the dense, intimidating menus we’re all used to. To get a better handle on the technologies behind this shift, it's worth understanding how AI interior design software is changing the industry.
To put it into perspective, here’s a quick comparison of the two workflows.
Traditional Rendering vs AI Cloud Rendering: A Quick Comparison
This table breaks down the core differences between the old-school approach in 3ds Max and the more efficient workflow offered by platforms like Vibe3D.
| Aspect | Traditional 3ds Max Rendering | Vibe3D AI Cloud Rendering |
|---|---|---|
| Render Time | Hours or days per image/animation | Minutes per iteration |
| Hardware Needs | Requires high-end, expensive workstations | Works on any standard computer with internet |
| Iteration Speed | Slow; minor changes require a full re-render | Extremely fast; test dozens of variations quickly |
| Workflow Focus | Technical settings, optimisation, and troubleshooting | Creative exploration and design refinement |
| Ease of Use | Steep learning curve, requires expert knowledge | Intuitive, user-friendly interface |
The table really highlights how the focus has shifted from managing technical constraints to unleashing creative potential.
This isn't just about getting things done faster—it's about becoming more agile. Imagine being able to generate multiple design options on the fly: different times of day, various material palettes, or several lighting schemes, almost instantly. This empowers you to communicate your vision far more effectively and helps clients make decisions without the usual delays.
The industry's appetite for these efficient tools is massive and growing. Just look at the 3D rendering market in India, which brought in USD 171.1 million in 2024, with 3ds Max playing a huge part. That market is expected to grow dramatically, which tells you everything you need to know about the industry-wide demand for better, faster visualisation.
This whole movement is fundamentally changing 3ds Max rendering from a purely technical chore into a dynamic, creative, and much more enjoyable process. If you're looking to explore different tools, you can learn more in our guide to the best architectural rendering software.
Getting Your 3ds Max Scenes Ready for Vibe3D AI
The path from a complex 3ds Max model to a breathtaking, photorealistic render always starts with one crucial step: preparation. While an AI platform like Vibe3D AI does the heavy lifting for the final 3ds max rendering, the quality of what you feed it directly dictates the result. A well-prepared scene makes for a smooth, glitch-free jump to the cloud, giving the AI a perfect canvas to work its magic.
Think of it like prepping a kitchen before a master chef arrives. It’s not just about finalising your model; it's about optimising it specifically for an AI rendering workflow. This means cleaning up your geometry, double-checking your materials are all properly assigned, and setting up your camera views to tell the full story of your design.
This diagram perfectly illustrates the shift from the old, slow, hardware-dependent process to the fast, flexible workflow of a cloud-based AI solution.
The real takeaway here is the massive reduction in time and complexity. You’re no longer held hostage by technical bottlenecks, freeing you up to focus purely on the creative side of things.
Optimising Your Model for Export
Before you even touch that export button, a bit of housekeeping inside 3ds Max will pay dividends. The aim is simple: send a clean, efficient file over to Vibe3D. This helps the AI interpret your design intent without any confusion.
Start with your model's geometry. It’s incredibly common for archviz projects to accumulate hidden or overly complex objects that just add dead weight to the file.
-
Ditch the Unseen: Go through your scene and delete any furniture, accessories, or structural bits that won’t even be visible from your final camera angles.
-
Simplify the Background: For elements way off in the distance, you don't need that 100k poly tree model. Swap out high-poly models for simpler, low-poly versions. It’ll slash your file size without anyone noticing a difference in the final render.
-
Run a Material Check: Make sure every single object has a material applied. Missing materials are a classic source of errors and can lead to some very strange results during rendering.
This clean-up isn't just a suggestion; it's essential. A model with messy geometry or sloppy material assignments can bog down the AI process, much like it would in a traditional engine like V-Ray. The big difference? With Vibe3D, a few minutes of prep can save you the headache of re-uploading and starting over.
A classic rookie mistake is exporting a scene with default "Standard" materials still lurking on small objects. Take a moment to apply proper, even if basic, materials to everything. This ensures the AI has the right information to work with, which leads to far more realistic and cohesive renders.
Setting Up Your Camera Scenes Strategically
One of the best things about Vibe3D is how quickly you can generate tons of design variations. To really harness this power, you need to export several distinct scenes from your single 3ds Max file. Don't just settle for one wide shot. Create a complete set of views that truly showcases the space.
You need to think like a photographer building a portfolio for the project. For a typical interior scene, I’d set up:
-
An establishing wide shot: This is your hero image that captures the overall feel and layout of the room.
-
A medium shot on a key area: Maybe you want to focus on the kitchen island or the main seating arrangement in the living room.
-
A detail or vignette shot: This is where you highlight specific materials, textures, or design features. It adds a layer of richness and sophistication to your presentation.
Each of these camera angles should be exported as a separate scene. When you bring these into Vibe3D, you’re not just rendering one angle; you’re creating an entire visual package. This approach lets you apply different styles, lighting, and materials to each camera view, giving you a full suite of polished images to present to your client.
For a deeper dive into composing compelling interior shots, our guide on 3ds max interior design offers some great tips. This strategic camera work ensures every part of your design is seen in its best light.
Generating Your First AI Renders in Vibe3D
Alright, so you’ve put in the hard work preparing your scenes in 3ds Max. Now for the fun part: bringing that vision to life. The process is simple: export all the scenes you want to render, then use Vibe3D AI to generate and refine them into photorealistic visuals.
The first step is a breeze. Just log into Vibe3D and create a new project. This will be your digital studio space for this particular design, a dedicated container to keep all your scenes and variations neat and tidy.
With your project set up, go ahead and upload all the scenes you exported from 3ds Max. This is exactly why setting up multiple camera angles beforehand is such a game-changer. You can upload your wide shot, medium shot, and a close-up detail shot all at once, ready to build out a complete presentation set.
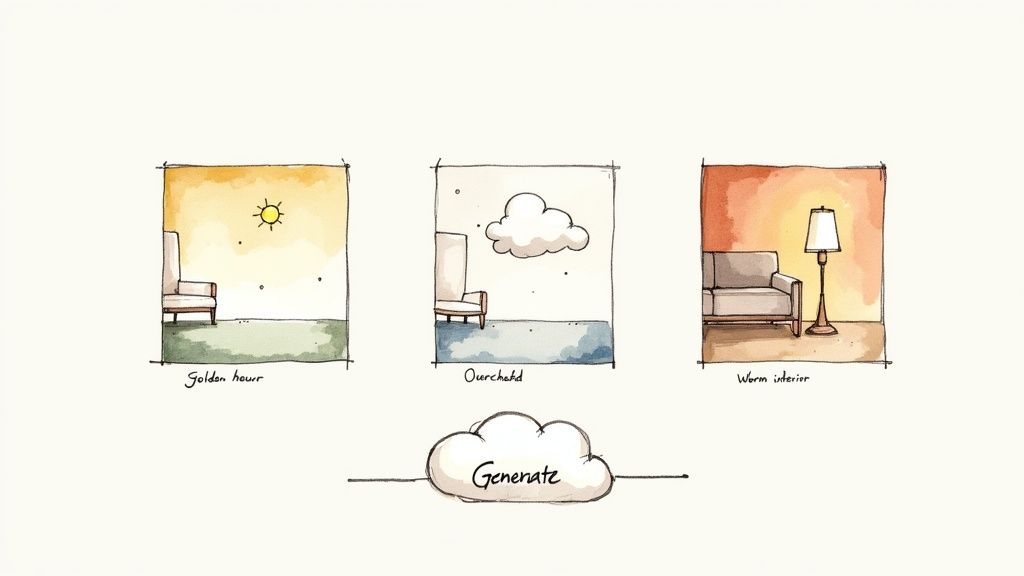
Exploring Creative Variations with Ease
Here’s where the Vibe3D workflow really breaks from the traditional 3ds Max rendering grind. Instead of wrestling with dozens of numerical parameters for lighting and global illumination, you’re playing with descriptive, intuitive prompts. For every scene you’ve uploaded, you can generate a whole range of aesthetic options with just a few clicks.
Let's say you've uploaded a living room scene. Now you can apply different moods to it almost instantly.
-
Time of Day: Want to see how the space feels in the crisp light of ‘Midday,’ the warm glow of ‘Golden Hour,’ or the cool tones of ‘Dusk’? One click.
-
Lighting Schemes: You can test out a ‘Warm Interior’ scheme for that cosy, inviting feel or switch to ‘Bright & Airy’ for a clean, modern vibe.
-
Material Swaps: Curious about the difference between oak and walnut flooring? No need to go back into 3ds Max. You can select different flooring options right inside Vibe3D.
This approach turns iteration from a time-consuming chore into a genuine creative exploration. In the time it would normally take to set up and kick off a single test render in V-Ray or Corona, you can generate a dozen high-quality variations, each with its own distinct character.
From a Single Scene to a Full Suite of Renders
The real power here is how quickly you can build a comprehensive set of visuals. For each of your uploaded scenes—the establishing shot, the detail shot, all of them—you can generate a whole palette of options. In a single session, you can put together a complete gallery that tells the full story of your design under all sorts of different conditions.
This completely changes the conversation you have with clients. Instead of showing them a single, precious render that took hours to create and then asking for notes, you can present a curated selection of beautiful options. It's a proactive approach that helps clients see possibilities they might not have even considered, leading to much faster decisions and happier outcomes.
The platform crunches all the complex numbers in the cloud, leaving you free to focus on the design narrative. A job that would have taken days of manual tweaks and render queuing on a local workstation can now be knocked out during your lunch break.
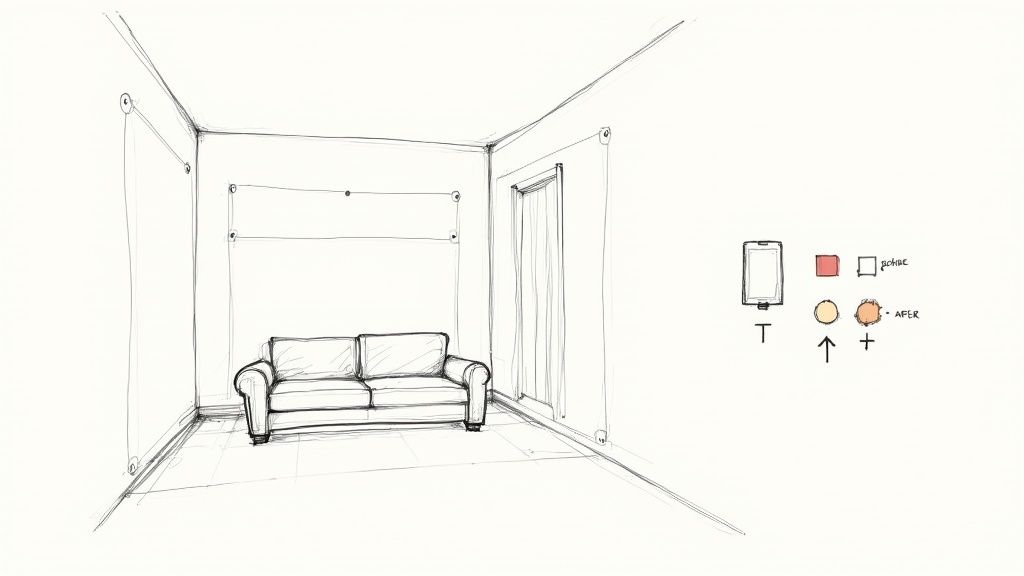
Fine-Tuning with the Edit Render Functionality
Once you’ve generated an initial batch of renders, the refinement begins. This is where Vibe3D's ‘Edit Render’ feature becomes your best friend. Maybe you've got a render where the lighting is absolutely perfect, but the wall colour is just a little off, or the client wants to see the sofa in a different fabric.
Instead of starting from scratch, you just select the render you want to tweak and use the editing tools. This lets you make targeted changes to colours and materials on an image that’s already been generated. For example, you can select the kitchen worktops and instantly switch the material from marble to granite, or change that accent chair from fabric to leather.
This ability to edit iteratively is a huge time-saver, especially when you’re dealing with specific client feedback. It closes the loop between the initial concept and the final polished image without ever making you reopen your 3ds Max file. After exploring variations and making edits, you can compare everything side-by-side to pick and download the best versions of each scene in ultra-realistic quality. This whole process ensures your 3ds Max rendering efforts lead to a stunning and complete visual package.
Refining Renders with Iterative AI Editing
Your first render is rarely your last. We've all been there—you create what you think is the perfect image, only for the feedback loop to begin. Traditionally, this meant heading straight back into your 3ds Max rendering file to tweak materials, adjust lights, and kick off another long render.
But what if that first render wasn't the end, but a high-quality starting point for creative exploration? This is where a modern AI workflow completely changes the game.
With a tool like Vibe3D's 'Edit Render' feature, you can make rapid, iterative changes directly on the image itself. There's no need to go back to the original 3ds Max file for every little adjustment.
This is a massive advantage when you're dealing with client feedback, which is almost always specific and visual. The ability to make changes on the spot can turn a passive client presentation into a truly interactive design workshop.
Making Instant Material and Colour Changes
Let's walk through a classic scenario. You’re presenting a gorgeous living room render, but the client isn't quite sold on the neutral beige feature wall. In the old days, you’d nod, take a note, and know you had hours of work ahead of you: update the material in 3ds Max, re-render, and send a new version.
With the 'Edit Render' function, it's a completely different story. You can simply select the wall in the image and tell the AI to change its colour to, say, a specific shade of blue. Seconds later, Vibe3D gives you a new version with the updated wall colour, all while keeping the original lighting, shadows, and reflections perfectly intact.
And this isn't just for simple paint colours. The same idea applies to much more complex materials.
-
Furniture Upholstery: The client loves the sofa but wants to see what it looks like in leather. No problem. Select the sofa, tell the AI to change the material to 'brown leather', and you'll have a photorealistic alternative in a flash.
-
Kitchen Surfaces: Not sure about that countertop? You can switch from 'white marble' to 'black granite' or even a 'butcher block' finish to see what works best with the cabinetry.
-
Flooring Options: Want to see how the mood changes? Instantly swap out light oak flooring for dark walnut or polished concrete.
Being able to iterate on materials like this isn't just about saving time—it’s about making better design decisions, faster.
This iterative process collapses the decision-making cycle. A feedback process that used to stretch over days or weeks of emails and re-renders can now happen in a single client meeting, where you can explore dozens of options together.
Experimenting with Design Styles and Objects
You can go well beyond simple material swaps. The 'Edit Render' function is also fantastic for more significant design exploration. This comes in handy when a client loves the layout but wants to explore a different stylistic direction. The flexibility that AI for interior design brings to the table allows for a much more fluid and creative way to finalise a space.
For example, maybe you've rendered a bedroom with a sleek, modern bed frame. The client, however, is now curious about a more traditional, rustic vibe. Instead of remodelling the bed in 3ds Max, you can use the AI editor to riff on the existing furniture.
Just select the bed and give it a simple prompt like "change to a rustic wooden bed frame." The AI will generate a new image that captures this style shift. This lets you test out major design ideas without sinking hours into modelling, giving you a quick and effective way to see if a client's vision will work.
Finalising and Downloading the Perfect Scene
After exploring a bunch of variations for each of your camera angles, the last step is to pick the winners. Vibe3D lets you see all your generated and edited renders side-by-side, which makes comparing the different options a breeze.
For each scene you exported from 3ds Max—your wide shot, your medium shot, and your detail shot—you’ll now have a whole collection of refined versions. You can pick the strongest composition for each one. Maybe you'll go with the 'Golden Hour' render for the main shot but a 'Bright & Airy' version for a close-up of the kitchen.
Once you and your client have signed off on the final selections, you can download them in ultra-realistic, high-resolution quality. These images are polished, professional, and ready for your portfolio or final presentation. They represent the best of your design intent, without all the traditional bottlenecks of 3ds max rendering. It’s a workflow that ensures your creativity, not technical hurdles, is what drives the final result.
Bringing It All Home: Finalising and Downloading Your Renders
After all the creative back-and-forth and exploring different design directions with Vibe3D's AI tools, it’s time for the final, satisfying step: choosing your hero shots. This is where you transform all those quick variations into a polished, professional package ready for your client or portfolio. All the speed gains from the AI-assisted 3ds Max rendering workflow come together right here, delivering impactful, high-quality visuals.
The first job is to curate your work. Vibe3D’s side-by-side comparison view is a lifesaver for this. Instead of digging through a folder of files named Final_v3_Final_Final.jpg, you can visually compare every version you've generated for a scene and see what works best.
Picking Your Winning Shots
When you’re deciding on the final images, you have to look deeper than the obvious changes. Think about the subtleties that make a scene feel real. Does that 'Golden Hour' lighting really bring out the grain in the wood flooring, or does it wash it out? Does the 'Overcast' setting create that soft, sophisticated mood the client was after?
I find it helps to judge each render against a few key points:
-
Light and Atmosphere: Which one nails the mood you're trying to create? The right light can make a room feel cosy and warm or sharp and modern.
-
Material Realism: Take a close look at how the AI handled the materials. Are the reflections believable? Do the fabrics have texture? This is what adds depth and realism.
-
Compositional Punch: For every camera angle—your wide, medium, and detail shots—pick the version that tells the strongest story.
This isn’t just about picking a pretty picture; it’s about choosing an image that sells your design. If you want to dive deeper into the different tools that can help get you here, our guide on the best architectural visualization software is a great resource.
Downloading in High Resolution
Once you've made your picks, getting them out of the platform is simple. Vibe3D lets you export your chosen renders in ultra-realistic, high-resolution quality. These aren't just web previews; they're full-fat, production-ready files you can confidently use for large prints, client presentations, or your website. The platform makes sure every little detail and texture is preserved.
The real game-changer here is the confidence it gives you. You've seen dozens of possibilities without the soul-crushing time sink of re-rendering everything from scratch. That means you know, without a doubt, that the version you download is the absolute best one for the job.
Keeping Your Final Files Organised
A pro workflow doesn't stop once the render is done. It’s always a good idea to have a solid system for managing your final files. I always create a dedicated project folder and stick to a consistent naming convention, like ProjectName_LivingRoom_Wide_GoldenHour.jpg. It's a simple habit, but it saves so much time when you need to find a specific image weeks later.
This last part really ties the whole process together. You start with your solid 3ds Max model, jump into a playground of creative AI options, tweak the details, and finish by curating a set of brilliant, professional visuals. The result is a final product that not only looks stunning but also makes your clients incredibly happy.
Answering Your Questions About 3ds Max and Vibe3D AI
Jumping into a new tool, especially one that changes up your trusted 3ds Max rendering pipeline, naturally brings up a few questions. I've seen a lot of designers and architects make the switch, and they often ask the same things. Let's clear up some of the most common queries so you can get started with Vibe3D AI and feel confident right out of the gate.
Will My 3ds Max Models and Materials Work?
This is probably the number one question I hear: "How well do my 3ds Max models actually transfer over to Vibe3D?" The short answer is, they translate incredibly well. The platform was built with standard architectural models in mind.
Vibe3D does a fantastic job of keeping your model's geometry, scale, and basic material assignments intact. It recognises standard materials and textures from 3ds Max, which gives the AI a solid starting point. It understands that a surface is meant to be wood, glass, or concrete, and from there, it applies its own advanced, photorealistic shaders and lighting.
The real secret is proper prep work on your end. If you follow the standard best practices—cleaning up your model and making sure every single object has a material applied—the process is surprisingly smooth. The platform is designed to complement a professional workflow, not fight it.
What about those really complex, custom-built procedural materials from V-Ray or Corona? The best approach here is to bake them into texture maps before you export. This little extra step ensures every tiny detail you worked so hard on makes it over perfectly.
How Do I Get the Most Out of the AI Editing Tools?
The 'Edit Render' feature is another hot topic. People are curious about how to steer the AI effectively when tweaking colours or materials in an image that’s already been generated. The trick is to be as clear and specific as you can with your instructions.
For example, just telling it to "change the sofa" is a bit vague. A much better prompt is "change the sofa material to dark blue velvet." The more context you feed the AI, the closer it's going to get to what you have in your head.
Here are a few practical tips I've picked up for mastering the editing tools:
-
Be precise with your selections. Use the selection tool to carefully outline the exact area you want to change. A clean selection is key to stopping the AI from accidentally bleeding changes onto nearby surfaces.
-
Use descriptive words. "Light oak wood flooring" will give you a much better result than a generic "wood floor."
-
Make one change at a time. Don't try to overhaul the entire scene in one go. Make one key change, see how it looks, and then move on to the next.
Working this way gives you precise control, letting you fine-tune a render until it's perfect without ever having to jump back into 3ds Max for a re-render.
Can It Handle My Large, Complex Scenes?
Architects and designers often worry if their huge exterior scenes or interiors packed with details will be too much for the platform. This is where Vibe3D really shines. Because it’s cloud-based, you aren't held back by the limitations of your own computer. This is a massive advantage over traditional 3ds max rendering.
You can throw complex projects at it without watching your workstation slow to a crawl. The cloud infrastructure is built specifically for this kind of heavy lifting. That said, good optimisation habits still pay off. A clean, well-optimised model will always upload faster and process more efficiently, which means you get to the creative part of your work even sooner.
Ready to see what an AI-driven workflow can do for your 3ds Max projects? You can produce stunning, photorealistic renders in a tiny fraction of the time. Give Vibe3D a try and see for yourself. Head over to https://vibe3d.ai to get your first project started.