Diving into the world of 3D can feel like a huge leap, but the basic idea is pretty straightforward. When we render 3D, we're essentially taking a digital three-dimensional model and creating a two-dimensional image from it. It's like being a photographer for a scene that only exists inside your computer, complete with all the lighting, textures, and shadows.
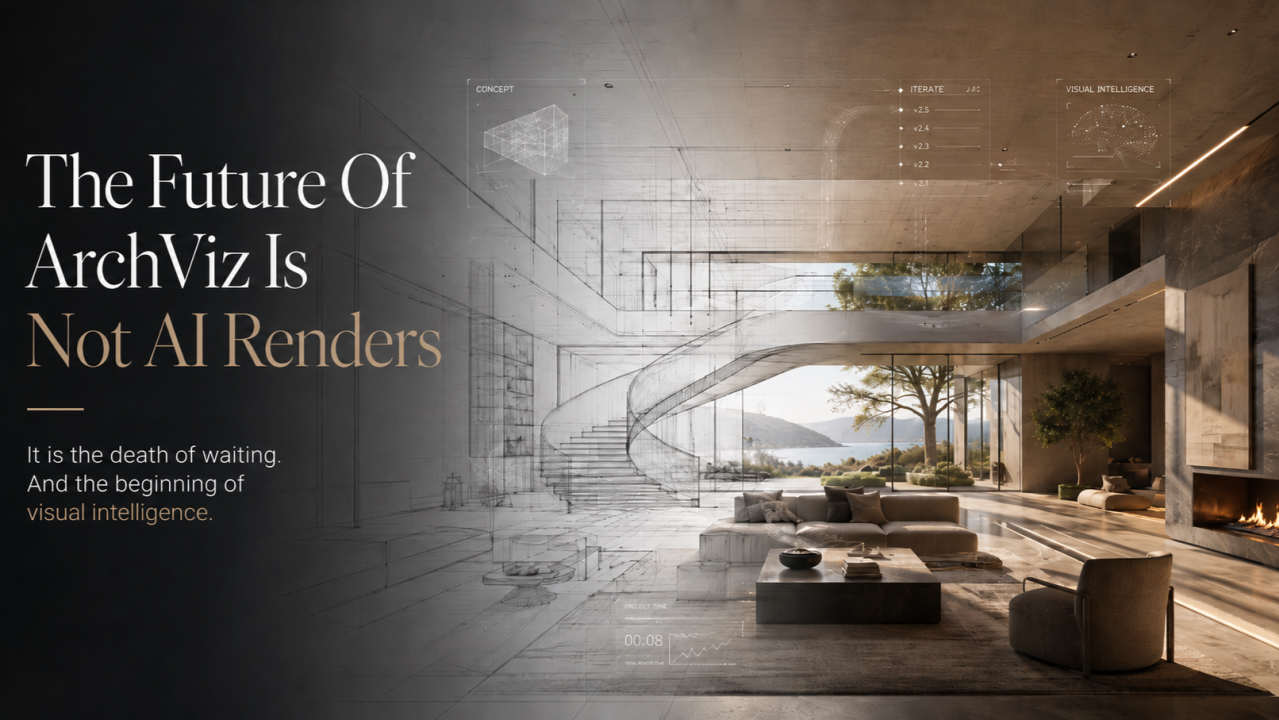
Your Blueprint for Photorealistic 3D Renders
Think of this guide as a friendly walkthrough, here to get you from a basic 3D model to a stunningly realistic image. We'll cut through the dense technical jargon and get right to the practical steps that actually matter, especially when you're working on interior and architectural scenes. I’ve learned this stuff the hard way over the years, and now I'm here to share the shortcuts.
We're going to walk through the entire process, from prepping your models all the way to hitting that final render button. The aim? To make your digital creations look so real you could step right into them.
What This Guide Covers
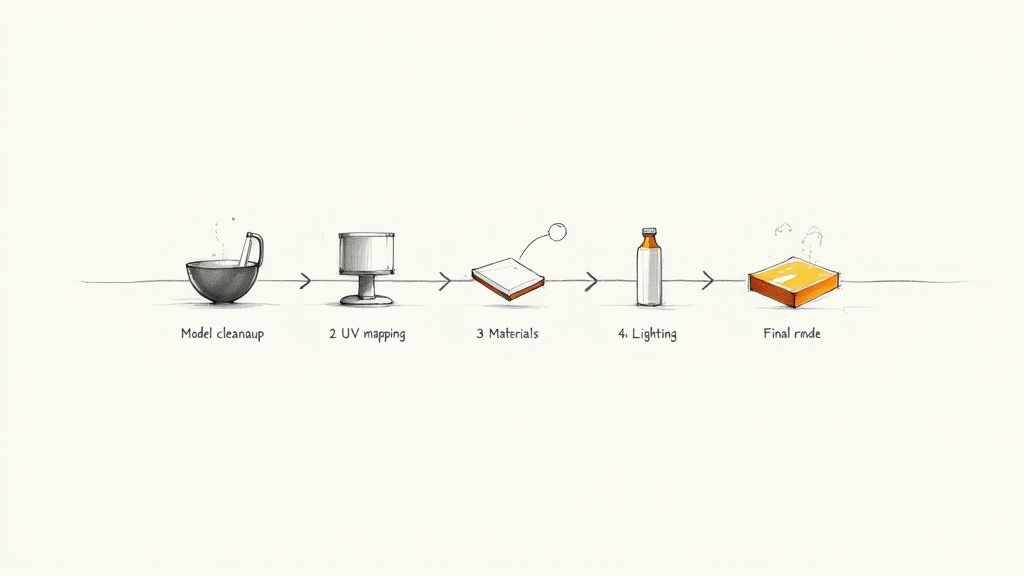
Getting from a simple wireframe to a polished, final image is a journey with a few key stages. I’ve laid this tutorial out to follow the same logical workflow that professionals use every single day.
-
Model Preparation: We’ll start by making sure your 3D assets are clean, optimised, and ready for texturing.
-
Lighting and Materials: This is where the artistry comes in—you’ll learn to breathe life and realism into your scene.
-
Render Settings and Optimisation: We'll figure out how to balance quality with speed to get fantastic results without waiting forever.
-
A Practical Workflow: I'll show you a step-by-step example using Vibe3D to get incredible results, fast.
The real magic of a photorealistic render is its ability to fool the eye. It's not just about technical perfection; it's about telling a story and conveying a mood or a time of day purely through light and shadow.
As you get started, having a good grasp of the foundational tools is a game-changer. It's worth checking out resources that break down the best 3D animation software for beginners to find a platform that clicks with you. That knowledge goes hand-in-hand with the techniques we’ll cover here, especially when you're ready to pick the right architectural rendering software for professional work. Let’s dive in.
Getting Your 3D Models Ready for a Flawless Render
Everyone wants to jump straight into lighting and materials, but a truly stunning render actually starts with a clean, well-organised 3D model. I can't stress this enough. Skipping this foundational step is a recipe for disaster, leading to countless headaches down the line.
Think of it like preparing a canvas before you paint. You wouldn't start a masterpiece on a warped, dirty surface, right? The same logic applies here. This prep work is about more than just deleting stray vertices; it’s about smart optimisation that dictates how light behaves and how textures wrap around your objects. A model riddled with issues will fight you at every turn, causing visual glitches and slow performance.
Why Clean Geometry Is a Deal-Breaker
The geometry—that mesh of polygons, vertices, and edges—is the very skeleton of your final image. If that skeleton is broken, everything you build on top of it will be unstable. Good, clean topology is what gives you smooth surfaces, predictable deformations, and textures that apply without bizarre stretching or pinching.
For example, if you're trying to render 3d furniture with beautiful curved surfaces, messy geometry can create weird shadows and light artefacts that instantly shatter the realism. Your render engine calculates light bounces based on the angle of every single polygon, so a jumbled mess will only lead to inaccurate and noisy results.
A common trap I see people fall into is thinking more polygons automatically means more detail. The truth is, efficient, well-placed polygons are far more valuable. A high-poly model that’s poorly made will almost always render worse than a lower-poly model with clean, intentional topology.
To get started on the right foot, focus on these core ideas:
-
Quads are your best friend: Stick to four-sided polygons (quads) whenever you can. They subdivide cleanly and are much easier for most software to handle.
-
Eliminate N-gons: Polygons with more than four sides (known as N-gons) are notorious for causing rendering errors, especially with lighting and material displacement.
-
Merge overlapping vertices: It's super common to have duplicate vertices sitting on top of each other. They cause shading errors and bloat your file size. A quick "merge by distance" usually cleans them right up.
Smart Ways to Optimise Your Models
Optimisation isn't about mindlessly deleting polygons. It's about reducing complexity without sacrificing visual quality. A heavy, unoptimised scene can bring even a beast of a computer to its knees, making the creative process of tweaking lights and materials painfully slow.
A classic example is importing a detailed CAD model for an architectural visualisation. These files are often built for manufacturing precision, not rendering speed, and can be packed with millions of useless polygons on things like screw threads or internal parts no one will ever see.
Your job is to simplify this geometry. For objects way off in the background, you can be pretty aggressive with reducing the polygon count. But for your "hero" assets, like that feature armchair in the centre of the room, you’ll want to preserve the detail while still cleaning up the mesh. Finding that balance is the key to a smooth workflow. If you're using a specific platform, it's also worth looking up best practices, like in our guide on how to render in SketchUp.
Don't Forget to UV Unwrap
Once your geometry is sorted, it's time for UV mapping. This process basically creates a flat, 2D pattern of your 3D model's surface, which tells the software exactly how to apply a texture. Without proper UVs, your beautiful wood grain or fabric texture will end up looking stretched, squashed, or just plain wrong.
Imagine trying to wrap a gift without cutting the paper to fit the box—you’d get a wrinkled, ugly mess. UV unwrapping is the digital version of creating that perfectly cut wrapping paper. Placing your seams in logical, hidden spots (like the underside of a sofa or the back of a picture frame) is crucial. Honestly, this step is absolutely essential if you want to render 3d scenes that look believable and professional.
Getting the Lighting and Materials Just Right
If a clean 3D model is the skeleton of your render, then lighting and materials are its soul. This is the crucial stage where a sterile digital object starts to feel like a living, breathing space. Nail this part, and you can genuinely trick the viewer's eye into believing what it sees is real.
It all begins with light. Light single-handedly sets the mood, defines the time of day, and dictates how every surface in your room is perceived. Without thoughtful lighting, even the most detailed models and high-res textures will look completely flat and unconvincing.
How to Craft Believable Digital Light
Honestly, the most effective way to light a scene is to copy how light works in the real world. I always start with one powerful, primary light source—think of it as your sun or the main window in a room. This is your key light, and it will establish the scene’s overall direction of light and cast the most prominent shadows, giving your space immediate form and dimension.
Once that key light is in place, you can start layering in secondary or fill lights. These are much softer and less intense. Their job is to bounce light into darker corners and ease up on those super harsh shadows. Think of them as the ambient light that reflects off walls and ceilings in a real room. This layering is what creates depth and helps you avoid that unnaturally dark, high-contrast look that just screams "computer-generated".
Good lighting is everything for photorealistic results. It's a skill that both interior designers and 3D artists spend years honing. For some great tips on how to illuminate a space, check out this piece on putting your living room in the best light.
A massive game-changer for realistic environmental lighting is using a High Dynamic Range Imaging (HDRI) map. It's a 360-degree image that wraps around your entire scene, providing incredibly realistic light and reflections from a real-world location. It's one of the best shortcuts I know for achieving complex, natural-looking illumination fast.
The Essential Properties of Realistic Materials
With your scene lit, it's time to tell your objects how to react to that light. We do this by creating materials with specific properties that mimic real-world surfaces. You don't need to be a physicist, but getting a handle on a few key concepts is essential.
Let’s break down the main components you’ll be tinkering with:
-
Diffuse or Albedo: This is just the base colour of your material—what it looks like under perfectly flat, even lighting without any shine.
-
Specular or Reflection: This slider controls how shiny or reflective a surface is. A mirror would have a high specular value, while something like rough concrete would have a very low one.
-
Roughness or Glossiness: This works hand-in-hand with specular and determines how sharp or blurry those reflections are. A polished chrome tap has low roughness (sharp reflections), whereas a brushed steel appliance has high roughness (blurry, spread-out reflections).
-
Bump or Normal Maps: These are texture maps that fake fine surface detail—like wood grain, fabric weave, or the texture of leather—without actually adding more polygons to your model. This is how you make surfaces feel tactile and real.
Creating convincing materials is a foundational skill. If you're looking to go deeper into this, especially for architectural work, we have a detailed guide on creating realistic materials for 3ds Max interior design.
Sell the Realism with a Touch of Imperfection
Perfection is the enemy of realism. Seriously. In the real world, nothing is perfectly clean, perfectly flat, or perfectly uniform. The secret to making your 3D scenes truly believable lies in adding subtle, calculated imperfections.
Think about a wooden coffee table in someone's home. It probably has tiny scratches, a slight variation in the wood stain, or even a few faint fingerprints. The metal leg of a chair might have minuscule scuffs near the floor. These are the tiny details that sell the illusion.
This pursuit of realism is why high-fidelity rendering is exploding. Just look at the India 3D mapping and modelling market, a sector closely tied to this tech. It hit USD 300 million in 2024 and is projected to soar to USD 1.13 billion by 2033, growing at a blistering 16.1% annually. This growth is being pushed by sectors like real estate and urban planning that absolutely require this level of detail.
You can add these all-important imperfections using texture maps. I often layer grunge maps, dirt maps, and subtle procedural noises onto my base materials to break up that sterile, computer-perfect look. Just remember not to overdo it—a little goes a very long way. The goal is for these details to be felt more than they are consciously seen, adding a subconscious layer of authenticity that makes your final image truly compelling.
A Practical Vibe3D Architectural Render Workflow

Alright, let's put theory into practice. I'm going to walk you through my typical workflow using Vibe3D to take a prepared architectural model from a basic file to a portfolio-worthy image. This is where you get to see how a modern tool can cut through the complexity and deliver jaw-dropping results without the usual headache.
First things first, get your cleaned-up model into the Vibe3D environment. Once it's loaded, your first job isn't materials or lighting—it's storytelling. You need to find the perfect camera angle. A great composition does more than just show the room; it guides the viewer's eye, highlights the best features, and sets an immediate mood. Think like a photographer, not just a 3D artist.
Setting the Scene with Materials and Light
With your camera angle locked in, the real fun begins. Vibe3D really shines with its intuitive, AI-powered material setup. Forget building complex shaders from scratch. You can just dive into its massive library of high-quality, physically-based textures and start applying them.
For an interior scene, this means getting realistic wood floors, textured fabrics for sofas, and sleek metals for fixtures in just a few clicks. The trick is to go beyond the defaults. Once you apply a material, get into its properties. Tweaking values like roughness and metallic is what truly sells the realism. A slightly higher roughness on a wooden floor suggests a matte finish, while a low roughness on a countertop will give you those sharp, believable reflections.
After your core materials are in place, it's time to light the scene. Vibe3D makes this part so much easier. I always start by establishing a natural light source, like sunlight pouring through a window. The goal is usually to get a soft, diffused look that fills the space without creating harsh, distracting shadows. This is absolutely crucial for architectural renders, where you want a space to feel bright and inviting.
Getting this right is all about mastering the core principles of realism: lighting, materials, and all those tiny details that make a scene feel lived-in.
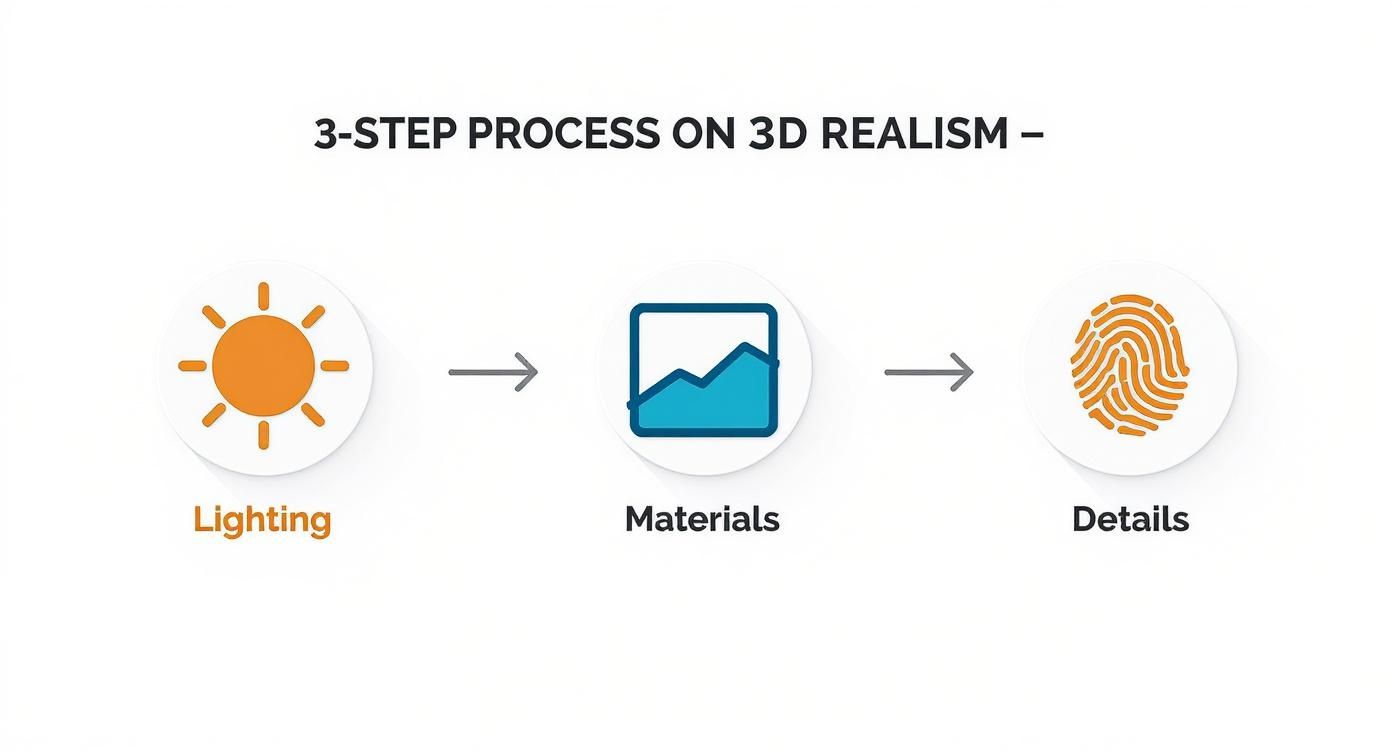
As this shows, once you've got your main lighting sorted, it's all about refining your materials and adding those subtle imperfections that bring a scene to life.
Finalising Your Render Settings in Vibe3D
You're almost there. The last stage before you hit that magic render 3d button is dialing in your output settings. This is always a balancing act between quality and time, but Vibe3D's cloud processing takes a lot of the waiting out of the equation.
To help you decide, here’s a quick comparison of settings I commonly use for different stages of a project.
Key Vibe3D Render Settings for Speed vs Quality
| Setting | Draft/Preview Render | Final High-Quality Render | What It Does |
|---|---|---|---|
| Resolution | 1920x1080 (Full HD) | 3840x2160 (4K) or higher | Determines the final image size and sharpness. Higher is better but takes longer. |
| Samples | Low (e.g., 512-1024) | High (e.g., 2048-4096+) | Controls how much light data is calculated per pixel. More samples = less noise. |
| Denoising | On (Essential) | On (Always a good idea) | AI-powered filter that cleans up any graininess, letting you get away with fewer samples. |
Ultimately, the right settings depend on your deadline and where the image will be used. For a quick client check-in, a draft render is perfect. For the final portfolio piece, you'll want to push for quality.
My personal tip is to always run a few low-resolution "draft" renders first. This lets me quickly check if my lighting and material balance is working before committing to a final, high-res render that might take a bit longer. Vibe3D's speed makes this iterative process completely painless.
The demand for high-quality 3D is exploding, especially in places like India. Back in 2019, the Indian 3D content creation market in media and entertainment was already valued at around $134.2 million. After a brief dip, it's now projected to grow at a compound annual growth rate of 13.9% through 2025, largely thanks to streaming platforms and online media. You can discover more about the growth of the Indian 3D content industry.
Once you're happy with your settings, hit render! One of the best things about using a tool like Vibe3D is how easy it is to generate variations. You can tweak the lighting, swap material colours, or nudge the camera and render again. Comparing these options side-by-side helps you and your client find that perfect shot, dramatically speeding up the whole feedback and revision cycle.
Getting Your Renders Right: Fixing Common Problems
You’ve hit the render button, you're excited, and then... disappointment. The image isn't what you envisioned. Maybe it's full of bright, distracting speckles, or the estimated completion time is stretching into next week. Don't worry, we've all been there. Learning how to troubleshoot these issues is what really levels up your skills.
Think of that first render not as a failure, but as a diagnostic test. It's telling you exactly what needs attention. Instead of randomly adjusting settings and praying for a better result, a methodical approach will save you a world of frustration and time.
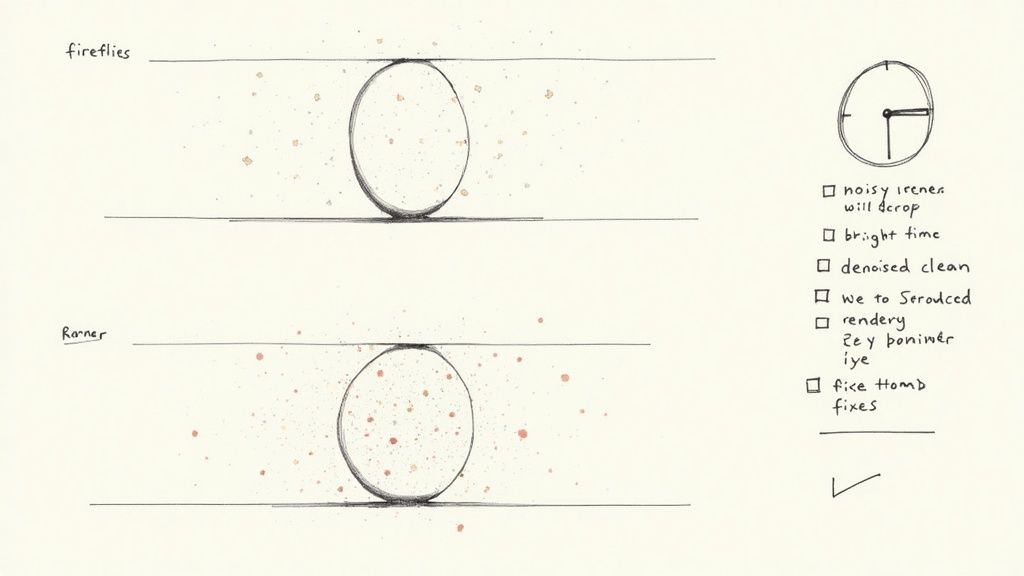
Taming Noise and Fireflies
One of the most common issues you'll run into is noise—that grainy texture or those pesky bright pixels called "fireflies." This usually means the render engine is struggling to get enough data, especially when calculating complex light bounces from tricky materials or tiny, intense lights.
My first port of call is always the lighting. Are any lights ridiculously bright or incredibly small? Those are classic culprits for creating fireflies. I also take a hard look at highly reflective or refractive surfaces like chrome and glass, which are notorious noise-makers. It’s far more efficient to increase the sample count for just that one problematic material or light, rather than bumping up the global settings for the whole scene.
I can't overstate how much of a game-changer modern denoisers are. These AI-powered tools are brilliant at cleaning up noisy images, which means you can often get away with much lower sample counts. This can easily cut your render times by 30-50% without a noticeable hit to quality—a huge win on any project.
Why Do My Materials Look Fake?
Another familiar headache is when your materials just look wrong. Your wooden floor has the sheen of plastic, or that brushed metal doesn't look convincing. Nine times out of ten, this comes down to how a surface reflects light.
A classic beginner mistake is making materials that are way too perfect. In the real world, nothing is perfectly smooth or 100% reflective. The magic is in the roughness or glossiness values. A slightly blurry, more diffused reflection often looks infinitely more believable than a flawless mirror finish.
Also, never underestimate the power of subtle imperfections. Adding a very faint fingerprint or smudge map to the roughness channel can instantly break up that sterile, CG look and sell the realism. Those tiny details are what trick the eye into believing what it sees. For a deeper dive, our guide to 3D rendering online has some great tips for nailing that perfect finish.
Speeding Up Painfully Slow Renders
Is your render crawling along at a snail's pace? Waiting for a scene to finish can be excruciating, especially on a tight deadline. If your render times are out of control, it's time to put on your detective hat and hunt for the bottlenecks.
Here are the usual suspects I investigate to speed things up:
-
Bloated Geometry: Do you have super high-poly models lurking in the background where no one will see the detail? Optimise them or swap them out for lower-poly versions.
-
Caustics: Those beautiful, shimmering light patterns that refract through glass are a massive drain on resources. Unless they are the absolute hero of the shot, turn them off.
-
Volumetrics: Atmospheric effects like fog and god rays add incredible mood, but they also add a ton of render time. Use them strategically.
-
Render Passes: Instead of rendering the final image in one shot, break it down. Render out separate passes for lighting, reflections, and shadows. This gives you way more flexibility to make tweaks in post-production without having to re-render everything from scratch.
This kind of methodical optimisation is only becoming more critical. The connection between high-quality 3D rendering and manufacturing is getting stronger, especially in markets like India, where the 3D printing industry was recently valued at USD 20.37 billion. With an expected growth rate of 23.5% CAGR through 2025, driven by government pushes for local manufacturing, the need for efficient and fast visualisation workflows is exploding.
Got Questions About Rendering 3D Scenes?
When you first dive into 3D rendering, a bunch of questions are bound to pop up. As you go from setting up a model to that final, polished image, you'll run into the same challenges and curiosities that everyone else does. So, let's clear the air and tackle some of the most common ones to help you get better results, and faster.
Think of this as your go-to guide for demystifying the tricky parts of the process. Nailing these fundamentals will make everything else feel a lot smoother.
Is a More Powerful Computer Always the Answer?
It’s tempting to think that stunning renders are just a matter of throwing money at a bigger, beefier machine. And while a powerhouse CPU and a top-of-the-line graphics card definitely make things faster, they aren't a magic wand for quality. Trust me on this: a well-optimised scene will always render better and quicker than a messy one, even on a pretty average computer.
I've seen artists with beastly workstations turn out mediocre images because their models were bloated and their lighting was a mess. On the flip side, I've seen jaw-dropping work from people using older machines who have absolutely mastered the art of optimisation. The real performance boost comes from smart workflows, not just raw processing power.
Your skill in prepping models, optimising textures, and setting up efficient lighting has a way bigger impact on your final render quality and speed than your hardware does. Focus on your technique first, and then upgrade your gear when your skills start to outgrow it.
Besides, cloud-based platforms are completely changing the game here. By offloading all that heavy lifting to powerful remote servers, you can render 3d scenes incredibly fast without needing a supercomputer sitting on your desk.
CPU vs. GPU Rendering: Which One Should I Use?
Ah, the classic debate. The real answer is: it depends. It comes down to your specific project and the software you're using. Each has its own strengths, and knowing the difference will help you make the right call.
-
CPU Rendering: Your processor is the workhorse, built to handle complex, heavy-duty tasks. CPUs are generally more precise with tricky calculations like light caustics and complex refractions, which is why they’ve traditionally been the top choice for final, high-detail architectural shots.
-
GPU Rendering: Your graphics card is all about parallel processing—it can chew through thousands of simpler tasks all at once. This makes it ridiculously fast, especially for getting instant feedback when you’re tweaking materials and lighting.
These days, many modern render engines use a hybrid approach, putting both the CPU and GPU to work to give you the best of both worlds. For most of us, though, especially when speed and iteration are key, GPU rendering is the go-to for the bulk of the work.
What Is Path Tracing and Do I Need It?
You’ll hear techy terms like "path tracing" and "ray tracing" thrown around a lot. Put simply, path tracing is a rendering technique that mimics how light actually behaves in the real world. It traces the path of light rays from the camera back to their source, calculating every single bounce, reflection, and shadow it makes along the way.
This painstaking simulation is what creates those incredibly realistic and physically accurate images. It's the secret ingredient behind the photorealism you see in Hollywood movies and high-end archviz. While it takes more computational muscle than older methods, the results are simply second to none.
If your goal is to render 3d scenes that look like photographs, then using a path tracer isn't really optional. Modern software and hardware have made it more accessible than ever, so it’s a technique every serious artist should get comfortable with.
How Long Should a Render Take to Finish?
The million-dollar question! And the honest answer is… anywhere from a few seconds to a few days. The time it takes to finish a render is tied to a whole bunch of factors.
Here’s a quick rundown of what impacts your render time the most:
-
Resolution: A 4K image has four times the pixels of a 1080p one, so it’s going to take a lot longer to process.
-
Scene Complexity: The more objects, polygons, and complex materials you have, the more your machine has to calculate.
-
Lighting Complexity: Scenes with dozens of lights, lots of glass, or atmospheric effects like fog are way slower to render.
-
Quality Settings: Cranking up the sample count to get rid of noise will directly add to your render time.
As a rough benchmark, a high-quality interior shot at 4K resolution on a decent machine could take anywhere from 30 minutes to a few hours. But with cloud rendering platforms, you can often slash that down to just a couple of minutes, which is a massive game-changer for professional work.
Ready to skip the long render times and technical headaches? Vibe3D uses the power of the cloud and AI to turn your 3D models into stunning, photorealistic visuals in a fraction of the time. Transform your workflow and start creating jaw-dropping renders today at https://vibe3d.ai.