AI-driven bathroom design isn't just a futuristic concept; it's a practical tool that uses intelligent software to bring your ideas to life. You can start with a simple text description or a floor plan, and the AI will generate incredibly realistic visuals of layouts, materials, and fixtures.
This technology makes it possible to play with countless styles—from sleek, modern minimalism to timeless, classic luxury—and see the results almost instantly. It turns what was once a complex, technical process into something far more intuitive and creative.
A New Chapter in Bathroom Design
Remember the days when picturing a new bathroom meant wrestling with complex software or spending hours making manual tweaks? Those days are fading fast. AI design tools are opening up the world of interior design, allowing anyone to create a custom, high-end look without needing a deep technical background. Think of these platforms as your digital co-pilot, guiding you from a rough idea to a concrete, workable plan.
But this is about more than just making pretty pictures. It's about smart, practical planning from the very beginning. AI lets you make better decisions long before a single tile is laid. You can experiment with different layouts to make a small space feel bigger, compare how marble countertops look with brass fittings, or see how a particular vanity will appear under different lighting. This kind of virtual trial-and-error helps you sidestep expensive mistakes and ensures the final result is exactly what you envisioned.
Where Visuals and Smart Functionality Meet
The real magic of today's AI tools is how they fuse beautiful aesthetics with everyday function. As you're designing your space, you can also plan for the integration of smart home tech. Want to see where a smart mirror would fit best? Need to ensure there's enough room for a touchless tap? Planning the wiring for voice-activated lighting? AI helps you visualise it all.
The result is a design that doesn’t just look good but genuinely makes life easier and more efficient. This trend is taking hold everywhere, especially in rapidly growing markets.
For example, the Indian bath fittings market is set for significant growth, projected to expand from roughly USD 11.49 billion in 2025 to USD 16.67 billion by 2030. A major driver of this expansion is the increasing adoption of AI and smart technologies in bathroom design, which mirrors a worldwide move towards more intelligent and responsive living spaces.
To better understand the value AI brings, let's break down its key advantages in the bathroom design workflow.
Key AI Advantages in Bathroom Design
| AI Feature | Benefit for Homeowners & Designers |
|---|---|
| Rapid Prototyping | Instantly generate multiple design options from a single prompt, saving hours of manual work. |
| Material & Style Exploration | Effortlessly swap out tiles, fixtures, and colour schemes to find the perfect combination without risk. |
| Photorealistic Visualisation | See a highly accurate preview of the final space, helping to align expectations and avoid surprises. |
| Spatial Optimisation | Test different layouts to maximise functionality and flow, especially in small or oddly shaped bathrooms. |
| Cost & Error Reduction | Identify potential design flaws and make changes digitally, preventing costly mistakes during construction. |
This table shows how AI isn't just a novelty; it's a powerful tool for making smarter, faster, and more confident design decisions.
The best part about AI is that it removes the fear of commitment. You can explore dozens of bold ideas in minutes—from a dramatic, dark-themed powder room to a serene, spa-like retreat—without any of the physical or financial risk.
Platforms like Vibe3D are at the forefront of this shift, providing tools that can turn a simple text prompt into a breathtakingly realistic visual. You can get a closer look at how an AI render engine works to understand the technology powering these creative workflows. At its core, using AI for bathroom design is about crafting a personalised wellness sanctuary in your home—a space that’s not only functional but also a true reflection of your personal style.
Preparing Your Space for AI Design
A brilliant AI bathroom design doesn’t just appear out of thin air from a clever prompt. It all starts with a solid, well-prepared foundation. Before you can ask an AI to dream up photorealistic concepts, you need to feed it the right raw materials. This groundwork is what channels the AI's creativity, leading to designs that are not only stunning but also practical and true to your vision.
The first, non-negotiable step? Getting your measurements right. An AI can imagine a breathtaking layout, but if it's based on the wrong dimensions, it’s completely useless. Grab a reliable tape measure and record the length, width, and height of the bathroom. Be meticulous about the exact locations and sizes of windows, doors, and any plumbing fixtures you’re keeping, like the toilet waste pipe or shower drain.
Translating Measurements into a Digital Plan
With these critical numbers in hand, it's time to translate them into a format the AI can actually work with. Many design platforms, including Vibe3D, let you build a simple digital floor plan right inside the tool. You can draw your walls, pop in doors, and set window dimensions, all based on what you measured.
Alternatively, if you're starting with a blueprint or even a rough sketch, you can often upload it directly. The platform can then use that image as a guide to build out an accurate 3D model. To make sure you've covered all your bases, it’s always a good idea to consult an expert bathroom remodel planning guide to catch any details you might have missed.
The most common mistake I see is people rushing this stage. Spending an extra 30 minutes double-checking every measurement can save you from designing a beautiful but unbuildable space. Precision here really is the key.
This process flow shows how a typical AI bathroom design project moves from the initial idea all the way to the final integration.
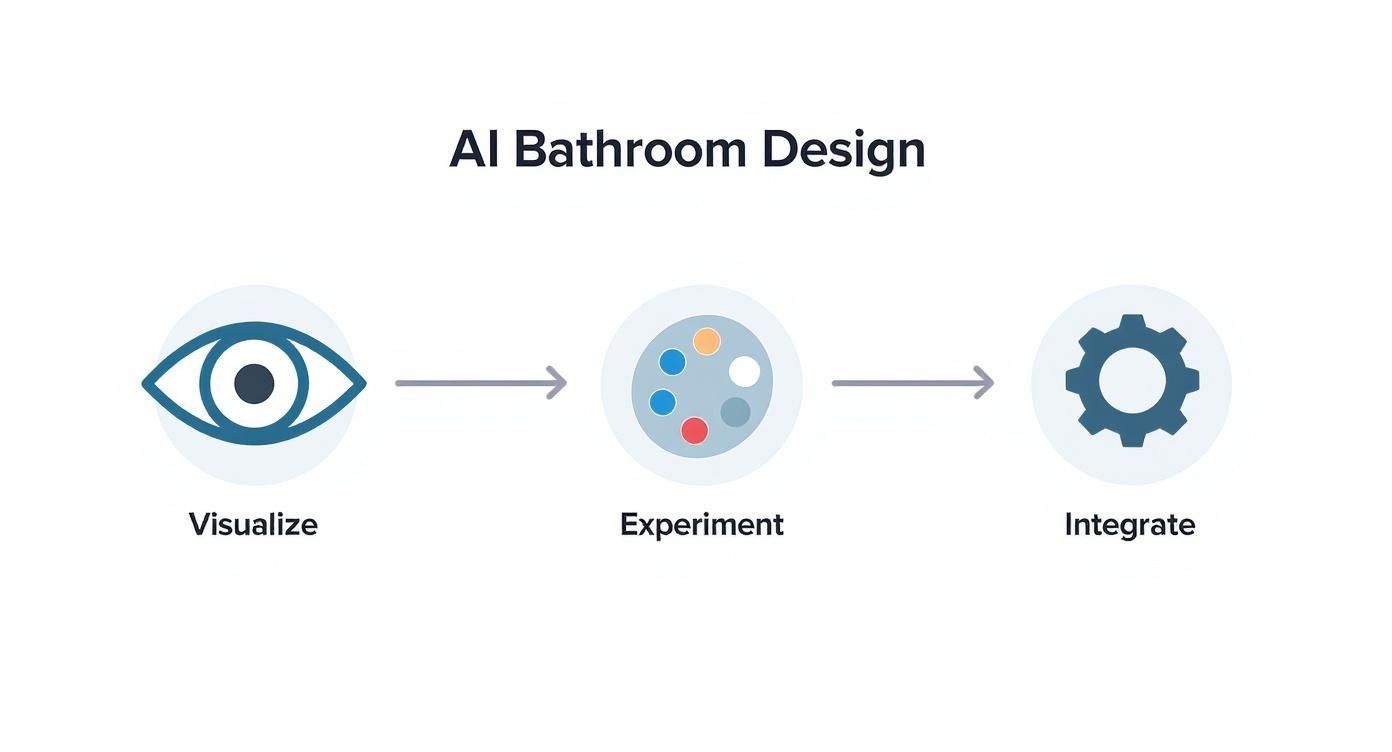
As you can see, the workflow is structured, moving from broad visualisation to specific experimentation and, finally, to practical integration.
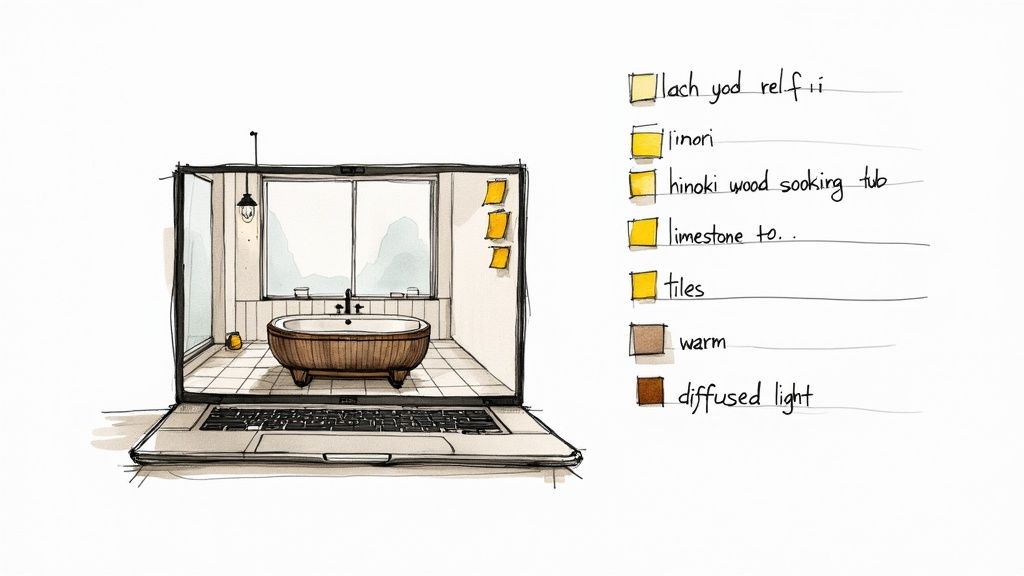
Curating Your Creative Inspiration
Once the technical layout is locked in, the fun part begins: gathering your creative inspiration. This is where you build the visual language that will steer the AI. Think of yourself as an art director putting together a mood board. This collection of images becomes the main creative brief for the AI, teaching it your personal aesthetic.
Start pulling together images that capture the feeling you want for your new bathroom. And don't just limit yourself to photos of other bathrooms! A powerful mood board includes a mix of elements:
-
Textures and Materials: Think close-up shots of fluted glass, honed marble, natural wood grain, or handmade zellige tiles.
-
Fixtures and Fittings: Find images of the specific taps, shower heads, or vanity styles you love. Look for little details, like knurled handles or a particular finish such as brushed brass or matte black.
-
Colour Palettes: Collect swatches, photos, or even artwork that represents the exact shades you have in mind.
-
Lighting Examples: Look for pictures that show the kind of light you prefer—whether it's warm and diffused, bright and clinical, or dramatic and focused.
Organising these ideas visually is crucial for both you and the AI. A well-structured mood board, sometimes called a concept sheet, helps you refine your own vision before you even write a single prompt. For more on this, you can find great strategies for creating an effective interior design concept sheet that will make your creative process much smoother.
By combining precise spatial data with a rich tapestry of visual ideas, you give the AI everything it needs to succeed. This preparation turns it from a random image generator into a focused design partner, ready to produce results that are deeply connected to your style and the reality of your space.
Crafting Prompts for Photorealistic Results
This is where the magic really happens. All the groundwork—the floor plans, measurements, and mood boards—comes together as you start guiding the AI. I’ve learned to think of writing a prompt not as giving an order, but as painting a picture with words. The AI is an incredibly powerful tool, but its output is a direct reflection of the context you provide.
The goal is to move past vague requests. A simple "modern bathroom" prompt will give you something, sure, but it will probably feel generic. It’s the small, layered details—the exact materials, the feel of the lighting, the specific stylistic notes—that transform a basic concept into a photorealistic, bespoke space. That mood board you spent time on? It's now your dictionary for crafting the perfect prompt.
The Anatomy of an Effective Prompt
From my experience, the best prompts aren't just one long sentence. They're a collection of descriptive phrases that build a complete scene. The most successful ones usually touch on four key areas: the overall style, standout features, specific materials, and the atmosphere you want to create.
For instance, instead of just saying "Japandi bathroom," you can bring the scene to life by being more descriptive:
A serene Japandi bathroom featuring a freestanding hinoki wood soaking tub, limestone floor tiles, and a minimalist oak vanity. A large window overlooks a tranquil zen garden, casting soft, natural light across the space. The walls are finished in a textured, off-white lime wash.
This level of detail gives the AI specific elements to work with, a clear mood to capture, and a defined material palette. The result is a design that feels intentional and unique, not just another generic interpretation of a popular style. This is a core skill, much like how professionals learn to articulate their vision in specialised software. For a deeper dive into that world, our guide to using 3ds Max for interior design is a great resource.
Describing Materials and Textures
One of the biggest hurdles in AI design is getting the tactile quality of materials right. To achieve photorealism, you have to use specific, descriptive language. This helps the AI understand not just what a material is, but how it should look and feel in the final image.
-
For glass: Go beyond "shower glass." Try "fluted glass shower screen" or "reeded glass partition" to create a distinct, textured look.
-
For tiles: Don’t just ask for "marble tiles." Get specific. Is it "honed Carrara marble with subtle grey veining" or "highly polished Calacatta gold marble"? For a more organic feel, you might prompt for "handmade zellige tiles with slight imperfections and a glossy finish."
-
For wood: Always specify the type and finish. "A light oak vanity with a visible grain" is far more effective than "a wood vanity." Think "dark walnut cabinetry with a matte finish" or "bleached pine wall panelling."
-
For metals: The finish is everything. Are the fixtures "brushed brass," "matte black," "polished chrome," or "aged copper"?
These seemingly small details are what separate a flat, computer-generated image from a render that looks like you could step right into it.
Prompting for Specific Lighting and Mood
Lighting is arguably the single most important factor for achieving a photorealistic result. You have to guide the AI on how to light the scene to create the right atmosphere. A well-lit render feels real; a poorly lit one looks fake, no matter how good the textures are.
Think about the mood you're after and prompt accordingly:
-
For a Spa-Like Ambience: Use phrases like "soft, diffused light," "warm, indirect lighting from a cove ceiling," or "a backlit circular mirror casting a gentle glow."
-
For a Bright, Airy Feel: Prompt with "bright, natural morning light streaming through a large window," "sun-drenched space," or "clean, even lighting with no harsh shadows."
-
For a Dramatic, Moody Look: Try "dramatic downlighting from spotlights," "a single pendant light creating a focused pool of light over the basin," or "strong, directional light creating high contrast and deep shadows."
Even specifying the time of day, like "golden hour light" or "cool, early morning light," can add a stunning layer of realism to your AI-generated bathroom.
To see just how much difference a few words can make, take a look at the following table. It shows how moving from a vague request to a specific one completely transforms the outcome.
Prompt Crafting Vague vs Specific
| Vague Prompt | Specific & Effective Prompt | Expected Outcome Difference |
|---|---|---|
| Modern bathroom with a shower | Industrial wet room with exposed copper piping, a concrete floor, and a black-framed, fluted glass shower screen. | The specific prompt will generate a distinct industrial aesthetic with clear material choices, whereas the vague one will produce a generic modern look. |
| Nice bathroom with a tub | Serene minimalist bathroom with a freestanding white composite stone bathtub, large format beige porcelain tiles, and warm, diffused light. | The specific prompt provides a clear colour palette and material type, resulting in a cohesive, spa-like atmosphere instead of a random assortment of fixtures. |
| Bathroom with a mirror | A small powder room with a dramatic, oversized, antique-gilded mirror that serves as a focal point. Backlit for a soft glow. | This prompt defines the mirror's style, scale, and lighting effect, creating a deliberate design feature rather than a simple functional object. |
As you can see, specificity is your best friend. It’s the key to unlocking the AI’s full potential and turning your vision into a truly convincing render.
Fine-Tuning Your AI-Generated Bathroom Design
That first image from the AI is always an exciting moment, but it's rarely the finished article. Think of it as a fantastic first draft—a solid concept that's now waiting for your professional eye. The real magic in designing with AI happens during the refinement stage. This is where you shift from simply writing prompts to becoming an art director, guiding the tool with precise adjustments to get the scene just right.
This back-and-forth is where you polish the initial idea until it perfectly matches your vision. It’s less about a single command and more about a conversation with your design partner, the AI. You make small, thoughtful changes that transform a good render into a stunning, client-ready visual, ensuring every detail serves both the aesthetic and the practical needs of the bathroom.
Making Pinpoint Edits with In-Painting
One of the most valuable tools in your refinement toolkit is in-painting. It lets you change specific parts of an image without having to re-render the entire thing from scratch, which is a massive time-saver. Instead of rewriting your prompt and hoping for the best, you just select an area and tell the AI what to change.
Let’s say the initial render is almost perfect, but the tap feels completely wrong for the style. Rather than starting over, you can use an in-painting tool to make targeted fixes:
-
Swap out fixtures: Just select the tap and prompt for a "brushed brass wall-mounted waterfall tap."
-
Alter tile patterns: Highlight a section of the floor and ask for "large-format hexagonal cement tiles in a charcoal grey."
-
Change vanity colours: Mask the vanity unit and instruct the AI to repaint it in a "deep navy blue with a matte finish."
This level of control is what makes the process so efficient. You can experiment with different materials and finishes quickly, a far more focused approach than just rolling the dice on a completely new render.
I recently worked on a project where the client loved the overall design but couldn't decide on the backsplash tile. Using in-painting, we explored five completely different options—from classic subway tile to bold zellige—in less than ten minutes. That kind of instant, visual feedback is something you just can't achieve with traditional modelling.
Tweaking the Lighting and Camera Angles
A bathroom's mood can shift dramatically with the light, and your design needs to shine in every scenario. A key part of the refinement process is playing with different lighting conditions and camera perspectives to see how they impact the space. This is another area where AI tools are brilliant, letting you test variables that would take ages to set up in traditional 3D software.
Simple text commands can show you how the design feels at different times of the day, helping you and your client make better decisions on everything from material sheens to where to place the vanity lights. For a more technical look at how this works, understanding the fundamentals of professional interior rendering can give you some great insights.
Try directing the AI with prompts like these:
-
"Show this scene with bright, direct morning sunlight streaming through the window."
-
"Render this bathroom at dusk with warm, artificial light from the vanity sconces."
-
"Change the camera angle to a low shot, looking up to emphasize the ceiling height."
The Creative Loop: Generate, Review, Adjust
Ultimately, the refinement stage is a constant cycle: generate, review, and adjust. Every small tweak gets you one step closer to that perfect result. Don't hesitate to create dozens of variations. Tools like Vibe3D are designed for this kind of rapid-fire iteration, making it easy to save and compare different versions side-by-side.
This collaborative loop is the heart of an effective AI-assisted workflow. You act as the director, providing the creative judgment and human oversight the technology can't replicate. Your expertise guides the AI, and the AI’s speed fuels your creativity—a partnership that truly elevates your design work.
Weaving Smart Technology into Your Design
A truly exceptional bathroom design today does more than just look good; it blends stunning aesthetics with intelligent, practical functionality. Your photorealistic renders are the perfect tool for this, acting as a blueprint to visualise exactly how smart technology will integrate into the finished room. It's about taking that beautiful image and turning it into a space that offers next-level convenience, hygiene, and efficiency.
Think of your AI-generated visuals as a practical map. You can use them to pinpoint the placement of every smart fixture, ensuring there's enough space, ideal positioning, and the right infrastructure like hidden power outlets or specific plumbing connections. This is the crucial step that transforms a design from simply looking incredible to feeling incredibly intuitive.
The demand for these intelligent features is booming. Globally, the smart bathroom market is set to skyrocket from USD 8,466 million in 2024 to over USD 19,022.9 million by 2031. This trend is especially noticeable in Indian urban centres, where homeowners are actively seeking tech that improves hygiene and saves water. Features like smart toilets and touchless taps are quickly becoming the new standard. You can dig deeper into the growth of the smart bathroom market to see how it's reshaping modern homes.
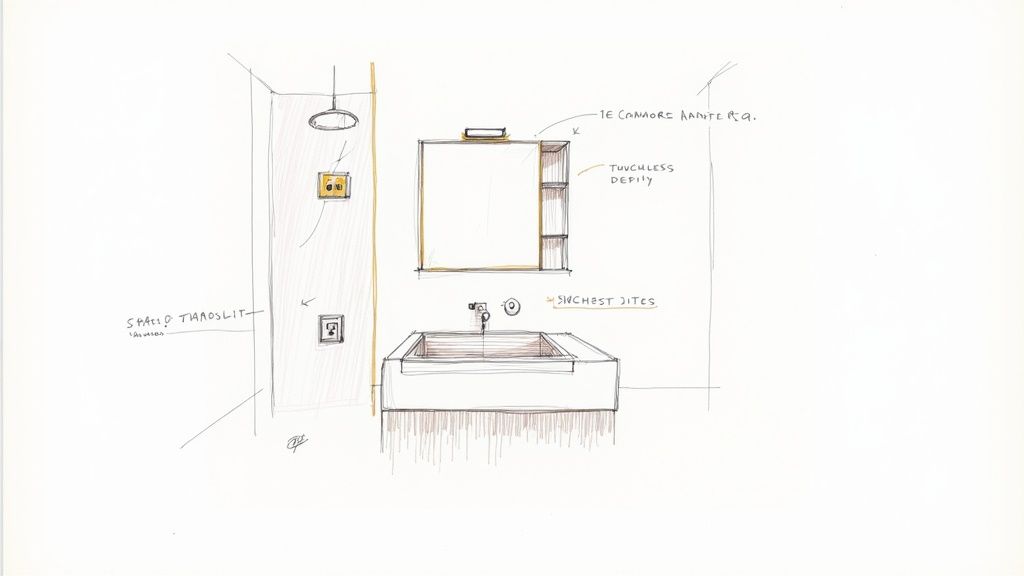
Planning for Key Smart Features
As you refine your AI design, start thinking about which smart elements you want to bring in and where they'll live. Every piece of tech has its own spatial and utility needs, and your digital plan is the perfect place to solve these puzzles long before any walls are opened up.
I always recommend starting with the upgrades that deliver the biggest impact:
-
Smart Toilets: These almost always need an electrical outlet nearby to power features like heated seats, automated lids, and bidet functions. Your render is the perfect tool to find a discreet spot for the outlet, usually tucked away behind the toilet itself.
-
Touchless Taps: While many are battery-operated and don't require special wiring, the AI design helps you nail the minimalist aesthetic. You can instantly see if the spout reach is right for the basin and how it contributes to the clean, uncluttered look.
-
Voice-Controlled Showers: Digital shower systems need both a power source and a home for the control panel. Your design lets you experiment with placement—is it better just inside the shower door or right outside?—and helps you map out the route for the necessary low-voltage wiring.
-
Anti-Fog Mirrors with Displays: A fantastic, futuristic touch, but they need a dedicated power source. Use your rendering to check that the mirror is perfectly centred over the vanity and that the wiring can be easily concealed in the wall behind it.
Using AI to Map Out Infrastructure
Your AI-generated image is much more than a pretty picture; it’s a practical tool for planning your infrastructure. Every time you place a smart device in your digital model, you’re also flagging the exact spot for your electrician and plumber. This simple act of foresight can save you from a world of headaches and costly changes down the line.
For instance, if you've settled on a smart mirror with built-in lighting and a weather display, you can mark its precise location on the wall within your design. This visual instruction is infinitely clearer for a contractor than a scribble on a floor plan.
"A great smart bathroom design is one where the technology feels completely invisible until you need it. Use your AI renders to plan for hidden wiring and integrated controls, ensuring the final space feels effortless and uncluttered."
By treating your AI design as a detailed electrical and plumbing map, you effectively close the gap between concept and construction. This level of planning ensures your vision for a high-tech, convenient bathroom can be built perfectly, without sacrificing the clean lines and serene atmosphere you worked so hard to create. The final result is a space that is as intelligent as it is beautiful.
Bringing Your Digital Render to Life
This is where the rubber meets the road—turning your meticulously crafted AI bathroom design into a physical space. The final render isn't just a pretty picture; it becomes the most critical document for ensuring a smooth renovation. Think of it as the ultimate bridge between your vision and the contractor's execution.
First things first, export your final design. A quick screenshot won't cut it. You need a high-resolution image that shows off every tiny detail, from the exact shade of the tile grout to the metallic finish on the taps. I always pair this with a detailed specification list. This document is your project's bible, listing the exact materials, fixtures, and finishes you've selected.
From Pixels to Plans
Your AI render is essentially a visual blueprint. When you hand this package over to your contractor, it leaves very little room for error or misinterpretation. Suddenly, the plumber, the tiler, and the electrician are all working from the same playbook. It’s the most effective way I’ve found to prevent those costly on-site mistakes that stem from simple misunderstandings.
The most successful renovations I’ve seen are those where the digital plan was treated as the ultimate source of truth. It removes guesswork and ensures that every decision made on-site aligns with the original, approved vision.
This is where the clarity of an AI-driven process really pays off. For instance, designers can use AI for precise space measurements and get instant design recommendations, allowing them and their clients to visualise multiple options in a flash. This dramatically cuts down on human error and speeds up the whole decision-making process.
Navigating Real-World Challenges
Of course, even the best plans can hit a snag. The real world has a way of throwing curveballs. You might discover the specific tile you chose in the render is suddenly out of stock, or an unexpected pipe behind a wall means you need to adjust the layout slightly.
This is where your AI design becomes an incredible problem-solving tool. Instead of panicking, you can quickly jump back into the software, generate a few alternative options, and review them with your contractor on the spot. This ensures any necessary pivots still fit your overall aesthetic. Looking through examples of bathroom renovation projects can give you a good sense of how these digital plans translate into reality.
Ultimately, mastering the art of creating these visuals is a core skill for any designer today. Our guide on how to render in SketchUp is a great place to build that foundational knowledge.
Got Questions About AI Bathroom Design? Let's Clear Things Up
Diving into AI for bathroom design can feel like a big leap, and it's totally normal to have a few questions. Getting a handle on what these tools can (and can't) do is the first step to making them work for you. Let's tackle some of the most common ones I hear.
Do I Need to Be a Tech Whiz to Use These Tools?
Not at all. The great thing about modern AI design platforms is that they're built for designers and homeowners, not software engineers. Most have straightforward interfaces where you plug in your room's dimensions and then just describe what you're imagining in plain English. The AI does all the complicated rendering work behind the scenes.
Sure, mastering every single advanced feature might take a little time, but getting a beautiful, high-quality design is surprisingly easy for a beginner. The real trick, as we've covered, is to start with clear, descriptive prompts to give the AI good instructions.
I tell people to think of it less like learning complex software and more like briefing a junior designer. You're the creative director; you set the vision. The tool just handles the heavy lifting of visualising it for you. It's this collaborative feel that makes AI so genuinely useful.
How Realistic Are the Designs AI Creates?
This really comes down to two things: layout accuracy and visual realism.
The accuracy of the layout is 100% dependent on your input. If you provide precise measurements, the spatial plan will be spot-on. This is the one step you can't afford to get wrong if you want a practical design.
Visually, the renderings are incredibly photorealistic. But it’s crucial to remember that a rendering is an idealised visualisation, not a perfect photograph of the finished room. For example, the subtle texture of a specific tile or the exact shade of a paint colour might look slightly different under your home's actual lighting.
My advice is always the same: once you've settled on a look, get physical samples of the materials. Check them in the actual bathroom to see how they look and feel before you commit to buying anything.
Is AI Going to Box in My Creativity?
Honestly, it’s the complete opposite. I see AI as a creative partner that massively speeds up the "what if" phase of a project. Instead of being a replacement for your ideas, it acts as an amplifier.
Think about it: you can test-drive a dozen wild ideas—bold colour palettes, unusual material pairings, weird and wonderful layouts—in the time it would normally take to sketch out just one concept. There's no cost and zero risk.
Your creativity is still the driving force. You provide the vision, and the AI just gives you a way to see it brought to life almost instantly, helping you refine your ideas and make decisions with much more confidence. It's liberating.
Ready to see this in action? You can transform your design workflow and start creating stunning, client-ready visuals in seconds. With Vibe3D, turning your 3D models into photorealistic renders is practically effortless. Start designing with Vibe3D today.