A truly photorealistic 3d rendering house exterior starts with a rock-solid digital foundation. Before you even think about dropping in fancy textures or setting up that perfect golden-hour lighting, the real magic happens in the prep work. This means meticulously cleaning up your 3D model, locking in the correct real-world scale, and organising your scene for a headache-free workflow.
Getting this right from the start is the secret to avoiding those infuriating rendering errors and, believe me, it saves a massive amount of time down the road.
Building Your Foundation for a Flawless Render
I get it. The most exciting parts of bringing a 3d rendering house exterior to life are tweaking the lights and applying materials. That's when the scene really starts to pop. It's so tempting to dive right into the creative stuff, but any seasoned artist will tell you that a little bit of prep work pays off big time.
Think of it this way: a messy model is like building a house on a shaky foundation. It’s guaranteed to cause problems later on.
Skipping this foundational work is a recipe for disaster. You'll run into frustrating issues like weird light leaks, random dark spots (we call them artefacts), and textures that stretch and warp in all the wrong places. Taking the time to get your model clean first gives you a perfect canvas, making every step that follows smoother and more predictable.
Cleaning and Optimising Your Architectural Model
Whether you're working with a model imported from CAD software like Revit or one you've built from scratch in a program like SketchUp, it's almost certainly going to need a bit of a cleanup. Architectural models, in particular, are notorious for having hidden geometry gremlins that can completely throw off a render engine.
Your main goal here is to create a "watertight" and efficient model. That means hunting down and fixing a few common culprits:
-
Overlapping Vertices: These are points in your geometry that are stacked right on top of each other. They need to be merged into a single vertex to keep things clean.
-
Hidden Interior Faces: Sometimes, when you join objects together, you end up with faces trapped inside the model where they’ll never be seen. They don't show up in the final render, but they still get calculated, wasting precious processing power.
-
Flipped Normals: Every face on a 3D model has a direction, or a "normal." If one is flipped the wrong way (pointing inwards), it can make the material on that surface look black or even transparent.
A clean, optimised model isn't just about sidestepping errors; it's a huge performance booster. A lighter, more efficient scene is way faster to navigate, quicker to texture, and ultimately, renders faster.
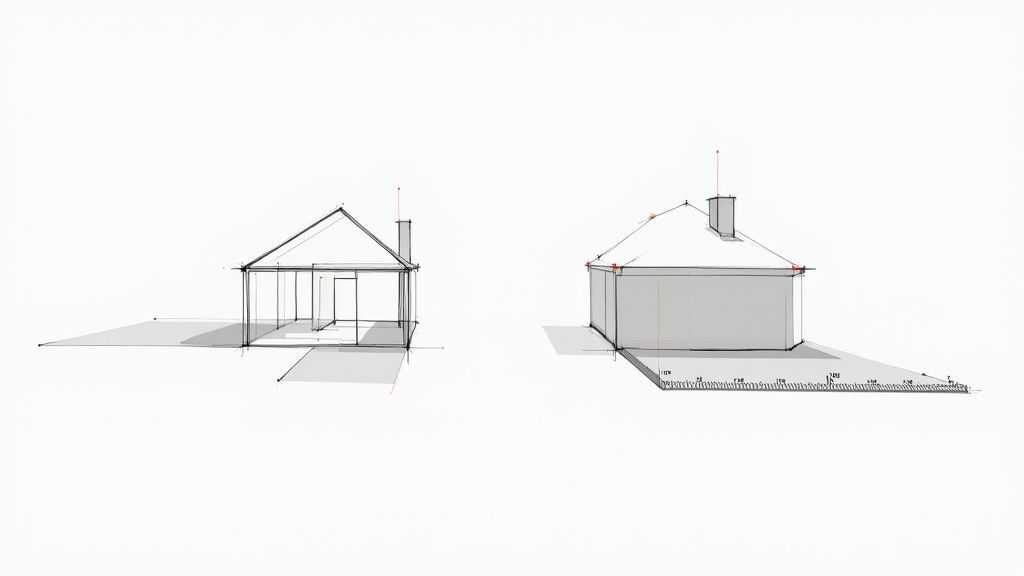
The prep workflow itself is pretty straightforward, but it's absolutely vital for getting your project off to a strong start.

This simple flow chart really nails the non-negotiable first steps. Get these right, and you'll avoid a world of technical pain and creative roadblocks later.
Before jumping into texturing and lighting, it's a great idea to run through a quick mental checklist to make sure your model is truly ready.
Essential Pre-Render Checklist for Your 3D Model
Here’s a quick summary of the critical checks to perform before you even think about lighting and texturing.
| Checklist Item | Why It Matters | Quick Tip |
|---|---|---|
| Geometry Cleanup | Fixes rendering artefacts, light leaks, and black spots. | Use your software's "Merge Vertices" and "Show Normals" tools to spot and fix issues quickly. |
| Scale Check | Ensures physically-based materials and lighting behave realistically. | Set your scene units to metres or feet right at the start and import models using the same scale. |
| Scene Organisation | Saves a ton of time finding and editing objects later. | Create a simple naming convention (e.g., EXT_Wall_Brick, INT_Floor_Wood) and stick to it. |
| Purge Unused Data | Reduces file size and speeds up save/load times. | Most 3D software has a "Purge" or "Clean" command to remove unused materials, layers, and blocks. |
Ticking these boxes might feel like a chore, but it sets the stage for a much smoother and more successful rendering process.
The Importance of Scale and Scene Organisation
Working to the correct real-world scale is absolutely non-negotiable. If your model's scale is off, nothing will look right. Physically-based materials and lighting systems rely on accurate dimensions to behave realistically. A brick texture designed for a 1-metre-high wall will look completely stretched and wrong on a 10-metre wall, and the way light falls and bounces off surfaces will just feel unnatural. Always, always set your units (like metres or feet) before you do anything else.
Just as crucial is keeping your scene organised. As you start adding landscaping, outdoor furniture, cars, and lights, your project can spiral into chaos really fast. Do yourself a favour and adopt a simple naming convention from the get-go (e.g., "Wall_Exterior_Brick," "Window_Frame_Main"). This makes it incredibly easy to find, select, and tweak specific elements without having to sift through an endless list of "Box001" and "Cylinder004." Learning how to do this well is key, and you can dive deeper with our detailed guide on /blog/how-to-render-in-sketchup for software-specific tips.
Gathering High-Quality References
Finally, your render will only ever be as believable as the real-world references you use to build it. Don't just google "brick wall" and grab the first image. Find pictures that show how that specific type of brick looks in different lighting conditions—direct sun, on an overcast day, at dusk. Look at how it weathers on the corners, and notice how the colour of the mortar totally changes the overall look.
Collect references for everything:
-
Materials: The specific grain of the wood for the deck, the texture of stained concrete, the sheen on roof tiles.
-
Lighting: The long shadows of a morning sun, the soft, diffused light of an overcast sky, the warm glow of golden hour.
-
Landscaping: The types of plants native to the project's real-world location, the different shades in a healthy lawn.
-
Atmosphere: Subtle touches like a hint of morning fog, a natural lens flare from the sun, or the specific colour of the sky at a certain time of day.
This reference-heavy approach has become an industry standard for a reason. Modern tools, often used with survey data from drones like those in The Ultimate 2025 Guide to 12 PIX4D Supported Drones, allow for unparalleled accuracy. This reliance on accurate, well-referenced visualisation is what allows artists to save everyone time and money by getting it right in 3D before a single brick is laid.
Bringing Surfaces to Life with Realistic Materials
Right, this is where the magic happens. Your clean, grey model is about to get a personality transplant and turn into a believable 3d rendering house exterior. We're not just slapping images onto surfaces here; we're getting into the nitty-gritty details that sell the illusion of reality. A great material tells a story—it has history, texture, and interacts with light just like the real thing.
The secret sauce for this is what we call a Physically Based Rendering (PBR) workflow. In plain English, it just means we're creating materials based on real-world physics. Instead of just guessing how shiny a surface should be, PBR uses specific data for things like roughness and reflection to mimic how light actually behaves.
This single approach is what separates an amateur render from a photorealistic one. It guarantees your materials will react consistently and believably under any light you throw at them, from the harsh midday sun to the soft glow of a sunset.
Crafting Believable Core Materials
Let's get practical. The key to convincing materials is adding subtle imperfections. Nothing in the real world is perfectly clean, perfectly flat, or perfectly uniform. This is your chance to layer in details that build up that sense of realism.
-
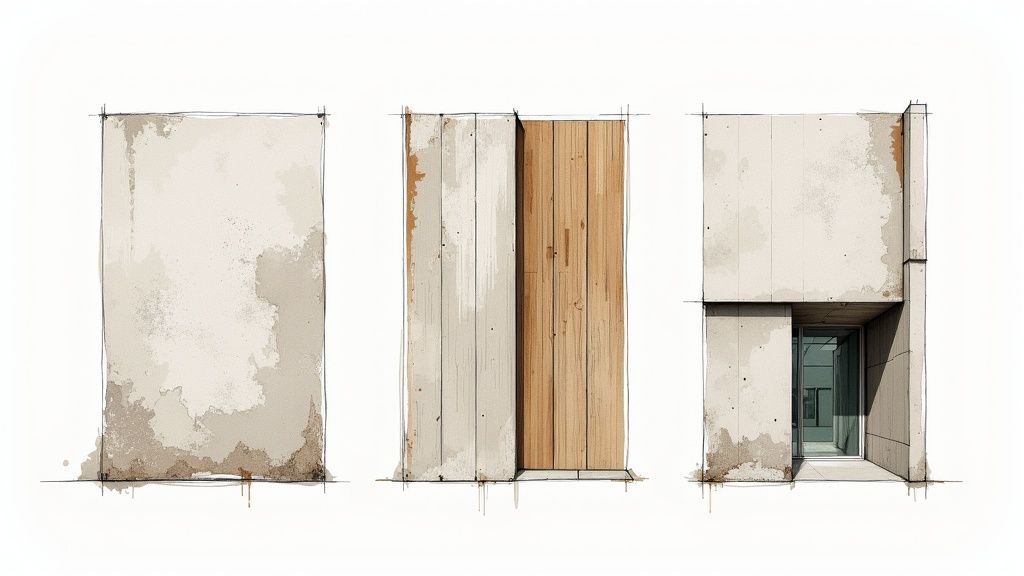
Concrete with Character: Don't just settle for a flat grey shader. Find a high-quality concrete texture and then layer a subtle grunge or dirt map over it, especially near the ground or under ledges where rain would naturally run down. A little discolouration or faint water stain can make a world of difference.
-
Glass That Reflects the World: The biggest rookie mistake with glass is making it perfectly clear and non-reflective. Real glass always has slight reflections and subtle distortions. Make sure your glass material is actually reflecting the sky and the environment around it. A very faint colour tint (like a hint of green or blue) also helps it feel much more authentic.
-
Wood with a History: For exterior wood like decking or cladding, think about how it's been exposed to the elements. Use a roughness map to make some areas slightly less shiny than others, faking a bit of wear and tear. A good bump map will add that subtle wood grain texture, making it feel like you could reach out and touch it.
These principles apply to pretty much any surface you’ll create. Whether you're working on exterior cladding or designing indoor spaces, the concepts of layering and imperfection are universal. To see how these same techniques work for interiors, check out our guide on 3ds Max for interior design.
Conquering UV Mapping and Tiling
One of the quickest ways to shout "this is a render!" is with repetitive texture tiling. You know the look—when a brick or wood texture repeats across a large wall, creating an obvious, unnatural pattern. Luckily, we have ways to fight this.
UV mapping is basically the process of telling your software how to wrap a 2D texture onto a 3D object. While it's easy for a simple box, complex architectural shapes can be a real headache. Most modern 3D software has tools like "triplanar mapping," which cleverly projects the texture from three directions at once, killing seams and stretching without you having to manually unwrap every little thing.
Another powerful trick is to use procedural textures. Instead of a fixed image, these are generated by a mathematical algorithm. This lets you create endless, non-repeating variations of materials like concrete, stone, or stucco. Many of us will mix image-based textures with procedural noise or grunge maps to break up that repetition and add some unique character.
The goal is controlled chaos. You want enough variation to feel natural, but not so much that it becomes a distraction. Subtle imperfections are what trick the eye into believing what it sees is real.
The Power of Displacement and Detail
To really push your 3d rendering house exterior into the big leagues, you have to think beyond flat surfaces. This is where displacement and weathering come in.
-
Displacement Maps: Bump maps are great for faking surface detail, but displacement maps actually alter the model's geometry when you hit render. This is how you get truly three-dimensional details like the rough profile of stone, the grout lines between bricks, or the coarse texture of stucco. It adds a level of depth and shadow-catching detail that a simple bump map just can't touch.
-
Dirt and Ambient Occlusion (AO) Maps: Think of these as your grime and contact shadow tools. An AO map darkens the little crevices where objects meet—like where a wall hits the ground—to simulate the soft, natural shadows you see in tight spaces. A dirt map works in a similar way, letting you add realistic weathering and grime buildup in those same nooks and crannies.
Layering all of these elements is what finally breathes life into your scene. It's the difference between a sterile 3D model and a picture that feels like a photograph of a real, lived-in home. Nailing these material details sets the stage for everything that comes next.
Mastering Light and Shadow for Ultimate Realism
Now that your materials are sorted, it’s time to tackle the one thing that truly brings a 3D rendering house exterior to life: light. Light is so much more than just making things visible. It’s what creates mood, carves out architectural details, and builds the depth that convinces our brains a 2D image is actually a 3D space.
Honestly, getting the lighting right is what separates a decent render from a jaw-dropping one. It’s the magic ingredient that transforms a sterile, computer-generated image into something that feels so real you could step right into it.
Sun and Sky vs HDRI Lighting
When it comes to daylight for exterior scenes, you've got two main choices: a built-in sun-and-sky system or an HDRI (High Dynamic Range Image). They're both incredibly powerful, but you'll use them for slightly different situations.
A sun-and-sky system is essentially a procedural tool. It gives you a sharp, direct light (the sun) and a simulated atmosphere (the sky). The big win here is control. You can punch in the exact time of day, date, and location to get total command over the angle and harshness of your shadows.
An HDRI, on the other hand, is all about image-based lighting. It's a 360-degree photograph that wraps around your entire scene, casting realistic light and reflections from every single angle. This approach is absolutely unbeatable for capturing the subtle colour shifts and complexity of a real sky.
So, how do you choose?
-
Sun-and-Sky: This is your go-to for those crisp, sunny days where you need sharp, well-defined shadows to really show off the building’s form. It’s also brilliant for things like shadow studies where you need to match a specific solar position.
-
HDRI: For pure realism, HDRIs are king. They excel in overcast scenes, complex sunsets, or any time you want the building's windows and metal surfaces to reflect a rich, detailed environment.
Choosing the Perfect HDRI
For most of my final beauty shots, I lean on HDRIs. They just inject an instant dose of authentic atmosphere that’s hard to replicate otherwise. But you can't just grab any old HDRI and call it a day; the image you select dictates the entire mood of your render.
Think about the story you're trying to tell with the image:
-
Crisp Morning: Find an HDRI with the sun low on the horizon, cool blue tones in the sky, and long, soft shadows.
-
Warm Golden Hour: These are the crowd-pleasers. HDRIs filled with rich orange and yellow light create that warm, inviting feeling clients absolutely love.
-
Dramatic Overcast Day: An overcast sky provides this beautiful, diffused light with incredibly soft, subtle shadows. It’s perfect for showing off material details without any harsh highlights or deep, black shadows.
A quick pro tip: Always rotate your HDRI! The position of the sun or the brightest spot in the image acts as your main light source. Just a slight rotation can completely shift the focus and dramatically improve your composition.
Adding Practical and Interior Lights
A dusk or evening shot lit only by the sky will feel cold and empty. To make your 3D rendering house exterior feel like a real, lived-in home, you absolutely have to add artificial lights. These are the small details that create a sense of life and warmth.
Start with the practical lights—the fixtures that would actually be there in real life. This means porch lights, pathway markers, and any landscape uplighting. Pay close attention to their colour temperature; a slightly warm, yellowish glow is almost always more convincing than a stark white light.
Next, you need to hint at life inside. You don't need to model full interiors. Often, just placing some simple, low-intensity area lights inside the windows is enough to give the impression of an occupied home. This tiny detail prevents windows from looking like black holes and adds a huge amount of realism to your evening scenes.
The demand for this level of detail is skyrocketing. In India, for example, the 3D rendering market is growing right alongside its massive real estate and construction industries. With revenue hitting USD 171.1 million in 2024 and forecast to blast past USD 1 billion by 2033, the pressure to produce top-tier, photorealistic house renderings is only getting more intense.
Balancing these different light sources is a delicate art, and your choice of software can make a massive difference. For a closer look at the tools that can help you nail it, check out our guide to the best architectural rendering software on the market today.
Framing Your Shot and Building the Scene
A technically perfect render means nothing if the shot itself is boring. This is the point where you stop being a 3D technician and start thinking like a photographer and a storyteller. We need to frame the shot, build a believable world around the house, and inject some life into the image.
Your render isn't just a dry representation of a 3D model. It’s a piece of communication. The whole point is to create something so inviting that a potential buyer can picture themselves walking right through the front door.

Think Like a Photographer
Before you even dream of placing trees or adding patio furniture, you have to lock in your camera angle. A powerful composition is what separates a good render from a great one—it guides the viewer’s eye and makes the whole image feel more dynamic. You don't need a degree in photography, but a few basic ideas will get you 90% of the way there.
The Rule of Thirds is a classic for a reason. Just imagine a 3x3 grid over your viewport. Instead of plonking the house right in the centre, try placing key features—like a prominent corner or the main entrance—along those lines or where they cross. It instantly creates a more balanced and professional-looking shot.
Also, keep an eye out for leading lines. Use a driveway, a garden path, or even a fence to naturally pull the viewer's gaze from the edge of the frame right towards the house. It's a simple trick, but it adds a surprising amount of depth and makes the composition feel deliberate.
Getting Your Camera Settings Just Right
Your virtual camera has settings just like a real one, and tweaking them is crucial for nailing the final look. The two big ones to focus on are focal length and depth of field.
-
Focal Length: This is your field of view. A super low focal length (like 18mm) gives you that wide, distorted "fisheye" look, which almost never works for architecture. On the other end, a high focal length (like 85mm) compresses the scene for a flatter, more refined feel. For most exterior shots, something between 24mm and 35mm is the sweet spot. It’s wide enough to show everything without making the building look weirdly stretched.
-
Depth of Field (DoF): This is that lovely effect where your subject is sharp, but the foreground or background is softly blurred. A little bit of DoF adds a massive dose of realism and helps the viewer focus on what matters. Try blurring some plants in the foreground or the trees in the distance to really make the house pop.
Here's a pro tip: getting the composition right at this stage saves a ridiculous amount of time later. Once you find an angle you love, lock that camera down. This way, you're only spending time detailing the parts of the scene that will actually be in the final shot.
Building a Living, Breathing Environment
With the camera set, it’s time for the fun part: building the world around the house. This is what truly sells the realism and stops your render from looking like a model floating in space.
To really understand how the house fits into its surroundings, it sometimes helps to zoom out and think about the entire property. We actually have a whole guide on creating a site plan rendering that dives deep into this.
Bringing in Nature
Start from the ground up. Use a scattering tool for believable 3D grass, not just a flat green texture. The key is imperfection—mix in different blade types, a few stray weeds, and maybe some clover to break up that perfect digital lawn.
Next come the trees, shrubs, and flowers. Always go for high-quality 3D models. The most important thing is to vary their scale and rotation slightly so it doesn't look like you just copy-pasted the same tree ten times. And please, choose plants that would actually grow in the project's real-world location!
Telling a Story with Small Details
Finally, it’s the little things that suggest someone actually lives here. A couple of chairs on the patio, a kid's bike leaning against the garage, a watering can next to a flowerbed—these details tell a quiet story and turn the house into a home.
Adding details like various outdoor lamps along a pathway isn't just about filling space; it's about building an atmosphere. These finishing touches are what elevate a render from a simple image to a compelling piece of art.
The Final Polish in Post-Production
Hitting the render button feels like the finish line, but it’s really just the start of the final, most crucial phase. This is where you transform a technically sound but often flat raw image into a polished piece of art. I've always found that this last 10% of effort makes 90% of the difference, elevating a good render into a truly standout 3d rendering house exterior.
We'll get into the settings that really matter, the magic of using render passes, and the artistic touches in post-production that pull everything together.
Dialling in Your Final Render Settings
Before you commit to that final, high-resolution render, a bit of smart setup can save you hours of waiting. The two things I always focus on are resolution and sampling.
For most client presentations these days, a resolution of 4K (around 3840 pixels wide) is the standard. It just ensures the image looks crisp on large displays and gives you the freedom to crop without losing any quality.
Sampling, or the noise threshold, is all about how clean your image looks. More samples mean a cleaner render, but also a longer wait. My go-to approach is to run a few quick test renders on a small section of the image. This helps me find that sweet spot where the noise is gone, but I'm not stuck waiting forever.
The Power of Render Passes
If you're not using render passes (or "render elements"), you're missing a trick. It's a total game-changer for post-production. Instead of getting one final image, your software spits out separate images for things like reflections, lighting, shadows, and ambient occlusion.
This gives you a massive amount of flexibility in a program like Photoshop. Are the reflections on the windows a bit too much? Just knock back the opacity of the reflection pass. Want to deepen the contact shadows under the eaves? Simply darken the ambient occlusion pass.
Think of render passes as the individual ingredients for your final image. By keeping them separate, you can adjust the flavour of each element in post-production without having to re-render the entire scene.
There's a reason this workflow is an industry standard. It grants you incredible control and saves countless hours you might otherwise spend re-rendering to fix tiny issues.
Colour Correction and Contrast Adjustments
Your raw render will almost always look a little flat. It's just the nature of the beast. The very first thing I do in post-production is bring it to life with some basic colour and contrast tweaks.
I usually start with a simple levels or curves adjustment to set my black and white points properly. This instantly punches up the contrast and makes the image pop. From there, I move on to colour balance. Maybe I want to cool down the shadows with a hint of blue or warm up the highlights to really sell that golden hour feel.
These are subtle changes, but they have a huge impact on the overall mood of the final image.
Enhancing Light and Adding Atmosphere
Now for the fun part—adding that final layer of artistic flair. One of my favourite tricks is to create a subtle glow around light sources. For an evening shot, adding a soft bloom around the porch lights can make them feel so much more natural and inviting.
Atmospheric effects are another powerful tool in the arsenal. Adding a very light haze or fog can create a wonderful sense of depth, which helps separate the building from its background. For a daytime shot, a carefully placed lens flare can add that final touch of photographic realism. It's these small details that trick the eye into believing it's looking at a real photograph.
This level of polish is becoming more and more important as the market gets competitive. For instance, many studios now work with teams in different regions to manage costs while maintaining quality. In India, 3D exterior house rendering services are known for offering significant cost advantages. A high-quality render might cost between USD 300 to USD 1,500, which is far less than the USD 2,500+ you might see in London or New York, all while leveraging a huge talent pool of skilled artists. You can explore more about these outsourcing dynamics on mrrendering.com.
The tools we use are also evolving to speed up this process. The rise of AI, for example, is making it faster than ever to generate variations and refine images. If you're curious about how this technology is changing our workflows, check out our guide on the possibilities of an AI render. It’s a fascinating look at where the industry is heading.
Got a Question About Exterior Rendering?
Even after you've got your workflow dialled in, a few questions always seem to come up, especially when you're in the thick of a project. Let's run through some of the ones I hear all the time from other artists and even from clients.
Think of this as a quick FAQ to clear up those little uncertainties that can sometimes bring a project to a grinding halt.
How Long Does a Single Exterior Render Really Take?
Ah, the classic "how long is a piece of string?" question. The honest answer is... it depends. The whole process is a balancing act between the complexity of the model, the level of realism you're aiming for, and, of course, the power of your machine.
For someone like me or a small studio, a single, high-quality hero shot usually breaks down something like this:
-
Modelling & Clean-up: This can be anywhere from 1-3 days. It all hinges on how good the architect's original plans are.
-
Materials & Scene Setup: I usually budget 1-2 days for getting all the materials right, setting up the lighting, and adding the landscaping.
-
The Actual Render: This is the big variable. It could be 30 minutes for a quick draft or 8+ hours for a final image on my local setup.
-
Post-Production Magic: A good 2-4 hours in Photoshop is pretty standard for those final, crucial adjustments.
So, all told, you're looking at a 3 to 6-day journey for one killer image. That's why having a solid, efficient workflow is everything.
What's the "Best" Software for Exteriors?
There's no magic bullet here; the "best" software is the one that works for you and your clients. In the pro world, most of us use a combination of a powerful 3D modelling tool and a dedicated rendering engine.
The usual suspects you'll find in most studios are:
-
For Modelling: You can't go wrong with industry workhorses like SketchUp, 3ds Max, Revit, Rhino, or ArchiCAD.
-
For Rendering: The big players are V-Ray, Corona Renderer, and Enscape. They're known for giving you incredible realism and control.
Honestly though, the real game-changer is anything that lets you iterate faster. Long render times are a creativity killer, and they make handling client feedback a total nightmare. This is where cloud rendering platforms and AI-powered tools are really shaking things up, turning those hours of waiting into minutes.
The best tool for the job is the one that helps you create top-tier work in the least amount of time. In this business, speed and quality are king.
Is it a Huge Pain to Change Materials or Lighting Later?
Not at all! In fact, this is one of the biggest reasons 3D rendering blows traditional photography out of the water for architectural projects. If a client suddenly decides they want to see that brick facade as stone, or swap a sunny day for a moody sunset, you can do it without having to start over.
With a well-organised project file, it's pretty straightforward. Swapping a brick material for a stone one can be a matter of minutes. Changing the time of day is often as simple as loading a different HDRI map and tweaking the camera's exposure. This kind of flexibility is precisely why a 3d rendering house exterior is such a potent tool for design and sales.
Ready to slash your rendering times and get client feedback turned around in a flash? Vibe3D uses AI to turn your detailed models into stunning, photorealistic visuals in seconds, not hours. Stop waiting and start creating by visiting https://vibe3d.ai to see how it can fit into your workflow.