Welcome to the ultimate guide for getting the most out of the SketchUp 3D Warehouse. If you've ever used SketchUp, you know this place. It's an absolute goldmine—a massive digital library packed with millions of free 3D models, from designer furniture to entire city blocks. It's the secret weapon designers use to bring their projects to life without modelling every single thing from scratch.
Unlock Millions of Free 3D Models
The SketchUp 3D Warehouse is, without a doubt, the world's biggest collection of free 3D models. For architects, interior designers, and even hobbyists, it’s an essential part of the toolkit. Why spend hours building a specific Eames chair or a potted plant when you can find a fantastic, ready-made version to drop right into your scene? It's a community-driven platform that can seriously speed up your design work.
But this guide is more than just a "how to search" tutorial. We're going to dive into a complete workflow that I use to get professional-level results every time.
-
We'll start with finding that perfect model—one that looks great but won't cripple your computer's performance.
-
Then, I'll show you how to clean it up properly to sidestep those frustrating rendering glitches.
-
Finally, we'll prep it so it's ready for some truly jaw-dropping, photorealistic renders.
This isn't just about downloading stuff. It's about mastering a process that saves you a ton of time and takes your designs from "pretty good" to "wow, how did you do that?"
As you can see, the interface is built for exploring. You can find everything from official, manufacturer-specific products to user-created models for just about any scenario you can dream up.
A Powerful Tool in Professional Workflows
The real magic of the Warehouse is how seamlessly it fits into professional design work, especially within the Building Information Modelling (BIM) world. Take India, for example, where SketchUp has a strong foothold. Around 40% of BIM users there rely on it for things like coordination and clash detection. Even though other big-name software might dominate the market, SketchUp's role in these specific tasks shows just how vital it is in the industry.
The ability to quickly populate a scene with entourage from the SketchUp Warehouse is a game-changer. It transforms an empty architectural space into a vibrant, lived-in environment that clients can instantly connect with.
Once you get the hang of using this resource, you can produce rich, detailed visuals much faster. That’s a huge advantage when you're trying to meet tight deadlines and blow your clients away.
While SketchUp is a beast, it’s always smart to know your options. It's worth checking out our guide on the best free 3D modeling software to see how it stacks up against the competition. At the end of the day, a well-chosen model is the foundation of any stunning render.
Alright, let's dive into the SketchUp 3D Warehouse. It's an incredible resource, but let's be honest—it can also feel like a digital jumble sale. With millions of models out there, the quality is all over the place. Finding that perfect, well-built asset without bogging down your project is the real skill.
The trick isn't just searching, it's about being strategic. You have to know what to look for and what red flags to avoid.
Pre-Flight Checks: Filtering for Quality
Before you even hit "search," get familiar with the advanced filter options. This is your first and best line of defence against messy, unusable models. Spending a few seconds here can save you hours of cleanup later.
Here’s what I always look at:
-
Polygon Count: This is the big one. More polygons can mean more detail, but they're also a massive drain on performance. As a rule of thumb, I aim for under 20,000 polygons for background props and entourage. For a main "hero" piece, like a detailed armchair, you can go higher, but always ask yourself if the detail is worth the performance hit.
-
File Size: Just like polygons, file size is a dead giveaway. If a model for a simple lamp is over 50MB, something is wrong. It usually means the geometry is a mess or it's packed with unnecessarily huge texture files. Steer clear.
-
Creator Reputation: Check who made the model. Does the creator have a good star rating? Lots of downloads? Verified brands and experienced creators tend to upload clean, optimised assets because their reputation is on the line.
Don't Download Blindly: The 3D Preview is Your Best Friend
Never, ever download a model without giving it a spin in the browser's 3D viewer first. This is a non-negotiable step. Orbit around the model, zoom in close, and look at how it’s built.
You're looking for clean lines and sensible geometry. If you spot weird, jagged edges, faces that seem to flicker as you move, or just a chaotic jumble of lines, just close the tab and find another one. A poorly made model will cost you far more time to fix than it's worth.
Pro Tip: Always click on the "Model Info" tab. It gives you the stats at a glance—polygons, materials, components. If a simple-looking vase has 200 different materials applied to it, you can bet it's a messy import that will wreak havoc on your material editor.
To make this process a bit quicker, I use a mental checklist every time I'm evaluating a model.
Quick Model Quality Checklist
Here's a quick rundown you can use to vet any model before it ever touches your project file.
| Check | What to Look For | Why It Matters |
|---|---|---|
| Polygon Count | Reasonable numbers for the object's complexity. | High poly counts will slow down your SketchUp viewport and increase render times dramatically. |
| Geometry | Clean lines, no strange artifacts, faces are properly oriented. | Messy geometry is a nightmare to clean up and can cause rendering errors. |
| Materials | A sensible number of materials. Check for logical naming. | Hundreds of unnamed materials on a simple object indicates a sloppy import and will clutter your project. |
| Components | The model should be grouped or componentised logically. | A model that's just a heap of raw geometry is much harder to edit and manipulate in your scene. |
| Creator | Is it a verified brand or a user with good ratings/many downloads? | Reputable creators are a much safer bet for finding clean, optimised, and reliable assets. |
Taking a moment to run through these checks will save you a world of pain down the line.
Use the Community to Your Advantage
Don't forget the social proof. A model with thousands of likes and a bunch of positive comments is almost always a good choice. Users are quick to point out if an asset is a performance hog or a dream to work with, so read the comments.
Another great trick is to search for collections rather than just individual models. Many pros and even brands (like Herman Miller or Kohler) curate fantastic collections of high-quality assets. This not only guarantees quality but also ensures you get stylistically consistent items.
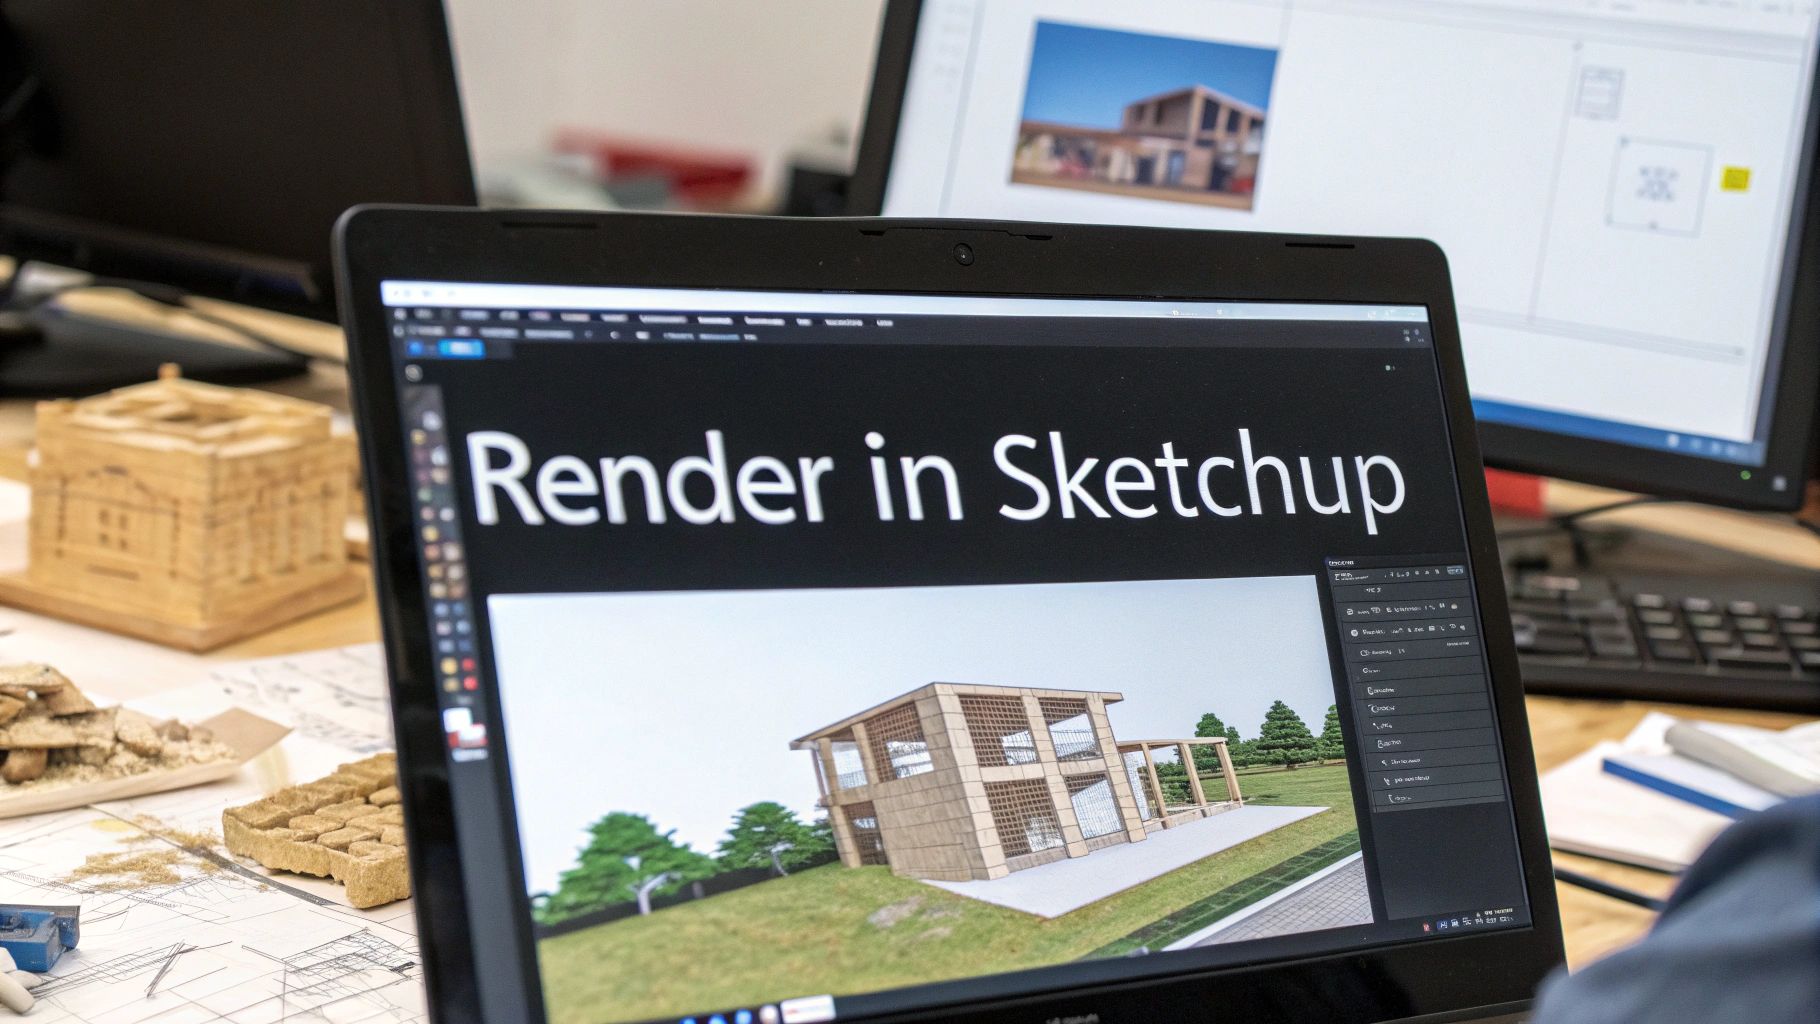
Nailing this selection process is foundational. When you start with clean, well-made models, every step that follows becomes infinitely smoother. Once your scene is assembled, you can focus on the fun part—learning how to render in SketchUp and creating stunning, photorealistic images.
The Essential Model Cleanup Process
So, you've found a promising model on the SketchUp Warehouse and dropped it into your project. Nice one. But this is where the real work starts—the part that genuinely separates a crisp, professional render from an amateur one. Almost every model you download will need some level of cleanup, and trust me, skipping this step is just asking for a headache later on.
Think of it like a chef prepping their ingredients. You wouldn't just toss unwashed veggies into a gourmet dish, right? It's the same idea here. We need to tidy up our 3D assets to make sure they perform well and look flawless when it's time to render.
The most common troublemakers in a messy model are way too much geometry, reversed faces that render all wrong, and a sea of unused materials and components that just bloat your file size. Taming this chaos is crucial for a smooth workflow.
Before you even get to the cleanup, the process of finding and checking a model is half the battle.
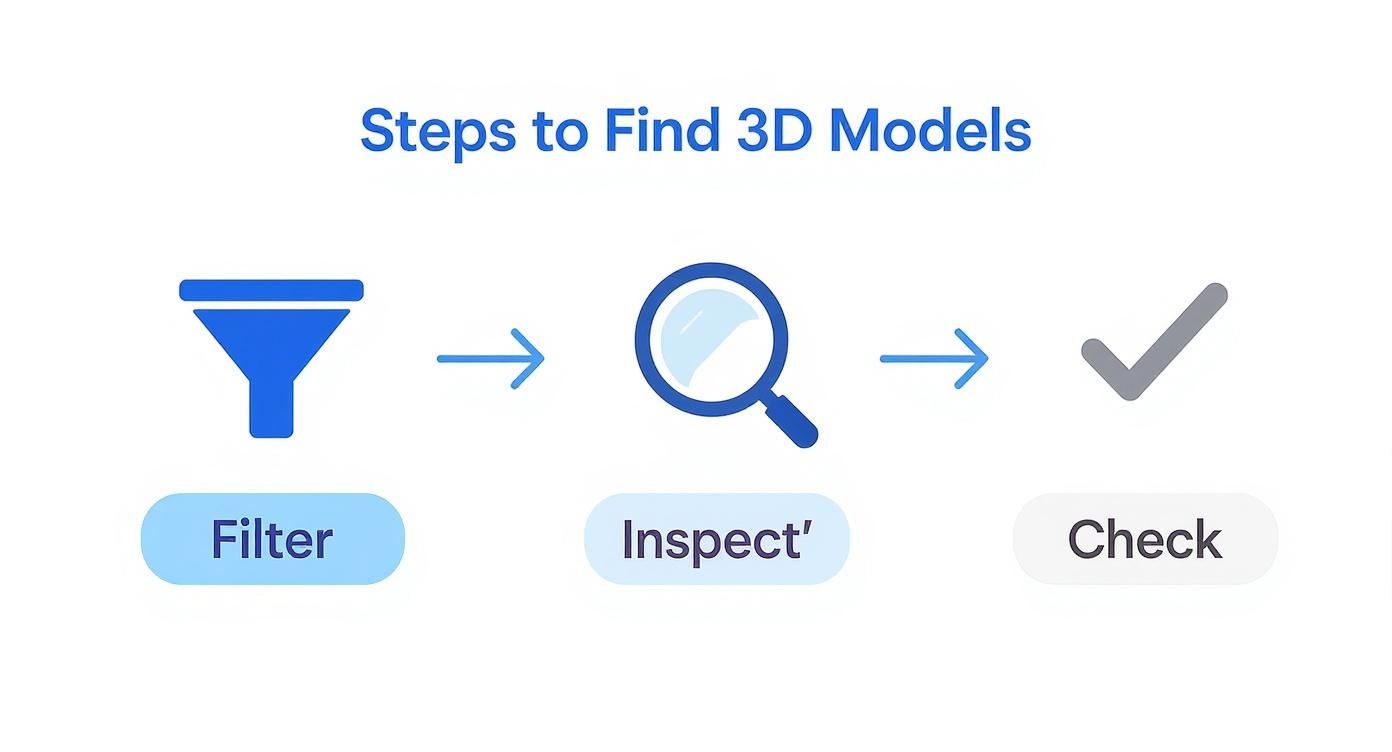
This workflow shows how important it is to filter, inspect, and check a model's quality before you download it. Getting this right from the start will save you a ton of cleanup time.
Taming the Geometry and Purging the Unused
Your first move after importing should always be a general purge. Head over to Window > Model Info > Statistics and hit that Purge Unused button. This one click is surprisingly powerful. It instantly gets rid of any components, materials, or styles that aren't actually in your model. You’ll often see your file size drop dramatically right away.
Next up, it’s time to deal with the geometry itself. Many models, especially complex things like plants or detailed furniture, come packed with unnecessary edges and faces. This is where a plugin like CleanUp³ is an absolute lifesaver. It automates jobs that would take ages to do by hand, like:
-
Merging coplanar faces to simplify surfaces.
-
Erasing stray edges and hidden geometry.
-
Removing duplicate faces that can cause weird rendering artefacts.
Running this plugin should be a standard part of your import routine. It doesn't just optimise the model; it makes it way easier to edit and add textures to later.
Structuring Your Model for Success
A clean model is also a well-organised one. A common problem with assets from the Warehouse is that they're often just a loose collection of raw geometry. It’s a complete nightmare to manage.
The golden rule is simple: everything should be a component or a group. Raw, ungrouped geometry has no place in a well-managed SketchUp file. It makes selections a pain, can lead to ‘sticky’ geometry, and generally complicates your whole scene.
Take a moment to organise the model into logical, nested groups. For instance, a chair model might have the legs as one group and the seat as another, all tucked inside a main "Chair" component. This structure is non-negotiable for efficient editing, especially when you need to swap materials or tweak things later.
This structured, user-friendly approach is a big reason why SketchUp is so popular in professional fields, including India's bustling AEC sector. It lets small and medium businesses get into powerful 3D workflows without the massive learning curve of other CAD software. With India's SaaS market projected to hit a USD 1 trillion valuation by 2030, accessible tools like SketchUp are set for even wider use. You can get more insights on SketchUp's market presence on enlyft.com.
Fixing Faces and Final Checks
Last but not least, you’ve got to check for reversed faces. In SketchUp, every face has a front (usually white) and a back (that default blue-grey shade). When faces are flipped, it can cause massive problems with materials and lighting in your render engine.
An easy way to spot them is to switch your view to the Monochrome style. Any blue-grey faces that should be white will stand out immediately. Just right-click on them and select Reverse Faces. If you have a model with loads of flipped faces, try right-clicking a correctly oriented face and choosing Orient Faces. SketchUp will do its best to fix all the connected geometry for you.
Getting this cleanup discipline down is fundamental. For a more detailed guide through the entire modelling and rendering process, check out our comprehensive tutorial on SketchUp that dives deeper into these concepts. Remember, a clean, organised model is the bedrock of any stunning, photorealistic render.
Optimizing Materials for Ultimate Realism

Alright, with our geometry all tidied up, it’s time to get to the fun part: the materials. Let’s be honest, a breathtaking render is almost all about believable materials, and this is exactly where most models from the Sketchup Warehouse completely fall flat. They often ship with low-res, lifeless textures that just won't fly for photorealism.
Think of it like this: a perfectly modelled armchair is still just a grey shape until you add the materials. It’s the subtle weave of the fabric, the specific grain of the wooden legs, and the way light gently reflects off the finish that actually tricks the eye into believing it's real. Our job is to swap out those default materials for high-quality ones that have genuine depth and character.
This means going way beyond a simple colour swatch or a basic JPEG. To really nail that realistic look, we need to be working with PBR (Physically Based Rendering) materials. These aren't just one image; they're a whole set of texture maps that tell your render engine precisely how a surface should react to light in the real world.
Sourcing and Replacing Low-Quality Textures
First things first, you need to play detective and hunt down any subpar textures. If the wood grain on a table looks blurry, or a fabric pattern has an obvious, repeating tile, it's got to go.
Luckily, we live in an age with incredible online resources. There are fantastic libraries where you can find professional-grade, seamless textures, many for free. I personally use websites like ambientCG and Poly Haven all the time; they have massive collections of PBR materials ready to download.
When you grab a PBR material, you'll usually get a zip file with several different images inside. Each one controls a specific aspect of the surface:
-
Diffuse/Albedo: This is your base colour and pattern—the raw look of the material.
-
Roughness/Glossiness: This one is huge. It dictates how sharp or scattered the reflections are. Think about the difference between rough concrete (high roughness) and polished chrome (very glossy).
-
Normal/Bump: This map creates the illusion of fine surface details, like bumps and grooves, without adding any extra polygons. It's what makes a brick wall look rough or a wood grain feel indented.
-
Displacement: For more dramatic effects, this map actually pushes and pulls the geometry at render time. It's perfect for things like cobblestones or deeply textured surfaces.
The core of this whole process is replacing the single, flat texture map from the original SketchUp model with this full set of PBR maps. You'll do this inside your rendering software's material editor. This single change is what separates an amateur-looking render from a truly convincing, professional image.
Dialling in Material Properties for Realism
Once you've loaded up your shiny new PBR maps, the real artistry begins. Now you get to tweak the settings to perfectly mimic how that material behaves in the real world. A classic rookie mistake is leaving reflection values on their default settings, which often makes everything look like it's been shrink-wrapped in plastic.
Let's walk through a real-world example, say, a wooden coffee table from the Warehouse.
-
Start with the Diffuse map: Apply your high-resolution, seamless wood texture. The most important thing here is to get the scale right. You want the grain to look natural for the size of the table, not like it belongs on a giant redwood or a doll's house chair.
-
Plug in the Roughness map: This is absolutely critical for wood. A good roughness map will have subtle variations, making some spots a tiny bit shinier than others, just like a real varnished or oiled surface.
-
Apply the Normal map: This adds that final touch of realism. The normal map will give the wood grain a subtle physical depth, making it look like you could run your hand over it and feel the texture.
Many of these material principles are universal across different software. For more tips, check out our guide on creating stunning realism in 3ds Max interior design—the core concepts are very similar.
It's also worth noting that textures are image files, and big ones can slow things down. Learning how to optimize images for web performance can teach you principles that are also useful for managing 3D textures. Over time, you'll build your own library of go-to materials, which will massively speed up your workflow and help you turn basic assets from the Sketchup Warehouse into render-ready heroes for every project.
Getting Your Scene Ready for Vibe3D
https://www.youtube.com/embed/ijCapvy2gjE
Right, so you've got a clean, organised model and your materials are looking spot-on. This is where the magic really starts to happen. All that prep work you did is about to pay off as we set the stage for a knockout render. The final leg of the journey is all about composing the scene—dialling in the lighting, finding the perfect camera angles, and doing one last check before you export.
We're moving beyond just showing off a model; we're trying to tell a story. A great scene composition guides the eye, sets a mood, and puts the best features of your design in the spotlight. It all comes down to how light and shadow play across those materials you've just spent time perfecting.
Let There Be Light (and Shadow)
Before you even dream of hitting that render button, you need to sort out your lighting. Honestly, SketchUp's built-in shadow tools are brilliant for this first pass. Just start playing with the time of day and year to see how natural light floods—or trickles—into your space. I'm always on the lookout for ways to create interesting patterns and highlights.
-
Go for a bit of drama: Tweak the sun's position to get some long, soft shadows. This is the secret to adding depth and stopping your render from looking flat and washed out, a dead giveaway of an amateur job.
-
Show off the good stuff: Use a beam of light to draw attention to a feature wall with that cool texture you found, or maybe that one hero piece of furniture you snagged from the 3D Warehouse.
-
Hunt down light leaks: As you're setting things up, make sure to orbit around your model. You're looking for any weird light bleeds coming through gaps in your geometry. They can totally ruin an otherwise perfect render.
This part of the process is less about technical tweaking and more about your artistic eye. A well-lit scene just feels more real and pulls you in.
Finding That Perfect Angle
Your camera angle is just as crucial as the lighting. A wonky angle can make a stunning room feel awkward and cramped. My advice? Start thinking like a photographer.
Grab SketchUp’s Position Camera tool and set your viewpoint at a natural eye level—I usually aim for somewhere between 1.5 to 1.7 metres. This simple trick makes the perspective instantly feel more relatable. Try to frame your shot using classic composition techniques, like the rule of thirds, to get a balanced and pleasing image.
Here's a pro tip: Before you export, do one final, paranoid sweep for any floating objects or bits of geometry poking through each other. You'd be amazed how often a tiny, hovering plant pot or a chair leg sinking into the floor can completely shatter the illusion.
Getting this prep work right is becoming more important than ever. The whole industry is moving this way. Just look at India, where the 3D CAD software market was valued at around USD 512 million in 2024 and is projected to more than double by 2033. It’s a clear sign of how much design and construction are going digital. You can read more about India's expanding 3D software market to see the trend.
Once you’re happy that the scene is perfectly lit and beautifully composed, it’s time to export. The goal is a smooth, painless process to get your model into a dedicated rendering tool. To turn your SketchUp models into photorealistic images without the headache, check out the AI-powered workflow at Vibe3D. It’s built to make sure all your hard work pays off in the final render.
Answering Your Top SketchUp Warehouse Questions
Let's be honest, diving into the SketchUp Warehouse can feel like a bit of a treasure hunt. Sometimes you strike gold, and other times... not so much. If you've ever found yourself wondering about the nitty-gritty details, you're not alone. I've pulled together answers to some of the most common questions I hear from other designers.
A big one is always about usage rights. The burning question: can you actually use these models for client work? For the most part, the answer is a relieving 'yes'. The general license for most models on the Warehouse allows for commercial use. That said, it never hurts to be cautious. I always recommend taking a quick peek at the model's details page just to be sure the creator hasn't specified any unique restrictions.
Should I Go for Low-Poly or High-Poly Models?
This is a classic trap I see people fall into all the time. You see a beautifully detailed model and your first instinct is to download it immediately. But hold on a second. For anything that isn't the star of your scene—think background clutter, plants, and other entourage—always, always go for low-poly models. Trust me, your computer will thank you.
Heavy, high-poly assets will make your SketchUp viewport grind to a halt and can add hours to your render times. Save those detailed, high-polygon models for the hero pieces that will be in the spotlight, like a beautiful feature chair or an intricate pendant light. As a personal rule of thumb, I try to keep any background stuff under 20,000 polygons.
I once saw a project file that was impossibly slow. The culprit? A single, ridiculously detailed tree model in the background that had more polygons than the entire building. It was crippling performance for a detail that was barely even visible in the final render.
Can I Trust Models from Big Brands?
You've probably seen models from big names like Herman Miller or Kohler and wondered if they're any good. Generally, these are your safest bet. Manufacturers want their products to look fantastic in your designs, so they usually put in the effort to create models that are well-built, correctly scaled, and properly optimised.
Using official brand models is a win-win. You get a quality asset, and it adds a touch of realism to your project that clients really notice. Even so, I still give them a quick once-over before dropping them into a major project.
Here's my quick 30-second check:
-
Give it a spin: I'll check out the geometry in the 3D preview to look for any obvious weirdness.
-
Check the structure: Is it grouped logically, or is it a chaotic mess of loose geometry?
-
Look at the materials: Are the materials named sensibly, or is it a list of "Material1," "Material2," etc.?
Making these little checks a habit will save you a world of headaches down the road and ensure you're building your scenes on a solid foundation of quality assets.
Ready to turn those perfectly prepped SketchUp scenes into stunning, photorealistic visuals? Vibe3D can take you from model to masterpiece in seconds. Our AI-powered platform makes high-end rendering ridiculously fast and easy. Start rendering with Vibe3D today.