For years, designers have loved SketchUp for its intuitive 3D modelling. But let's be honest, getting those models to look photorealistic has often been a real headache. It meant wrestling with complicated rendering software sketchup plugins, navigating steep learning curves, and enduring painfully long render times.
This traditional route usually demanded a beast of a computer, putting it out of reach for many smaller firms and solo designers. Thankfully, a new AI-driven approach is turning this whole process on its head.
Why Traditional SketchUp Rendering Is Being Reimagined
SketchUp’s genius has always been its simplicity for creating 3D geometry. The problem arises when you need to turn that clean model into a jaw-dropping, client-ready image. That’s historically been a separate, and often frustrating, battle.
The old workflow meant getting bogged down in a sea of technical settings for lighting, materials, and textures within various plugins. I've seen countless designers spend more time tweaking render parameters than actually designing. This technical overhead doesn’t just blow up project timelines; it kills the creative freedom to quickly iterate and explore new ideas.
The Shift to a Smarter Workflow
This is where AI-powered solutions like Vibe3D come in. They’re built to tackle these exact pain points. Instead of forcing you to become a rendering guru, these tools automate the most gruelling parts of the visualisation process. This change is making high-end rendering accessible to anyone, regardless of technical skill or the specs of their computer.
What this really does is level the playing field. Smaller studios can now produce visuals that are just as stunning as those from larger firms, but without the massive investment in hardware and specialised training. The need for this kind of efficiency is clear, especially when you see how popular SketchUp has become globally. For example, over 1,100 companies in India now use SketchUp for architecture and design, a market that thrives on simple and affordable solutions.
The core idea is to decouple modelling from rendering. You build your vision in SketchUp, then let an intelligent system handle the heavy lifting of making it look real.
The modern workflow we'll break down in this guide is refreshingly simple:
-
Export Scenes from SketchUp: Finalize your camera angles for an interior or exterior project in SketchUp and export each scene you want to render.
-
Upload to Vibe3D: Log into vibe3d.ai, create a new project, and upload all your exported scenes.
-
Set the Scene: For each scene, select different rendering settings like time of day, lighting, flooring, and other key elements.
-
Refine with Edits: Use the "Edit Render" feature on each scene to change specific colors or materials to explore variations.
-
Download in High Quality: Choose the best versions of each scene and download them in ultra-realistic quality for your presentation.
This approach transforms rendering from a technical chore into a fluid, creative part of the design process. To see how different tools stack up, have a look at our detailed comparison of top-tier architectural rendering software.
Getting Your SketchUp Model Ready for AI Rendering
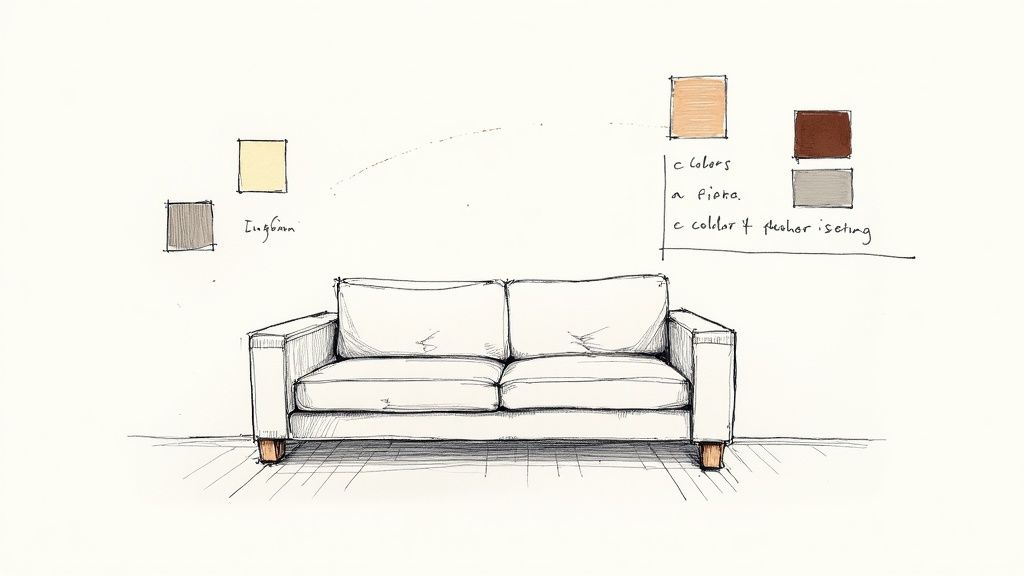
A jaw-dropping AI render doesn't just magically appear. It all starts back in your SketchUp file. The first and most crucial step is preparing your model for the Vibe3D AI workflow. A little prep work here saves a ton of headaches down the line.
The absolute first thing you should do is lock in your camera angles. Use SketchUp’s built-in Scenes feature to save every single viewpoint you plan on rendering for your interior or exterior project. Think of each scene as a photograph you've already composed. This guarantees the framing and perspective are exactly what you want before you begin the rendering process.
A Clean Model Means a Clean Render
Clean geometry is everything. While AI is brilliant with materials and light, it can only work with the shapes you provide. Weird artefacts like overlapping faces or random stray lines can throw it for a loop and give you some bizarre results. Spending a few minutes cleaning things up is always worth it.
To keep your sanity and make life easier, get organised:
-
Layers (Tags): I can't stress this enough. Put different categories of objects on their own tags—furniture, walls, glazing, vegetation, you name it. This lets you easily hide or isolate parts of your model when you need to focus.
-
Groups and Components: Make friends with groups and components. Grouping related objects just keeps the file tidy. Using components for anything that repeats (think chairs, windows, or light fixtures) shrinks your file size and makes global edits a breeze.
The secret here isn't to build a model with flawless, render-ready materials directly in SketchUp. Your real goal is to create a clean, well-structured geometric foundation. The AI is going to do all the heavy lifting on the photorealism later.
Exporting Your Scenes for Vibe3D
Once your scenes are saved and your model is organised, moving over to Vibe3D is dead simple. The key is to export each of your saved SketchUp scenes as a separate 2D image. I know, it sounds a bit strange, but it’s the most direct way to feed this particular AI workflow. We dive deeper into the basics in our guide on how to render in SketchUp.
When you export as a JPEG or PNG, you're essentially "baking in" your camera angle, field of view, and composition for that specific shot. This set of images is what you'll upload directly to Vibe3D. This simple step is the bridge from your 3D workspace to the AI rendering engine, perfectly setting the stage for the creative magic to happen.
Bringing Your Scenes to Life with Vibe3D AI
Alright, you've done the groundwork in SketchUp. Your scenes are prepped, exported, and ready to go. Now for the fun part—turning that clean geometry into something that looks and feels real. This is where a tool like Vibe3D AI comes in, letting you bypass the steep learning curve and technical headaches that often come with traditional rendering software SketchUp plugins.
The first step is simple: log in to your vibe3d.ai account and create a new project. Think of this as a digital folder for a specific design. Next, you'll upload all the scenes you just exported from your SketchUp model.
Vibe3D AI is one of the best AI content creation tools because it's built to interpret these 2D exports and intelligently construct a stunning 3D visualisation from them. No complex geometry imports are needed.
Defining the Atmosphere for Each Scene
Once your scenes are uploaded, you get to treat each one as its own mini-project. This flexibility is a game-changer. For each uploaded scene, you can select different rendering settings to create a variety of moods and styles.
This isn't about fiddling with dozens of sliders. It's done with straightforward, intuitive choices:
-
Time of Day: Pick from moods like 'Afternoon', 'Golden Hour', or 'Night'.
-
Lighting Style: Choose a preset that matches the interior lighting vibe you're after.
-
Flooring Material: Quickly establish a base with something like 'light oak' or 'polished concrete'.
By mixing and matching these settings for each camera angle, you’re not just making a single render; you’re telling a story. You can show a client how a space transforms throughout the day, giving them a much deeper appreciation for your design.
The diagram below recaps the simple preparation workflow you’ve just completed in SketchUp, which is the foundation for this whole process.
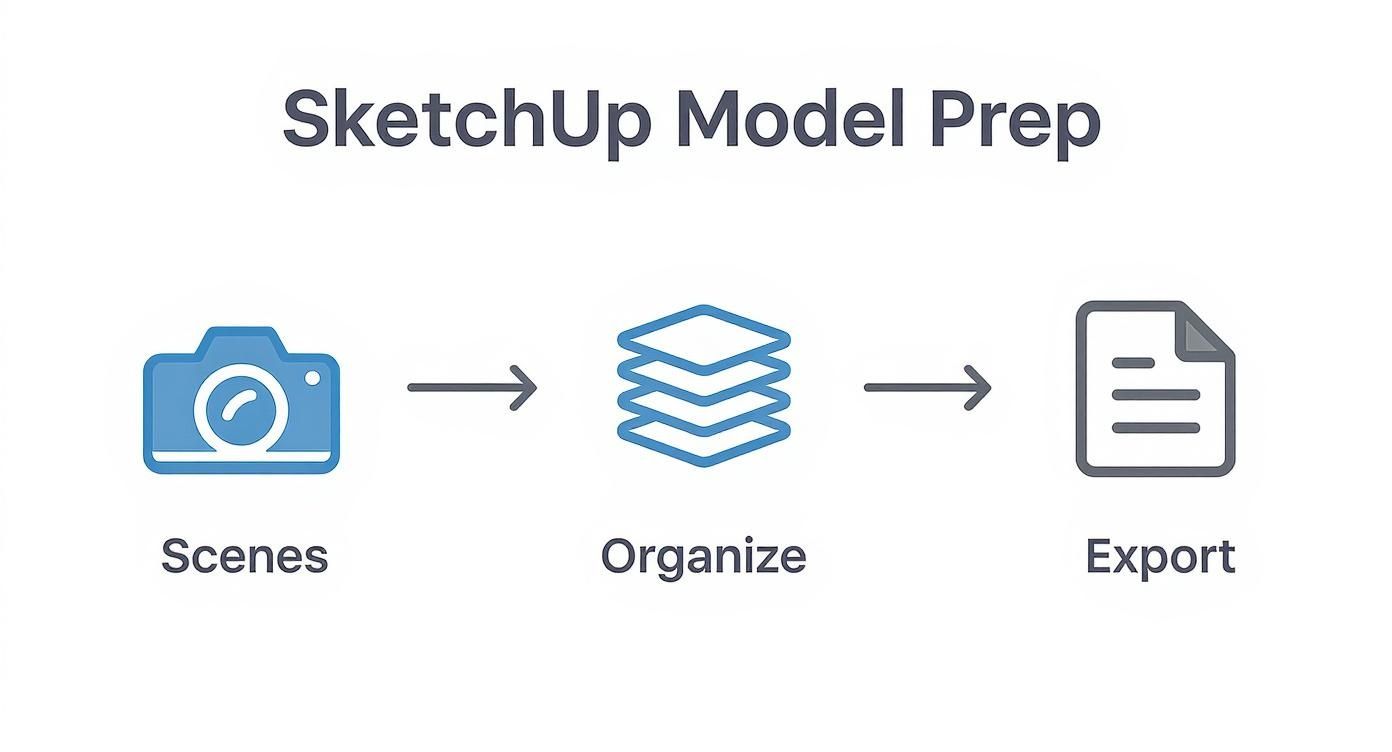
Getting this part right—setting scenes, organising your model, and exporting clean images—is what makes the AI rendering stage so fast and effective.
To help you get started, here's a quick guide to pairing Vibe3D's settings with the mood you want to create.
Key Vibe3D AI Settings for Different Moods
| Desired Mood | Recommended Time of Day | Suggested Lighting Style | Example Use Case |
|---|---|---|---|
| Bright & Airy | Afternoon | Natural Daylight | A minimalist living room with large windows. |
| Warm & Cosy | Golden Hour / Night | Warm Interior Lights | A bedroom or snug designed for relaxation. |
| Dramatic & Moody | Twilight / Night | Accent & Spot Lighting | A high-end kitchen or a sophisticated study. |
| Crisp & Modern | Morning / Overcast | Cool Ambient Light | A contemporary office space or a sleek bathroom. |
This table is just a starting point. After generating the initial render for each scene, you'll use the "Edit Render" feature to refine your vision.
Iterating and Refining with AI Edits
After Vibe3D generates the first pass, the "Edit Render" feature is where the real design exploration begins. This allows you to make significant changes to colors or materials without ever needing to go back and open SketchUp.
Picture this: your client loves the layout, but they’re not sold on the dark blue feature wall. Instead of a lengthy process of remodelling, re-texturing, and re-rendering, you just select the wall in the image and type, "change wall to a warm, off-white colour." The AI gets it, and you have a new version in seconds. You can see more on how this is changing the game in our guide to /blog/ai-for-interior-design.
This rapid feedback loop is what makes working with Vibe3D so different. Rendering is no longer a final, static step but a dynamic part of the conversation with your client.
You can spin up dozens of variations for every scene. Experiment with materials, colours, and decor. Swap the wooden floor for marble, change the sofa from cotton to velvet, or add a piece of art to the wall. Once you have a collection you’re happy with, you can compare them all side-by-side and prepare to download the winners.
Refining Your Vision with AI-Powered Edits
Your first render is almost never the final one. The real magic in today's rendering software sketchup workflow isn't just getting that first image, but how incredibly fast you can react to feedback. For each scene you’ve generated, the Vibe3D "Edit Render" functionality becomes your primary design tool.
This feature lets you make lightning-fast changes to materials and finishes without ever needing to go back into your original SketchUp file. It completely cuts out the tedious, old-school cycle of tweaking the model, re-exporting it, and waiting for a new render to cook. That process used to eat up hours, sometimes even days, on a project.
Making Changes with Simple Instructions
Let's say your client is thrilled with the layout of a room but is getting cold feet about the finishes. They might ask, "I wonder what that sofa would look like in a dark leather instead of this fabric?" or "Can we just see that feature wall in a sage green?" With a traditional workflow, each of those "justs" kicks off a whole new chunk of work.
With Vibe3D's editing tools, it’s more like having a conversation. You just select an area of the rendered image and tell the AI what you want to change, using plain English.
This back-and-forth turns rendering from a static, final step into a live, interactive design session. It's all about exploring possibilities on the fly, right there within the photorealistic image.
Take a single kitchen scene. In just a few minutes, you could create a whole set of compelling alternatives to show your client.
-
Select the countertops and type: "Change to white marble with grey veining."
-
Click on the cabinet fronts and prompt: "Make these a dark, navy blue matte finish."
-
Highlight the backsplash and simply ask: "Apply small, hexagonal ceramic tiles."
This kind of speed is a massive advantage, especially in fast-moving markets. For instance, the growing use of SketchUp in India is largely driven by small and medium-sized architecture and construction firms that need to be nimble and collaborative. It’s no surprise that the market for rendering and simulation software in the region is expected to grow at a CAGR of about 17% through 2030. This speed-to-market is exactly what these firms need.
Finalising and Downloading the Best Versions
Once you’ve used the edit feature to generate different materials and colors for each scene, you’ll have a whole gallery of high-quality options. Now it’s time to curate your presentation. Vibe3D lets you compare these versions side-by-side, making it easy to pick out the strongest looks that nail your client’s brief.
Finally, download the best versions of each scene. The platform provides ultra-realistic images, making sure every crisp detail and subtle lighting effect is perfectly preserved. This high-quality output is ready to go straight into a client presentation, a marketing brochure, or your online portfolio. The entire workflow shows what’s possible when you let AI render your designs. You'll get approvals faster and find yourself with more time to focus on creative design instead of getting bogged down in technical tasks.
Downloading and Presenting Your Final Renders
After iterating through different colors, materials, and lighting using the "Edit Render" feature, you've curated a collection of stunning visuals for each scene. The final step is to download the best versions and prepare them for your client. This is where your design choices and hard work crystallise, turning your SketchUp model into a visual story that sells the project.
One of the best parts about using a tool like Vibe3D is the ability to see all your variations side-by-side. Before you even think about downloading, you can compare every version of a scene to cherry-pick the absolute best options—the ones that truly nail the project's vision.
Choosing the Right Output
Once you've zeroed in on the winning renders for each scene, downloading them is simple. Vibe3D lets you download in ultra-realistic quality, ensuring the final images are crisp, clean, and ready for any professional use case. You can select different resolutions and formats based on where the images will live.
Here are a few common scenarios I run into:
-
Digital Portfolios & Websites: A high-quality JPEG is usually your best bet. It looks great online without bogging down your site's loading speed.
-
Client Presentations: For showing work on a screen, you can't go wrong with a sharp 2K or 4K resolution. Every little detail will pop.
-
Print Materials: If you're designing brochures or large-scale prints, you absolutely need a high-resolution PNG or TIFF file to prevent any pixelation.
This need for efficient, high-quality output is only growing. In India, for instance, the CAD software market, which includes tools like rendering software SketchUp, was valued at around USD 617.6 million in 2023 and is expected to climb. That growth points directly to a huge demand for better 3D modelling and rendering workflows. You can dig into more details on the Indian CAD market over at psmarketresearch.com.
Presenting Your Work with Impact
The images you’ve created do more than just show a design; they tell a story. So, don't just email a single, final render and call it a day. Use the variations you generated to your advantage. Showing a client a couple of different material finishes or lighting scenarios for the same scene proves you’ve been thorough and gives them a stake in the final outcome. We cover more on this in our guide to 3D rendering online.
The goal is to move beyond a simple "here's the render" presentation. Instead, you're guiding your client through a visual journey, showing them the full potential of their space.
When you've got your renders just right, think about creating engaging tutorials to walk clients or your team through your process. It’s a brilliant way to communicate your design thinking and build your professional brand at the same time. This approach ensures all your hard work makes a real impact, helping you get approvals faster and win that next big project.
Got Questions About Vibe3D and SketchUp?
Whenever you're thinking about adding a new tool to your workflow, especially one that uses A.I., a few questions always pop up. It's only natural. Getting straight answers is the best way to dive in with confidence and really make the most of what this new approach has to offer.
Let's walk through some of the most common things designers ask when they start using Vibe3D as their go-to rendering solution for SketchUp.
"Do I need a beast of a computer to use Vibe3D A.I.?"
Nope, not at all. And honestly, this is probably one of the biggest perks of using a cloud-based renderer. All the heavy lifting—the stuff that usually makes your computer sound like it's about to take off—happens on Vibe3D's servers, not your local machine.
Your computer only needs enough juice to run SketchUp itself and export your scenes as simple images. This completely sidesteps the never-ending, expensive cycle of hardware upgrades. You can create incredible, photorealistic visuals without needing a top-of-the-line graphics card or the latest processor. It levels the playing field, making high-end rendering a real possibility on almost any setup.
"How much detail should I be putting into my SketchUp model?"
This is a fantastic question because it really gets to the core of why this workflow is so efficient. In SketchUp, your job is to focus on what it does best: creating clean geometry, establishing solid forms, and framing compelling camera angles with the Scenes feature. Forget about spending hours painting on detailed textures or wrestling with complex lighting setups inside your model.
Think of it this way: your SketchUp model is the architectural blueprint. It defines the structure, composition, and layout. Vibe3D’s A.I. then acts as the expert interior stylist and photographer, generating the photorealistic materials, lighting, and atmosphere from your simple text prompts.
Just give it a clean foundation, and let the A.I. handle the artistry.
"Can I render exteriors just as easily as interiors?"
Absolutely. The process is pretty much identical. You'll set up and export your exterior scenes from the SketchUp model just like you would for an interior space. Once you upload those views to Vibe3D, you can start playing with a whole range of settings built specifically for outdoor environments.
You can instantly transform the entire mood of your architectural visualisation. Want to see what it looks like in different conditions? No problem.
-
Try golden hour sunlight for those long, dramatic shadows.
-
Go for a bright, clear afternoon to get crisp, clean lighting.
-
Select an overcast day for soft, diffused light that really shows off the building's form.
The A.I. has been trained to beautifully handle natural elements like skies, atmospheric effects, vegetation, and realistic shadows. This means you can create stunning exterior shots with the same speed and ease as your interiors.
"Just how accurate are the A.I.-generated materials?"
Vibe3D's A.I. is remarkably good at interpreting material prompts. When you type in 'light oak wood flooring' or 'emerald green velvet', it generates textures, reflections, and surface details that look incredibly realistic under the specific lighting conditions of your scene.
Now, will it be a perfect 1-to-1 match for a physical sample from a specific supplier? Not quite. But what it delivers is an exceptionally believable representation that is more than convincing for communicating your design intent. It's perfect for exploring different material palettes on the fly and getting that all-important client buy-in much faster than you could with traditional rendering. The goal here is to nail the vibe and the aesthetic, and it does that brilliantly.
Ready to see what your SketchUp models are truly capable of? Take Vibe3D for a spin and turn your designs into stunning, photorealistic renders in seconds. You can create your free account and start rendering right now.