In the world of interior design, a sketch or a mood board can only take you so far. To truly bring a complex vision to life and get everyone on the same page, you need something more. High-quality interior design 3d rendering has become that essential bridge, closing the gap between your creative concept and your client's understanding. It’s the tool that cuts through the guesswork and gets projects approved, faster.
Why High-Quality Renders Are No Longer Optional
Let's be clear: photorealistic visuals aren't just a nice-to-have anymore; they're a core part of any serious design workflow. Think of them as indispensable tools for communication, marketing, and even managing the project itself. Designers who get this right have a serious competitive advantage, presenting their work with a level of clarity and polish that sets them apart.
The real magic is how a render translates an abstract idea into something tangible, something a client can feel. They might struggle to imagine how a certain fabric will catch the light or how a new layout will affect the flow of a room just by looking at a 2D drawing. A detailed 3D render, on the other hand, lets them step inside the space. It ensures everyone is aligned on the vision long before a single wall is painted.
Sidestep Costly Revisions and Misunderstandings
From a practical standpoint, one of the biggest wins of using detailed 3D renders is the massive reduction in expensive do-overs. When clients can see exactly how a marble finish will look next to the cabinetry, potential problems get flagged and fixed in the digital stage—not after the materials are ordered and installed. It’s a proactive approach that saves time, money, and frankly, a lot of headaches.
A great render is really a form of project insurance. It confirms every little decision with the client, building their confidence and slashing the risk of those dreaded "I thought it would look different" conversations later on.
Build a Killer Portfolio and Marketing Machine
Beyond client presentations, high-quality rendering is a powerful engine for your business. A portfolio packed with stunning, lifelike images immediately signals a high level of professionalism and skill. It's what attracts discerning clients who expect a polished, compelling presentation from the get-go.
These visuals are your best marketing assets, perfect for:
-
Website Galleries: Putting your best foot forward for anyone discovering your work.
-
Social Media: Creating scroll-stopping content that captures attention.
-
Proposals and Pitches: Showing potential clients you can deliver on their vision before they even sign.
A Modern Workflow That Actually Works
The good news is that creating a professional interior design 3d rendering isn't the daunting task it once was. Today’s workflows often blend the detailed modelling of powerhouse programs like SketchUp or 3ds Max with the blistering speed of new AI-driven renderers like Vibe3D.
This hybrid approach means designers can produce incredible visuals without the steep learning curves or overnight render times that used to be the norm. It’s never been easier to make this essential skill a part of your everyday practice.
Building a Flawless Foundation for Your 3D Scene
Every jaw-dropping render you’ve ever seen started with a surprisingly simple first step: a clean, meticulously organised 3D scene. This isn't the most glamorous part of the process, but getting it right is the secret to preventing future headaches. Think of it as preparing your digital canvas before you even think about paint—the effort you put in now will pay off tenfold down the line.
A messy scene, cluttered with overly complex models and no logical structure, is a one-way ticket to slow performance, painful revisions, and agonizingly long render times. It's the digital equivalent of trying to build a house on a shaky foundation.
This whole journey, from a raw idea to a final, stunning visual, is really about bridging that gap between your vision and the client's reality.
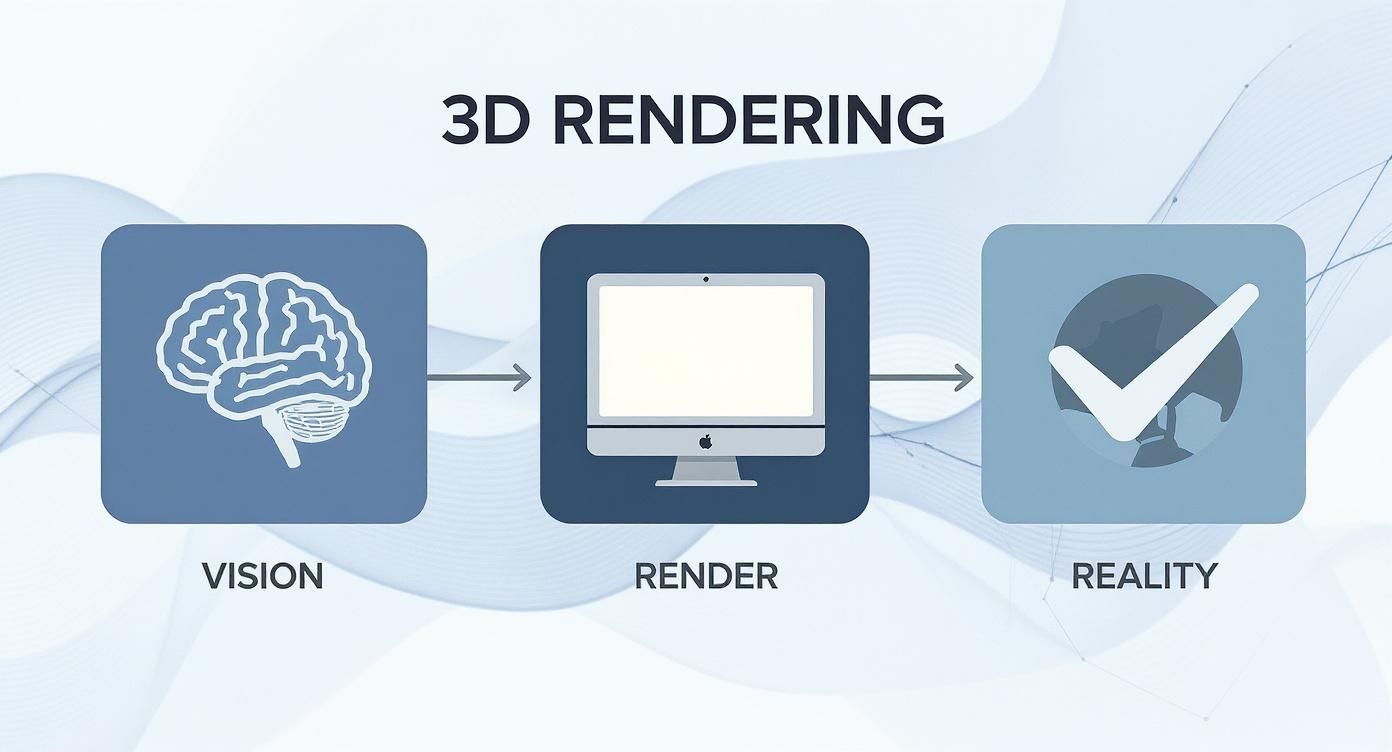
The 'Render' stage is just the technical bridge. The real strength comes from how well you prepared that initial scene.
Master Your Models and Geometry
First things first, you need to tame your 3D models. It doesn't matter if you built them from scratch or grabbed them from an asset library—they often arrive with ridiculously high polygon counts. These are the silent performance killers in any scene.
Your mission is to simplify the geometry without losing any noticeable detail. For example, a decorative cushion with millions of polygons for tiny fabric threads is complete overkill for a wide shot of a living room. Jump into your software’s optimisation tools and start reducing polygon counts on anything that isn’t a hero object right in front of the camera. It’s one of the easiest ways to keep your project feeling light and responsive.
Grouping is your other best friend here. Instead of a hundred separate books on a shelf, group them into a single "Bookshelf Decor" object. Suddenly, selecting, moving, and managing your scene becomes a breeze.
A clean scene is a fast scene. Taking 30 minutes to organise your model at the start can save you hours of frustration and waiting for renders to finish. It’s the single most overlooked step by designers new to 3D.
The way you build and manage your 3D models directly impacts everything from viewport performance to final render times. Here’s a quick look at how good habits stack up against common mistakes.
How Your Modeling Habits Affect Rendering Outcomes
| Modeling Practice | Best Practice Approach (Efficient) | Common Mistake (Inefficient) | Impact on Rendering |
|---|---|---|---|
| Polygon Management | Use low-poly models for distant objects; optimise high-poly assets. | Using a 5-million-polygon sofa model for a background element. | Massively increases RAM usage and calculation times for lighting and shadows. |
| Object Grouping | Logically group related items (e.g., all kitchen utensils). | Leaving hundreds of individual objects floating in the outliner. | Makes scene navigation difficult and can slow down file load/save times. |
| Layer Organisation | Separate geometry by category (walls, furniture, lights, decor). | Dumping everything into a single, unorganised layer. | Inefficiently forces the renderer to process hidden or irrelevant geometry. |
| Asset Naming | Implement a clear naming convention (e.g., FURN_Sofa_Leather_01). |
Default names like Box001, Cylinder034, Sphere_final_final. |
Wastes time searching for assets and makes collaborative work nearly impossible. |
Ultimately, treating your 3D file with the same care as an architectural plan will always lead to better, faster, and more professional results.
The Power of Smart Organisation
With your geometry in good shape, it's time to get organised. A consistent naming convention isn't just a nice-to-have; it's non-negotiable for any serious project. A simple system like FURN_Sofa_LivingRoom or DECOR_Vase_Main makes finding and tweaking specific objects painless, especially when a scene starts to get crowded.
This kind of disciplined workflow is more important than ever. In a booming market like India's, where 3D rendering generated around USD 171.1 million and is on track to hit USD 1,025.8 million by 2033, efficiency is everything. With the software segment owning a massive 87.32% share, mastering your tools is how you stay ahead.
If you’re just getting started with one of the most popular platforms out there, our beginner's guide on how to render in SketchUp is a great place to build these essential skills.
Setting Up a Compelling Camera Angle
Finally, let’s talk about your camera. It's not just a viewport; it's your storyteller. A great render is essentially a photograph of a space that doesn't exist yet, so applying real-world photography principles is a game-changer.
Start by setting your camera at a natural, human eye level—usually between 1.2 and 1.6 metres. This simple adjustment makes the space feel instantly more relatable and immersive, pulling the viewer right into the room. Avoid those strange, floating-in-the-corner perspectives.
Next, think about composition. Use leading lines, like the edge of a rug or the beam on a ceiling, to guide the viewer's eye toward the focal point of your design. Play around with different focal lengths. A wide lens can capture an expansive view, while a longer lens can create a beautiful, detailed vignette. Your camera setup is what frames your entire design, so get it right before you even think about adding a single material.
Crafting Believable Materials and Textures
The real magic in photorealistic interior design 3d rendering isn’t just about getting the model right; it's in the convincing detail of every surface. This is the part of the process where a digital model starts to feel like a real, tangible space. Honestly, moving beyond the default material settings is what separates a decent render from a truly breathtaking one.
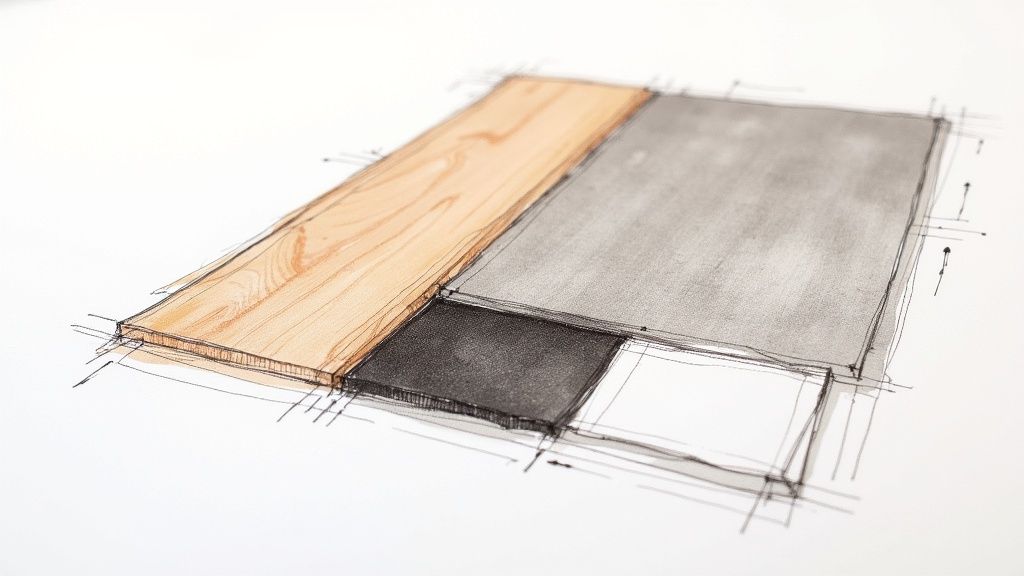
A flat, lifeless surface can shatter the illusion in an instant, no matter how perfect your geometry or lighting is. The secret is getting a handle on the core properties that make materials look the way they do in the real world. Just think about the difference between a rough, unpolished concrete floor and a sleek, lacquered hardwood. One just soaks up light and shows off its deep texture, while the other reflects its surroundings with a sharp, clear sheen.
Our job is to recreate those subtle differences digitally.
Beyond Just Colour and Shine
To build authentic materials, you have to think in layers. Most rendering software gives you control over a few key channels that all work together to define how a surface looks. It’s less about finding one perfect setting and more about striking the right balance between these properties.
-
Diffuse/Albedo: This is simply the base colour of your material—the brown of a wood plank, the grey of a stone tile. It's the colour you'd see if light hit it without creating any shine at all.
-
Reflection/Specular: This channel dictates how shiny or reflective a surface is. A mirror would have a sky-high reflection value, while a piece of cotton fabric would have almost zero.
-
Glossiness/Roughness: This works hand-in-hand with reflection. It determines if reflections are sharp and clear or soft and blurry. A polished chrome tap has high glossiness, giving you crisp reflections. A satin-finish door handle has low glossiness, so its reflections are much more diffused.
-
Bump/Normal Maps: These are the game-changers. They’re texture maps that fake small-scale surface details like wood grain, the weave of a fabric, or the tiny pits in concrete. They create an amazing illusion of depth without adding any actual geometry, which is crucial for keeping your scene running smoothly.
Getting these elements to play nicely together is what breathes life into a material. A leather sofa isn't just brown; it has subtle colour shifts, a soft sheen that catches the light, and a fine grain texture you can practically feel.
Sourcing and Applying High-Quality Textures
The believability of your materials is directly linked to the quality of your texture maps. Low-resolution, blurry images will always lead to a render that looks amateurish. Thankfully, there are plenty of incredible resources out there for high-quality, seamless textures.
Once you have your textures, you’ll need to master UVW mapping. Think of it as digitally "unwrapping" your 3D object onto a flat, 2D surface so you can place your texture map precisely. It’s what ensures a wood grain flows correctly along a tabletop instead of looking stretched and weird at the corners. For more insights on how these visuals come together, you can find a deeper dive into the world of professional interior rendering.
The biggest giveaway of a beginner's render is often sloppy texture mapping. Obvious tiling patterns or stretched textures immediately break the illusion of photorealism. Take the extra time to properly scale and align your maps—it’s a small detail that makes a world of difference.
Practical Material Setups for Common Finishes
Let's put these ideas into practice with a couple of common interior finishes. It's also worth noting that staying aware of broader design movements, like environmentally friendly interior design principles, can help you create renders that are not only beautiful but also relevant.
Example 1: Polished Hardwood Floor
-
Diffuse: Start with a high-resolution, seamless wood plank texture. "Seamless" is key to avoiding those ugly repeating patterns.
-
Reflection: Give it a moderate reflection value, just enough to catch the light sources in your scene.
-
Glossiness: Use a relatively high glossiness value to create those sharp, clear reflections that mimic a polished varnish.
-
Bump: Apply a subtle bump map based on the wood grain to create the illusion of tiny grooves and texture when light hits it at an angle.
Example 2: Velvet Upholstery
-
Diffuse: A deep, rich colour map.
-
Reflection: Keep this very low. Velvet isn't shiny.
-
Special Properties: Many render engines have a dedicated "Sheen" or "Falloff" parameter. This is exactly what you need to simulate how velvet looks lighter on edges facing you, which is the signature look of its soft pile.
-
Bump: A very fine, almost noisy bump map can add that last bit of subtle, tactile quality.
By breaking down materials into these core components, you can systematically build any surface you can imagine, from the cool roughness of a marble countertop to the soft, light-absorbing quality of a woollen rug. This meticulous attention to detail is the foundation of every truly convincing interior design 3d rendering.
Using Light to Create Atmosphere and Realism
If materials give an interior design 3d rendering its soul, then lighting is its heartbeat. It’s the single most powerful tool you have for shaping mood, creating drama, and breathing life into a digital scene. Get the lighting right, and you pull the viewer into an immersive experience. Get it wrong, and even the most meticulously modelled space will feel flat, sterile, and uninviting.
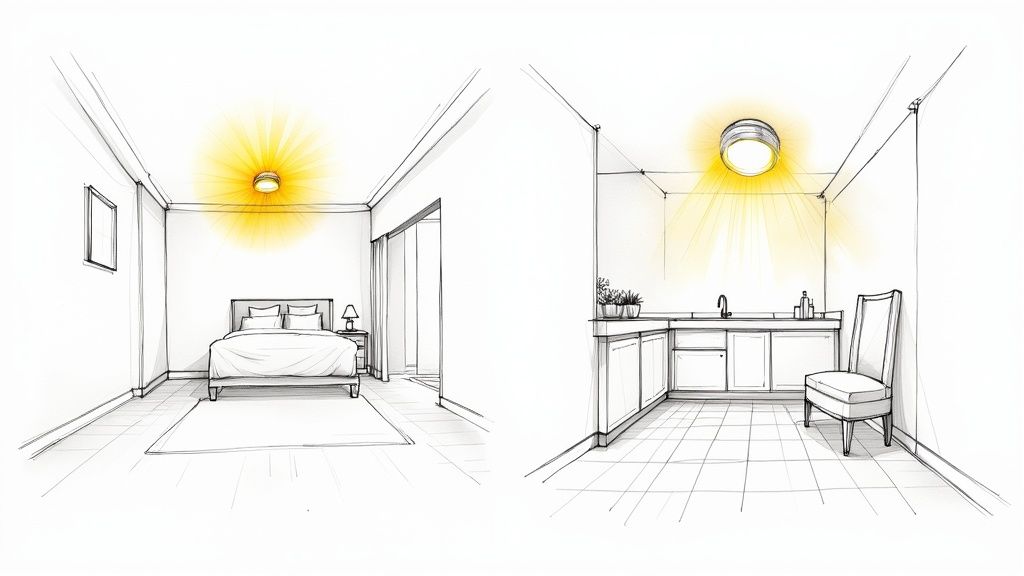
This is where the artistry of rendering really comes into play. You stop being just an assembler of digital objects and become a sculptor of light and shadow, aiming to evoke a specific feeling. The goal is to move beyond simply lighting a room and start using light to tell a story—whether that's the soft, warm glow of a cosy bedroom or the bright, crisp energy of a modern kitchen.
Harnessing Natural Light with HDRI Domes
The quickest way to establish a believable baseline is to start with natural light. For this, High Dynamic Range Image (HDRI) sky domes are your best friend. An HDRI is a 360-degree photograph of a real-world environment that contains a massive amount of accurate light and colour information.
When you wrap your scene in an HDRI of, say, a partly cloudy sky, your render engine uses that image's data to illuminate everything. The result is beautiful, natural-looking soft shadows and subtle colour bounces that are incredibly difficult to fake manually. It’s the perfect foundation of diffuse, ambient light to build upon.
Placing Artificial Lights for Drama and Focus
With your natural light base in place, it’s time to add artificial lights. This is how you add depth, guide the viewer’s eye, and put a spotlight on the most important design features.
-
IES Profiles: Have you ever noticed the distinct, often beautiful pattern a real-world downlight casts on a wall? That unique shape is its photometric profile. IES (Illuminating Engineering Society) files are the digital blueprints of these profiles, provided by actual lighting manufacturers. Dropping them into your spotlights adds an immediate and undeniable layer of authenticity.
-
Spotlights and Point Lights: These are your workhorses for creating focused beams. Use them to wash light over a piece of art, illuminate a kitchen island, or cast dramatic shadows from a tall plant.
-
Area Lights: These simulate light coming from a larger surface, like a softbox in a photography studio or light bouncing in through a large window. They produce lovely, diffuse shadows and are perfect for faking bounced light or adding a gentle fill to lift dark corners.
The way professionals approach this in the real world is guided by sophisticated architectural lighting design principles. Bringing that same thoughtful mindset into your digital workflow will absolutely elevate your renders.
Adapting Three-Point Lighting for Interiors
A classic technique from photography and cinematography, the three-point lighting system, can be adapted brilliantly for interior renders. It’s all about a strategic balance of three key light sources to define form and create a true sense of dimension.
-
Key Light: This is your main light source—the strongest and most direct. In an interior scene, this could be the sun pouring through a window or a statement chandelier. It’s what establishes the overall mood and casts the most defined shadows.
-
Fill Light: The fill light’s job is to soften the harsh shadows thrown by the key light. It’s a less intense, more diffuse light source placed roughly opposite the key. An invisible area light outside the camera’s view or even a softly glowing table lamp can do the trick.
-
Accent (or Rim) Light: This is the finishing touch. Often placed behind an object, it creates a subtle highlight or "rim" of light that helps separate it from the background. This is a fantastic way to make a feature chair or a sculptural vase really pop.
Never underestimate the power of "off-screen" lights. Some of the most effective lights in a render are the ones the viewer never actually sees. Their only purpose is to subtly bounce light or fill in dark areas, perfectly mimicking how light behaves in reality.
This push for greater realism is a key factor in the technology's rapid adoption. In fact, the India interior design market, estimated at USD 28.87 billion, is projected to hit USD 50.28 billion by 2030, partly because digital tools like 3D rendering are making high-end design more accessible.
Mastering light is a journey of constant observation and practice. Start paying close attention to how light behaves in your own home—how it reflects off a countertop versus a wooden floor, or how shadows stretch and soften as the day goes on. Replicating those little nuances is what will make your interior design 3d rendering not just look realistic, but feel believable. If you're looking for platform-specific guidance, tutorials on lighting for /blog/3-ds-max-interior-design can provide more targeted techniques.
Optimizing Renders and Polishing for Client Presentation
You’ve built the scene, crafted believable materials, and sculpted the perfect lighting. Now comes the part where all that hard work pays off: turning your 3D scene into a photographic masterpiece that will not just impress your clients, but convince them.
This final push is a balancing act between quality and speed. Waiting hours for a single image just isn't practical in a real-world workflow, but a noisy, low-quality render won't do your design justice either. This is where mastering your render settings separates the pros from the beginners.
Getting Technical With Render Settings
Diving into a render engine's settings can feel like stepping into a cockpit full of confusing dials. But you really only need to master a few key controls to get the results you want without the headache.
-
Sampling: This is just the number of light calculations your computer does for each pixel. Low samples give you a fast but grainy (or "noisy") image. High samples create a clean, crisp result but can take ages. The real skill is finding the lowest sample count you can get away with for an acceptable level of noise.
-
Noise Reduction (Denoising): Honestly, this is a game-changer for workflow speed. Modern render engines use clever AI denoisers that intelligently clean up the grain from a render that used fewer samples. You can often cut your render times in half with very little loss in detail.
-
Resolution and Aspect Ratio: My rule of thumb? Always render at a higher resolution than you think you’ll need. You never know when a client will want to zoom in or use an image for print. A width of 3000-4000 pixels is a safe starting point for most presentations. And make sure your aspect ratio matches the final destination, whether it's 16:9 for a screen or 4:5 for an Instagram post.
Supercharging Your Workflow with AI
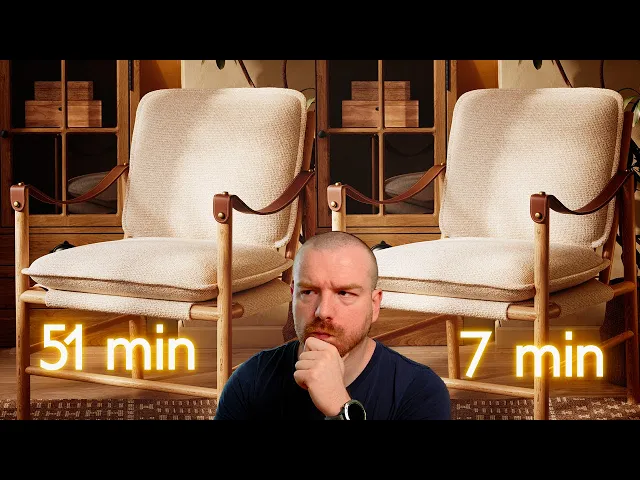
The biggest shift in our industry right now is the rise of AI-powered tools. Think about the traditional rendering process: you set everything up, hit "render," and then you wait. If a client wants to see a different colour sofa? You have to go back, change the material, and start the whole rendering process all over again. It's a massive time sink.
AI renderers completely flip this on its head, allowing for almost instant changes.
With an AI rendering workflow, exploring design variations is no longer a chore; it's a creative playground. You can generate a dozen different moods, material palettes, or furniture layouts in the time it used to take for one traditional render to finish.
This speed gives you an incredible advantage. You can respond to client feedback on the fly and explore more creative ideas without worrying about blowing the budget or missing a deadline.
The market is already feeling this shift. In India, for instance, residential real estate sales have soared to a ten-year high. The premium and luxury sectors, which rely heavily on high-end visuals, saw new property launches grow by an incredible 169% and 116% year-over-year. This shows just how powerful interior design 3d rendering is for attracting serious buyers. You can find more data on this trend and its impact on the 3D rendering market on Towards Packaging.
The Final Polish: Post-Production
A raw render straight out of the software is rarely the finished product. Just like a professional photographer retouches their photos, a 3D artist uses post-production to add that final 10% of magic that really makes an image come alive. I do most of my post-work in Adobe Photoshop or Affinity Photo.
You'd be amazed what a few small tweaks can do.
My Go-To Post-Production Techniques
| Technique | What It Does | My Pro Tip |
|---|---|---|
| Colour Grading | Fine-tunes the overall colour to create a specific mood—like warm and cosy, or cool and modern. | I always use adjustment layers like "Curves" and "Selective Colour" so my edits are non-destructive. |
| Contrast and Levels | Makes the image "pop" by deepening the blacks and brightening the whites for more impact. | A subtle S-curve adjustment in the Curves panel is a classic trick for adding beautiful, punchy contrast. |
| Adding Imperfections | Gently introduces things like lens flare, vignetting, or chromatic aberration. | These subtle effects mimic real camera lenses, tricking the eye into believing it's looking at a real photograph. |
| Atmospherics | I often paint in soft light rays (volumetrics) or a gentle haze to add depth. | Use a very soft, low-opacity brush to add atmosphere where light streams into the room. |
This final stage is what elevates a technically good render into a piece of art that connects with people on an emotional level. If you're looking to explore different tools for your workflow, you might find our guide on the top architectural rendering software useful.
By combining smart render settings, the incredible speed of AI, and a thoughtful post-production pass, you can create visuals that don’t just show a design—they sell a vision.
Common Questions About 3D Rendering
Even with a solid workflow in place, it’s natural to have questions, especially when you're starting out. Here are some of the most common queries I hear from fellow designers, with straightforward answers to help you feel more confident.
What’s the Best Software to Use?
This is the million-dollar question, isn't it? The truth is, there’s no single “best” software—it’s all about finding the best workflow for you. A really effective and popular setup is to use a dedicated 3D modelling tool, like SketchUp or 3ds Max, to build your scene and then pair it with a powerful rendering engine like V-Ray or Corona Renderer to bring it to life.
Ultimately, your choice depends on your budget, what you already know, and the kinds of projects you’re tackling.
-
If you're just starting out: SketchUp is a great place to begin because it’s so intuitive. Match it with an easy-to-use renderer, and you’ll be off to a running start.
-
For seasoned professionals: Many of us lean on 3ds Max for its sheer depth and control, especially when working on highly detailed and complex interiors.
The most important thing is that your software should make your life easier, not harder. The best tool is the one that lets you get your ideas out of your head and onto the screen without a massive headache.
How Long Does a Single Render Take?
Honestly, it can be anywhere from a few minutes to a whole day. The time it takes to produce one photorealistic render depends hugely on a few things: how complex the scene is, the detail in your materials, your final image resolution, and, of course, the power of your computer.
A simple, well-optimised room might be done in under 30 minutes. But a large, intricate interior packed with complex lighting and lots of shiny, reflective surfaces? That could easily tie up your machine for several hours with traditional methods. This is where newer, faster tools are really starting to change things.
Can I Get Started if I’m Not a Modelling Expert?
Absolutely. You don't have to be a 3D modelling wizard to create beautiful renders. While it's a great skill to have, you can jump right in by using high-quality, pre-made 3D assets. Believe me, even seasoned pros do this all the time to save precious hours.
Places like 3D Warehouse and Turbosquid are treasure troves of furniture, lighting, and decor that you can drop straight into your scene. This lets you skip some of the tedious work and focus on what really matters.
Instead of building a chair from scratch, you can channel your energy into:
-
Scene Composition: Arranging everything to create a balanced and beautiful layout.
-
Lighting Design: Creating the perfect mood and atmosphere for the space.
-
Material Application: Making sure every surface looks real and convincing.
This approach lets you produce professional-level work while you build your modelling skills at your own pace.
How Much Does 3D Rendering Actually Cost?
The cost of interior design 3d rendering really breaks down into two paths. If you're doing it yourself, your main costs will be software subscriptions—which can be anything from a manageable monthly fee to a pricier annual license—plus whatever you spend on premium 3D models or textures.
The other option is to hire a freelance 3D artist or a visualisation studio. Here, you're usually paying per image or per project. A single, high-quality render can run you anywhere from a few hundred to several thousand pounds, depending on the artist’s skill, the project’s complexity, and how fast you need it.
For many designers, learning to do it themselves is a great long-term investment. And as you get comfortable with the process, you'll find new tools can speed things up even more. For a closer look at what's next, check out our guide on how AI for interior design is changing the game.
Ready to turn your 3D models into stunning, client-ready visuals in seconds? Vibe3D uses AI to deliver photorealistic renders with incredible speed, cutting hours from your workflow and allowing you to iterate on designs faster than ever. Start creating with Vibe3D today.