A stunning house 3D render doesn't just happen at the final click of a button. The real magic begins much earlier, with a perfectly prepared 3D model. Think of this stage as laying the foundation; get it right, and the rest of the process—from texturing to lighting—becomes exponentially easier and the final result far more believable.
Building the Foundation for Your Render
Before you even think about lighting or textures, the focus has to be on clean geometry. Your 3D model is the skeleton of the entire project, and a messy, inaccurate one will plague you every step of the way. You'll run into frustrating issues with textures stretching weirdly, light leaking through invisible gaps, and endless delays trying to fix problems that should have been solved at the start.
This whole process starts with the source material. Before firing up your 3D software, make sure you have a solid grasp of what architectural drawings entail. These plans are your bible for this project, giving you the precise dimensions, scale, and spatial relationships you need to build from.
From 2D Plans to a 3D Model
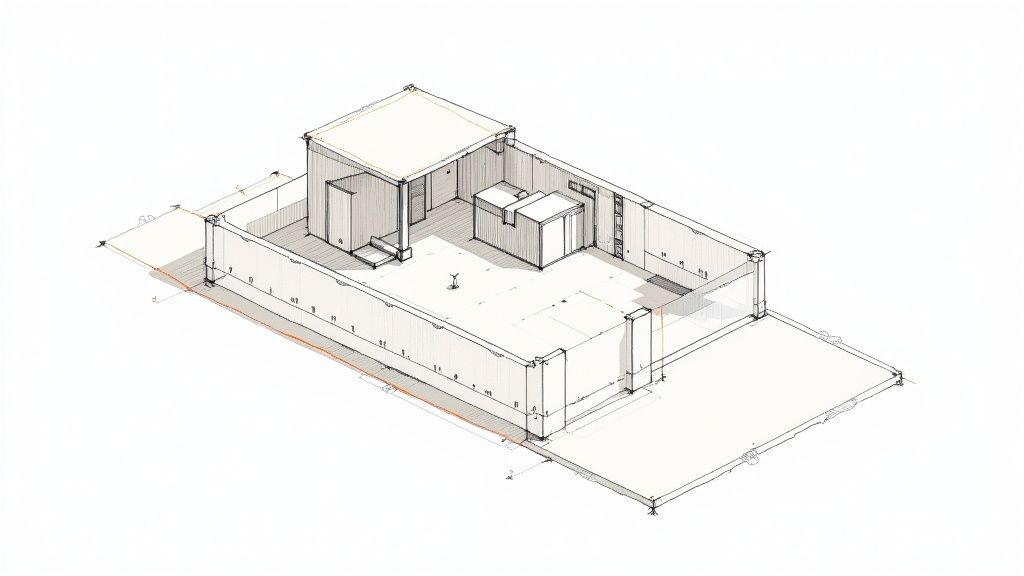
The first real task is to take those 2D plans—be they CAD files, PDFs, or even hand-drawn sketches—and bring them into the third dimension. Precision is everything here. The very first thing you should do is set your software's units to match what's on the plans, whether it's metres, feet, or millimetres. From there, you can start blocking out the main structural elements like walls, floors, and the roof.
Your goal should be to create a "watertight" model. This means no gaps, no holes, and every vertex properly connected. This is critical, especially for interior shots, because any tiny crack in the geometry can cause light to leak in, completely ruining the realism of your render. Some artists prefer importing CAD files directly to guarantee accuracy, while others rebuild everything from scratch for total control. If you’re a SketchUp user, there are some great guides that cover the best ways to prepare your models; you can learn more about /blog/how-to-render-in-sketchup and its specific workflow.
Pro Tip: Keep your main building shell simple at first. Don't get bogged down modelling every single doorknob, light switch, or power outlet. Model these smaller details as separate objects to be added later. It keeps your core model lightweight and much easier to navigate.
The Importance of Scene Organisation
I can't stress this enough: a disorganised scene is a slow scene. As your model gets more complex, trying to find and edit a specific window frame or piece of furniture becomes an absolute nightmare if you haven't been organised from the start. A clear naming convention is a lifesaver.
Here’s a simple system that has saved me countless hours:
-
Use Prefixes: Group everything by category. For instance,
WALL_,WIN_,DOOR_,FURN_. A name likeWALL_Exterior_FrontorFURN_Sofa_LivingRoomtells you exactly what and where something is at a glance. -
Be Descriptive: Vague names are your enemy.
Kitchen_Cabinet_Upper_01is infinitely more helpful thanBox001when you're in a hurry. -
Use Layers or Collections: All modern 3D software has this feature. Create logical groups for the main structure, all the furniture, the lighting fixtures, and the landscaping. This lets you quickly hide everything you're not working on, keeping your viewport clean and responsive.
This kind of structured workflow does more than just speed things up; it's a professional habit that makes your project files easy for colleagues to understand and work with. It's one of the key differences between an amateur and an expert creating a complex house 3D render. When your foundation is this organised, every subsequent step just flows that much better.
Breathing Life into Surfaces with Materials
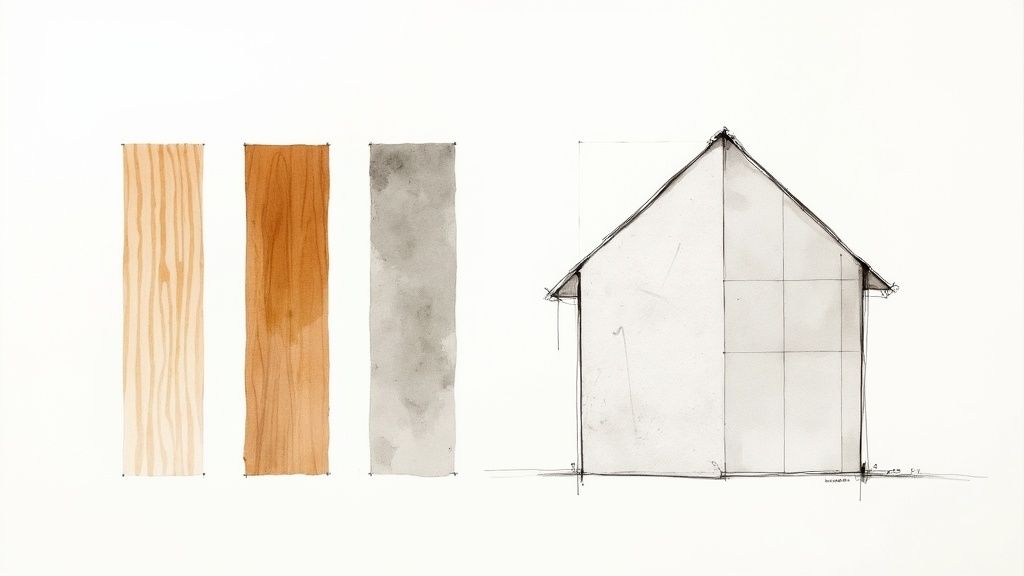
With your 3D model prepped and organised, it's time for the fun part: making it look real. This is where you transform sterile geometric shapes into tangible surfaces. A truly photorealistic house 3D render comes down to how convincingly your materials interact with light, and for that, we need to go beyond just applying a simple colour.
The industry standard for achieving this is a Physically Based Rendering (PBR) workflow. PBR isn't just a fancy term; it's a method that simulates how light actually behaves in the real world. Instead of trying to fake reflections and shadows, PBR materials use a collection of texture maps that instruct the render engine on how to react based on true physical properties.
This realistic approach is a massive driver in high-end visualisation, especially with the real estate market booming. We've seen residential sales soar to a ten-year high, crossing 173,000 units sold. This surge is heavily supported by AI-enhanced 3D rendering that presents properties with stunning accuracy. Just look at the premium market, which saw a staggering 169% year-over-year jump in new projects that leaned on 3D renders to captivate buyers.
Getting to Grips with PBR Texture Maps
To really master PBR, you have to understand what each texture map brings to the table. It's the combination of these maps, not just a single image, that creates a believable material.
A proper PBR workflow relies on a few key texture maps that work together. Here’s a quick breakdown of the essential ones you'll be using constantly.
Essential Texture Maps for PBR Materials
| Texture Map | Function | Impact on Realism |
|---|---|---|
| Albedo (Diffuse) | Defines the base colour of the surface, free of any lighting or shadow information. | Provides the core pigment of the material, like the pure colour of wood grain or concrete. |
| Roughness | Controls how sharp or blurry reflections are. A black value is smooth (mirror); a white value is rough (chalk). | Crucial for defining surface finish. Differentiates a glossy countertop from a matte wall. |
| Normal (Bump) | Simulates fine surface details and texture without adding more polygons to the model. | Creates the illusion of depth, like wood grain, fabric weave, or the porous texture of a brick. |
These maps are the foundation of virtually every realistic material you’ll create. Getting comfortable with how they influence each other is key to producing high-quality renders.
A classic rookie mistake is grabbing a photo of a wooden floor and using it as the albedo map. That photo has shadows and highlights already baked into it, which will clash with your scene’s lighting and shatter the illusion. Always source textures created specifically for PBR.
Applying Textures the Right Way: UV Unwrapping
So you've got your high-quality texture maps. How do you get them onto your 3D objects correctly? The answer is UV unwrapping.
Think of it like taking a cardboard box and carefully unfolding it to lay it flat. That flat pattern is your UV map, and it tells the software exactly how to wrap your 2D texture around your 3D model.
For simple objects like walls or floors, this is usually pretty easy. But when you get to more complex shapes—a curved staircase, an ornate archway, or a custom-designed chair—a sloppy UV unwrap will cause textures to stretch, pinch, and look completely distorted. The trick is learning where to place "seams" on your UV map. Just like a tailor hides seams on clothing, you should place yours in areas that won't be easily seen, ensuring a clean, continuous look.
The Magic is in the Imperfection
Here’s a secret that separates the pros from the amateurs: nothing in the real world is perfect. Adding subtle imperfections is what ultimately sells the realism and tricks the human eye.
Get in the habit of adding little details that tell a story:
-
Scuffs and Smudges: Think about faint scuff marks along skirting boards or subtle fingerprints on a glass door.
-
Weathering and Dirt: For an exterior shot, maybe a little grime has collected under a windowsill or where the foundation meets the ground.
-
Natural Variation: No two planks of wood are ever identical. Use different texture variations or procedural masks to avoid that repetitive, computer-generated pattern look.
These small, deliberate touches are what elevate a house 3D render from something that looks good to something that feels truly real. These principles are vital whether you're crafting a sprawling exterior or a cosy room, and they are especially critical in workflows like 3ds Max interior design, where every material is under close scrutiny.
Shaping the Mood with Light and Camera
If materials give your model substance, then lighting gives it a soul. Honestly, this is probably the single most important step in nailing a photorealistic house 3d render. Lighting isn't just about making things visible; it’s about sculpting form, creating depth, and setting an emotional tone.
Great lighting can make a simple model look spectacular. On the flip side, I've seen incredibly detailed models fall completely flat because the lighting was an afterthought. The real goal here is to mimic how light behaves in the real world—from the soft, diffuse glow of an overcast sky to the sharp, dramatic shadows of a setting sun.
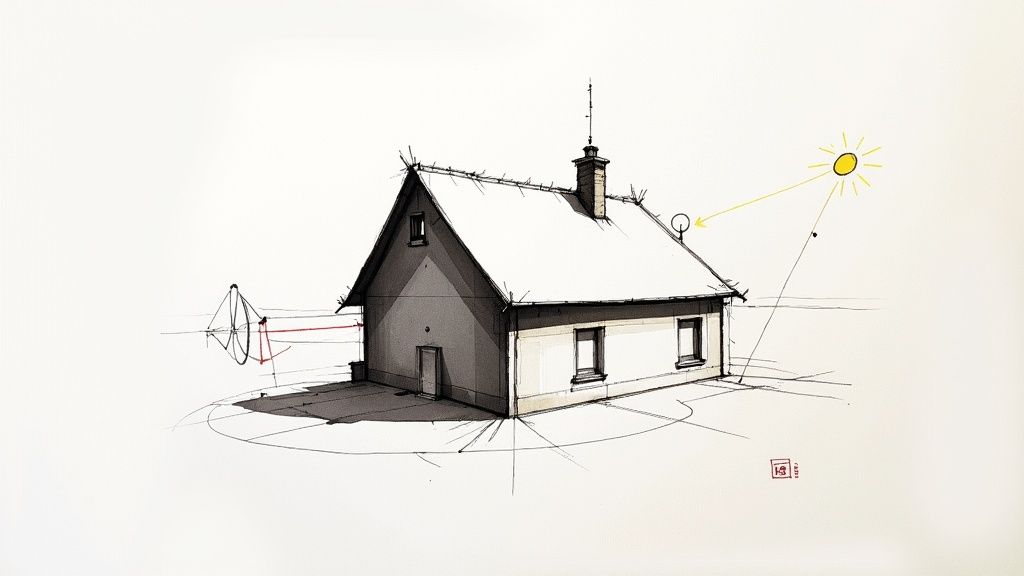
Harnessing Natural Light with HDRI Maps
The fastest way to get realistic, natural-looking exterior light is by using a High Dynamic Range Image (HDRI). The easiest way to think of an HDRI is as a 360-degree photograph of a real-world location that wraps around your entire scene.
This one image file holds a huge amount of light information—the brightness and colour of the sun, the soft ambient light from the sky, and even bounced light from the ground. When you use it as your main light source, it instantly bathes your model in a complex, believable environment. This creates the kind of soft shadows and true-to-life reflections that are a nightmare to replicate manually.
For instance, a "clear sky" HDRI will give you those harsh, defined shadows perfect for a bright afternoon shot. An "overcast" HDRI, however, will create soft, diffuse shadows for a more muted, even feel. Choosing the right HDRI is your first big decision in setting the scene's mood.
Sculpting with Sun and Artificial Lights
While an HDRI gives you a fantastic base to work from, you still need to direct the viewer's attention and inject some drama. This is where you bring in individual lights.
-
Sun Light: A directional sun light gives you precise control over the angle and intensity of your main light source. I often use it to create long, artistic shadows during golden hour or to highlight a specific architectural feature with a direct beam.
-
Area Lights: These are my go-to for faking light coming through windows or from large, soft sources. Placing area lights just outside windows can brighten up an interior without completely blowing out the view outside.
-
Spot Lights: Use these for accent lighting. Think of highlighting a piece of art on a wall or illuminating landscaping features in a dusk or night scene.
A classic mistake I see all the time is over-lighting a scene. Real-world photography is often about managing shadows, not getting rid of them. Let some areas fall into darkness; that contrast is exactly what creates depth and visual interest in your final house 3d render.
Just as lighting sets the mood for an exterior, it's absolutely crucial for creating inviting interiors. The core principles of balancing ambient and artificial light are universal. For a more detailed look at this, our guide on photorealistic interior rendering gets into specific workflows for crafting stunning indoor spaces.
Thinking Like a Photographer
Your virtual camera is every bit as important as your lighting setup. Its settings and position literally determine the story you tell. You need to stop thinking of it as just a viewpoint and start treating it like a real camera in the hands of an architectural photographer.
Mastering Camera Angles and Composition
The angle you choose completely changes how a viewer perceives the space. A low angle can make a house feel grand and imposing. An eye-level shot, on the other hand, feels more grounded and personal. Whatever you do, avoid placing your camera at awkward, unnatural heights.
Try applying some classic photography principles to your shots:
-
Rule of Thirds: Picture a 3x3 grid over your viewport. By placing key features—like the main entrance or a striking roofline—along these lines or where they cross, you create a more balanced and dynamic image.
-
Leading Lines: Look for elements like driveways, pathways, or fence lines. You can use these to guide the viewer’s eye through the image and straight to the focal point—the house.
-
Framing: Use things in the foreground, like trees or an archway, to frame your main subject. This adds a fantastic sense of depth and context to the shot.
Essential Camera Settings for Realism
Beyond just where you put the camera, its technical settings are what sell the photographic illusion.
-
Focal Length: This controls your field of view. A wide focal length (say, 18-24mm) is great for capturing entire rooms, but be warned—it can distort vertical lines near the edges. A longer focal length (something like 35-50mm) gives a more natural, compressed look that’s often more flattering for architectural details.
-
Depth of Field (DoF): In a real photo, not everything is perfectly sharp. A shallow depth of field, where the foreground or background is slightly blurred, is a powerful tool for drawing the viewer's eye to a specific point. Just use it subtly; a little goes a long way in adding that final touch of realism.
When you combine thoughtful lighting with purposeful camera work, you stop making a 3D model and start creating a compelling piece of architectural art.
Choosing and Optimising Your Render Engine
Think of your render engine as the digital darkroom for your project. It’s where all the meticulous work of modelling, texturing, and lighting finally comes together into a single, polished image. This is the heavy lifter in the process, translating your complex 3D scene into a photorealistic house 3d render. Picking the right engine is a big deal, and knowing how to tune its settings is what separates a good render from a great one.
The market is crowded with incredible render engines, but in the world of architectural visualisation, a few key players have rightfully earned their spot at the top. Each one has its own personality, catering to different workflows and artistic styles.
The Big Players in Architectural Rendering
Your choice of engine is often tied to your main 3D software and, frankly, your personal preference.
-
V-Ray: This is the industry workhorse for a reason. V-Ray is incredibly powerful and plugs into just about every 3D package out there. It gives you an almost overwhelming amount of control, letting you fine-tune every last detail. It's a favourite among veteran artists who need that level of precision.
-
Corona Renderer: Known for being artist-friendly, Corona delivers breathtaking realism without bogging you down with complex settings. Many find it has a much gentler learning curve than V-Ray, which is perfect if you'd rather focus on the creative side of things instead of getting lost in technical manuals.
-
Cycles: As Blender's native, physically-based engine, Cycles is a powerhouse that just happens to be completely free. Its node-based material system is incredibly flexible, and its tight integration within Blender makes for a seamless workflow. It's a go-to for countless independent artists and smaller studios.
If you're still weighing your options, it’s worth taking a look at the different types of architectural rendering software to get a feel for the ecosystem that fits you best.
Finding the Sweet Spot Between Quality and Speed
Once you've settled on an engine, the real craft begins. Every 3D artist is locked in a constant battle: getting the highest possible quality in the shortest amount of time. Hitting 'render' with the default settings will almost always give you an image that's either too noisy or takes an eternity to finish.
The trick is to understand the handful of core settings that govern this trade-off.
A classic rookie mistake is just cranking every quality slider to its maximum setting. This rarely produces a better image; it just guarantees a painfully long render time. The pro approach is to dial settings up just enough to get a clean result, and not an ounce more.
Key Settings to Master
The terminology might change slightly from one engine to another, but the underlying concepts are universal.
-
Sample Count (or Quality Level): This is your most direct control over image quality. The engine fires "samples" (rays) into the scene to gather light information. More samples equal a cleaner, less grainy image, but they also add a lot of time to the render. Don't guess. Instead, render a small region of a particularly noisy area and find the lowest sample count that looks clean enough.
-
Noise Threshold (or Adaptive Sampling): This is the smarter way to work. Rather than firing a fixed number of samples everywhere, you set a noise limit. The engine then concentrates its power only on the tricky parts of the image—like dark corners or complex reflections—and quickly moves on from the clean areas. This can save a massive amount of time. A threshold of 0.01 is often a solid starting point for final-quality renders.
-
Denoising Tools: Modern renderers have incredible AI-powered denoisers built-in. These tools analyse a noisy render and intelligently smooth out the grain, often making an image look like it was rendered for hours longer than it actually was. Using a denoiser means you can get away with lower sample counts, which dramatically slashes your render times.
Smart Optimisation with Render Passes
If you want ultimate control—especially for post-production—you need to work with render passes. Sometimes called Render Elements (in V-Ray), these break your final image down into its fundamental building blocks.
You can export separate images for components like:
-
Direct Lighting: Just the light coming straight from your light sources.
-
Reflections: An image containing only the reflections in the scene.
-
Ambient Occlusion: Adds those subtle contact shadows that give everything a sense of weight and depth.
-
Z-Depth: A black-and-white map that shows distance, perfect for adding atmospheric effects like fog or haze later on.
By rendering these passes, you can assemble them in a program like Photoshop or Affinity Photo. This workflow lets you make huge changes to the look of your house 3d render—like making reflections pop or deepening shadows—all without having to hit that render button again.
The Final Polish with Vibe3D and Post-Processing

So, your render is finally finished. It’s tempting to call it a day, but this is where the real magic happens. A raw render, straight out of the engine, is like a great photo that hasn't been developed. It has all the right ingredients, but the final touches in post-processing are what will make your house 3d render truly stand out.
This is the classic 80/20 rule in action—the final 20% of your effort here will deliver 80% of the final polish. We’re talking about refining colours, punching up the details, and adding atmospheric effects that convince the eye it's looking at a photograph. It’s the crucial step that separates an average render from a professional piece of architectural visualisation.
Of course, this final stretch is also where deadlines start to feel incredibly tight. Client feedback pours in, asking for changes that would typically mean hours of re-rendering. But the workflow is changing, and we now have tools that make this iterative process much faster and more creative.
Speed Up Revisions with Vibe3D
Before you jump straight into manual post-production, it's worth seeing how modern tools can dramatically cut down on that back-and-forth. This is where a platform like Vibe3D comes in. It's built to take your final 3D model and generate a whole suite of photorealistic variations in seconds, not hours.
Imagine your client wants to see a different time of day or a new material on the walls. Instead of kicking off another long render, you can use simple commands to get new versions almost instantly. It opens the door to rapid experimentation, letting you and your client dial in the perfect look without the painful waiting game.
Being able to quickly show a client multiple high-quality options is a huge advantage. As expectations get higher, this kind of AI-driven iteration is becoming less of a luxury and more of a necessity for staying competitive.
This infographic really breaks down the balance we're all trying to strike between speed and quality to get that final, perfect image.
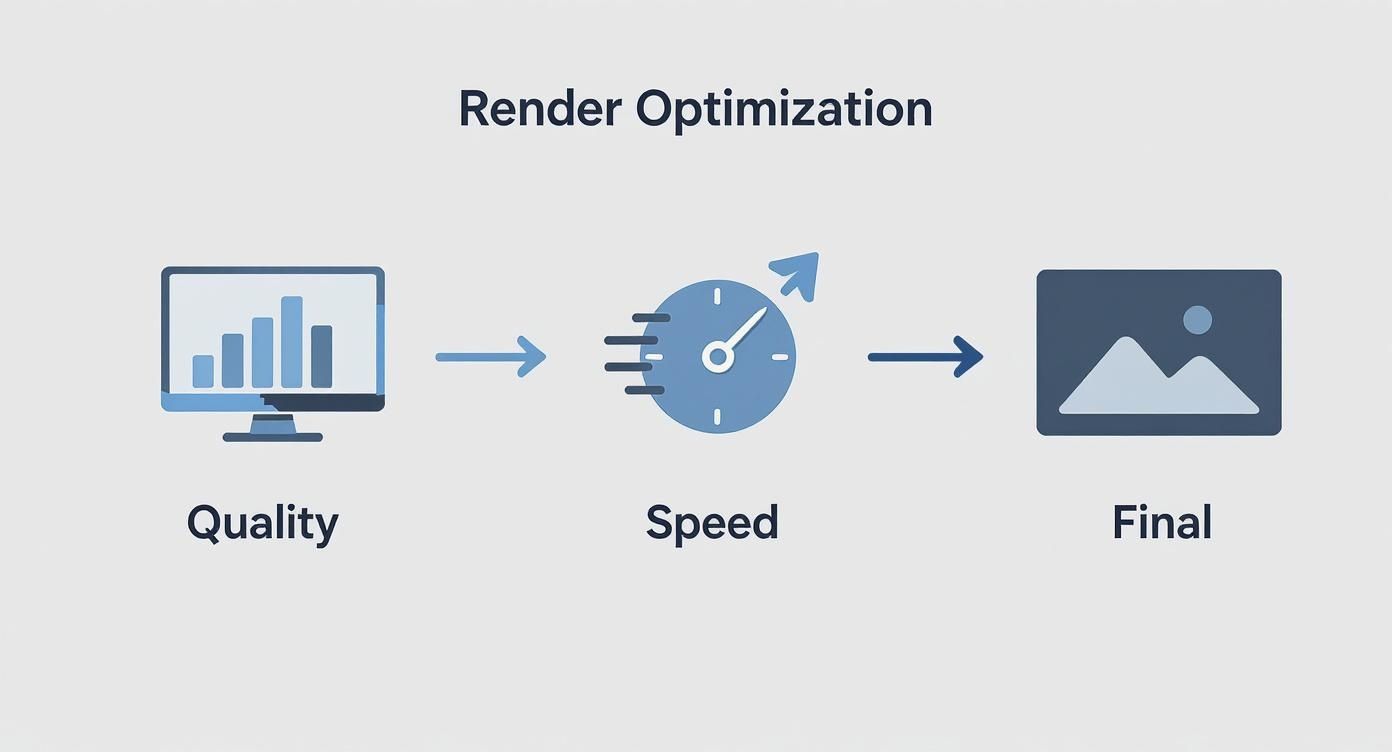
As you can see, hitting that sweet spot is a process of tweaking technical settings while keeping an eye on an efficient workflow.
Essential Post-Processing Techniques
Once you've got your base render locked in, it’s time to fire up an image editor like Photoshop or Affinity Photo. This is where those render passes we talked about earlier become your secret weapons, giving you incredible control over the final look.
A great first step is to layer in your Ambient Occlusion (AO) pass. Just set its blend mode to "Multiply" and you'll immediately see a difference. It deepens the contact shadows, making every object feel more grounded and realistically connected to its environment.
Next, it's time to set the mood with colour grading. This part is more art than science. Using adjustment layers like Curves or Colour Balance, you can gently nudge the tones. For a warm sunset scene, you might add a touch more red and yellow to the highlights. For a cool, overcast day, maybe push some blues into the shadows.
Adding Atmosphere and Final Touches
Atmospheric effects are what sell the illusion. Your Z-depth pass is your best friend here. Use it as a mask to paint in a subtle haze or fog that gets stronger in the distance. This one trick adds a profound sense of depth and scale to your house 3d render.
Finally, don't shy away from adding small imperfections that mimic a real camera lens. They break the "too-perfect" digital look.
-
Lens Flare: When used sparingly, a well-placed lens flare can make a sunny scene feel much more authentic. Just don't overdo it.
-
Chromatic Aberration: This is that subtle colour fringing you see on the edges of objects in real photos. A tiny amount can make a huge difference.
-
Vignette: Gently darkening the corners of the image is a classic technique to frame your house and guide the viewer's eye right where you want it.
This level of digital artistry is in high demand. In India, for example, the need for 3D rendering software is growing fast across architecture and design, driven by a rising pool of skilled artists and better IT infrastructure. These final, thoughtful adjustments are what truly complete the illusion and create a photorealistic masterpiece.
Common Questions on House 3D Renders
Even with a solid workflow, some questions seem to come up on almost every project. Getting a handle on these common hurdles can save you a ton of time and frustration, letting you focus on the creative side of things instead of getting bogged down in technicalities. Here are a few of the most frequent queries I hear from other artists.
How Long Does a High-Quality Render Take?
This is the classic "how long is a piece of string?" question. Honestly, it can be anything from a few hours to several days for a single, polished image. It all comes down to a few key variables.
The complexity of your scene is the biggest time-sink. A clean, simple exterior shot with straightforward daylight might only take 2-4 hours. But if you're working on a detailed interior, packed with complex furniture, glossy surfaces, and tons of artificial lights, you could easily be looking at 24 hours or more on a decent machine.
A few other things that will crank up your render times are:
-
Resolution: Pushing an image out at 4K is going to take a lot longer than at 1080p. It's not a linear increase, either—it's exponential.
-
Render Settings: Chasing that last bit of quality with higher sample counts or an ultra-low noise threshold will add hours to the clock.
-
Your Hardware: This one's obvious, but a beefy GPU or CPU will cut your wait time down significantly.
The real trick isn't just rendering fast; it's rendering smart. Get into the habit of doing low-res iterative tests. They're perfect for nailing your lighting and materials before you commit to that final, time-consuming render.
What Is the Best Software for Photorealistic Renders?
There's no single "best" program out there. The right choice really boils down to your personal workflow and what ecosystem you feel most at home in. That said, the industry definitely has its favourites.
For the actual 3D modelling, you can't go wrong with 3ds Max, Blender, or SketchUp. They're the standards in architecture for a reason. Each has its own quirks and strengths, but all of them are more than capable of building the detailed models you need for a professional house 3d render.
When it's time to render, V-Ray and Corona Renderer really dominate the archviz world. They're known for their incredible realism and massive libraries of physically accurate materials that just work right out of the box. Blender's own engine, Cycles, is also a seriously powerful—and completely free—alternative that can produce breathtaking results. The key isn't to constantly jump between software; it's to pick a workflow and master it.
How Can I Make My Renders Look Less Computer-Generated?
The secret to shaking that sterile, "too perfect" digital look is to embrace imperfection. Real life is messy. It's full of tiny flaws, and layering these details into your scene is what ultimately tricks the eye into believing what it's seeing.
Think about adding small details that tell a story and break the perfect symmetry that computers love to create. These little touches add up to create a huge impact.
-
Subtle Surface Wear: Think about adding faint scuffs on the floor where a chair scrapes back and forth, or a bit of weathering on the exterior brickwork.
-
Asymmetry: Never place things like cushions or books in perfect alignment. Nudge them around a bit, overlap them—make them look like a person actually put them there.
-
Atmospheric Effects: Use subtle camera effects. A gentle depth of field can soften the background and draw focus, while a tiny bit of bloom on bright lights can add a lovely, soft glow.
These details give a space a sense of history and life. The most convincing renders feel like a snapshot of a real moment, not just a sterile 3D model.
Ready to transform your 3D models into stunning, client-ready visuals without the endless render times? With Vibe3D, you can generate photorealistic architectural renders in seconds, not hours. Refine your designs with simple text prompts and present endless variations to your clients with ease. Try Vibe3D today and discover a smarter, faster way to bring your vision to life.