In modern architecture, a high-quality render isn't just a nice-to-have; it's a fundamental part of communicating your design intent and truly bringing a vision to life. The process of ArchiCAD rendering is all about creating those photorealistic images or animations directly from your Building Information Model (BIM). Think of this guide as your practical roadmap for turning a detailed ArchiCAD project into a stunning visual masterpiece.
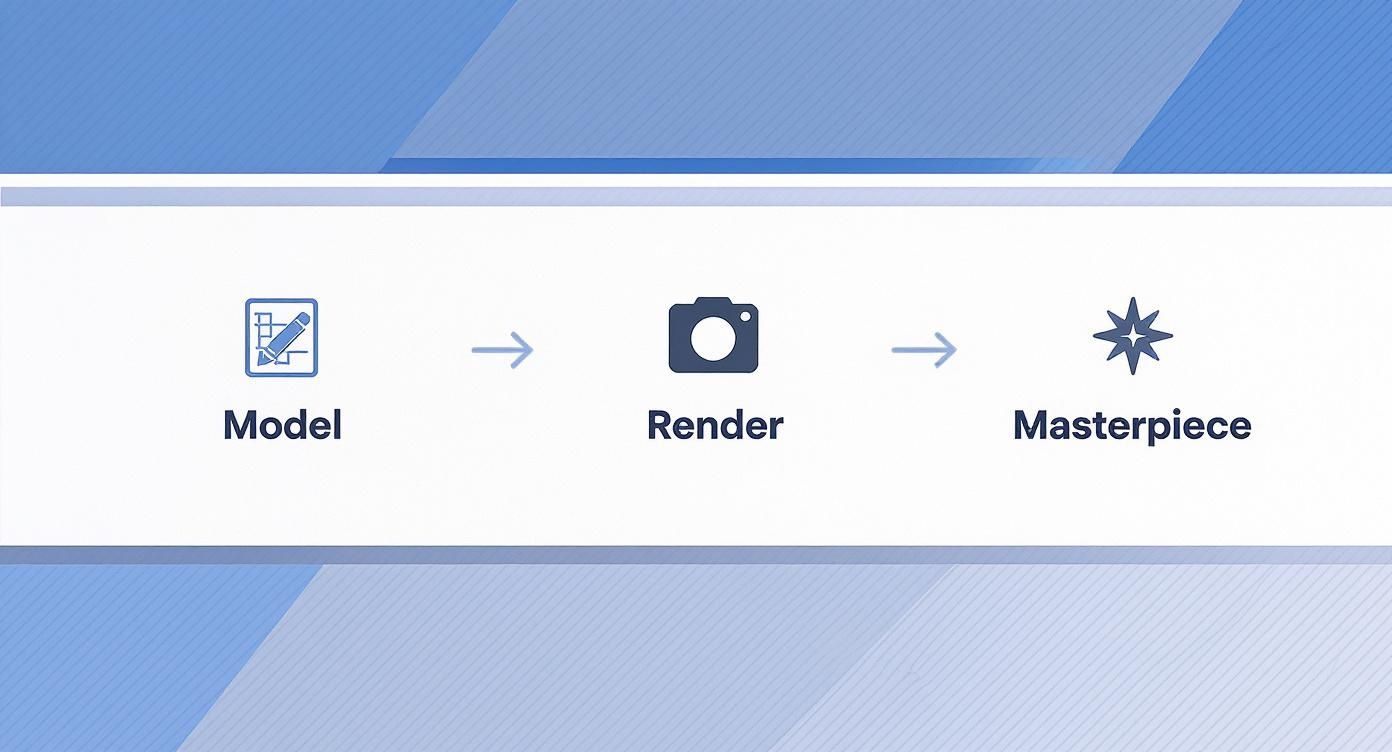
From BIM Model to Visual Masterpiece
Transforming a technical ArchiCAD model into a compelling visual isn't as simple as clicking a button. It's a structured workflow that involves careful preparation, knowing your tools inside and out, and understanding how to frame your design in the best possible light. Whether you're a solo architect or part of a large firm, a reliable rendering process is your secret weapon for killer client presentations, marketing materials, and internal design reviews.
This journey transforms abstract plans into tangible, emotive visuals that stakeholders can connect with. It's about taking a clean BIM file and guiding it through several key stages to produce a final masterpiece.
This simple workflow visualises the journey from a technical model to a finished render.
Ultimately, the goal is to create visuals that don't just show a building, but accurately communicate its form, materials, and atmosphere.
The demand for these high-quality visuals is skyrocketing, and the market reflects it. In India, for example, the 3D rendering software market was valued at USD 1.26 billion in 2025 and is projected to hit USD 3.45 billion by 2031. That’s a staggering growth rate of 17.8%, which really underscores how vital visualisation has become. You can dig deeper into India's 3D rendering software market trends over at Mobility Foresights. If you're creating animations, you might also find this ultimate guide to compress video without losing quality helpful for sharing your work.
Key Stages in the Rendering Pipeline
To get consistent, high-quality results without tearing your hair out, it helps to break the process down. Each stage builds on the one before it, which makes things more efficient and saves you from frustrating rework later on.
-
Model Preparation: This is the foundation. It’s all about cleaning up geometry, organising your layers, and optimising the model specifically for rendering—which is a different mindset than just preparing it for construction documents.
-
Scene Composition: Here's where the artistry comes in. You'll be setting up cameras, arranging lighting, and adding environmental elements to create a scene that feels both compelling and realistic.
-
Material and Texture Application: This stage is crucial for realism. It involves applying and tweaking surfaces to accurately represent real-world materials, whether that’s brushed metal, rough-sawn timber, or polished concrete.
-
Rendering and Post-Processing: This is the final step where you execute the render itself and then make those subtle, final adjustments in an image editor to really make the image pop.
The best architectural visualisation software bridges the gap between technical drawings and client understanding. It translates complex data into an experience, allowing people to feel what it's like to inhabit a space before a single brick is laid.
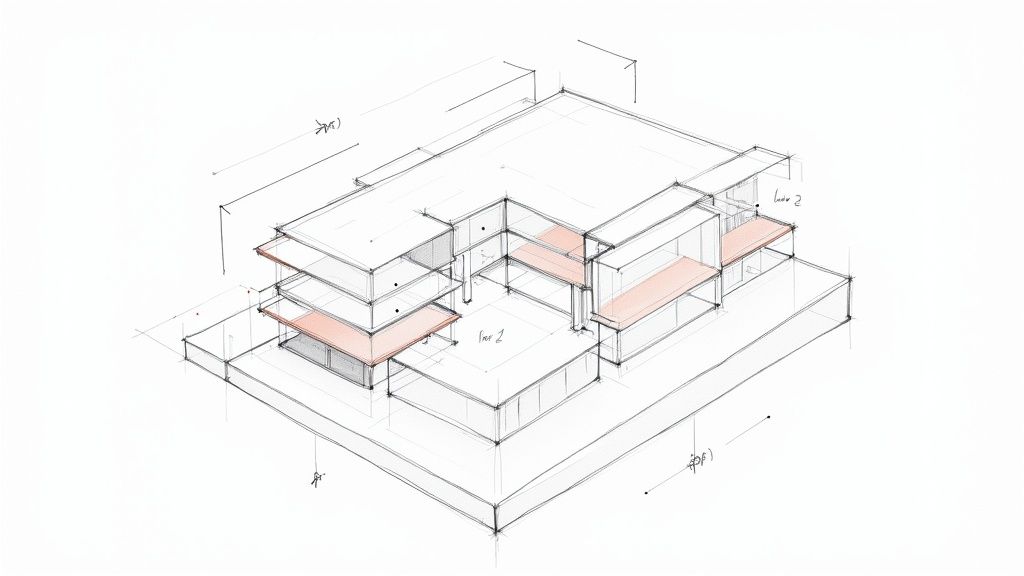
Getting Your Model Ready for a Flawless Render
Before you even think about tweaking lights or finessing textures, the biggest wins in your ArchiCAD rendering workflow come from old-fashioned model discipline. A clean, organised file isn't just a "nice-to-have"; it's the bedrock for faster renders and better-looking images. Think of it as prepping your ingredients before you start cooking.
The guiding principle here is simple: only make the renderer calculate what the camera can actually see. Every bit of hidden geometry, every complex object sitting just outside the frame, still eats up precious processing power. This is where a little strategic model management can make a massive difference.
Master Your Layers for Peak Efficiency
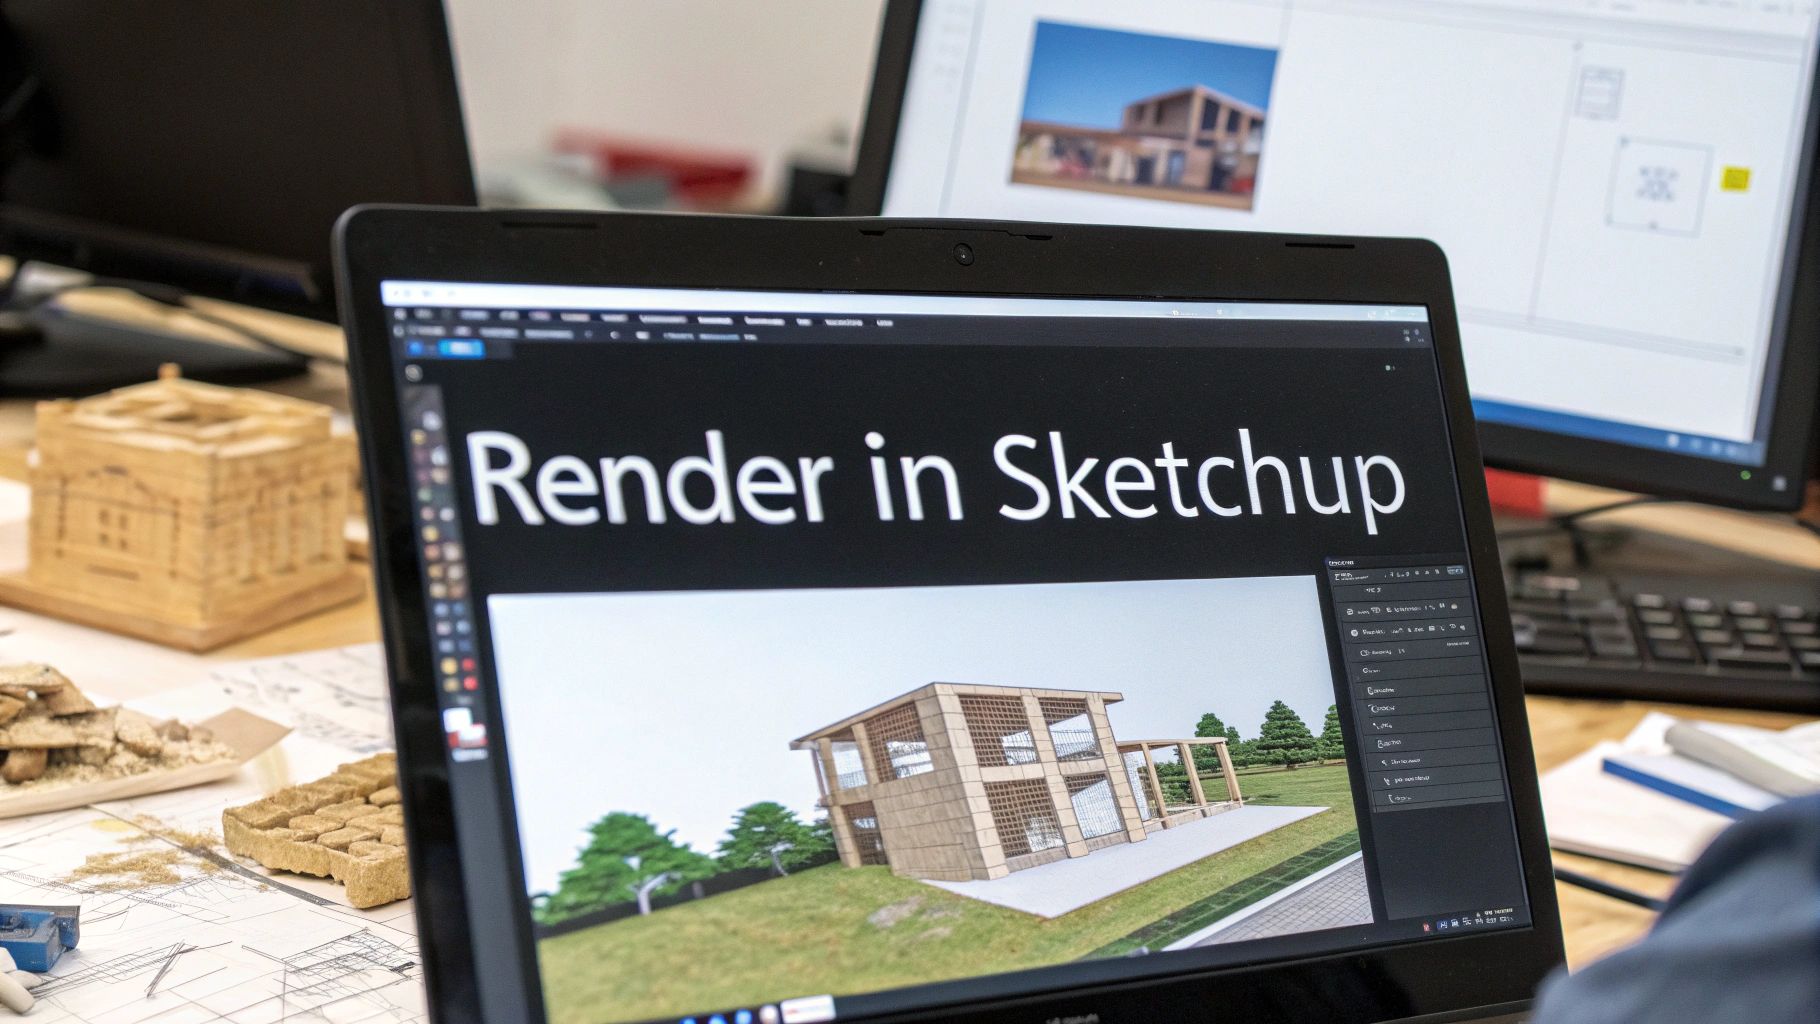
Your best friend for optimising a model is ArchiCAD’s Layer system. Instead of relying on a single, catch-all '3D' layer combination, get into the habit of creating specific combos just for your rendering views. It’s the same logic you’d use for managing drawing sets, and it works wonders for render times. While the software differs, the core principles of clean modelling are universal, something we also explore in our guide on how to render in SketchUp.
Start creating dedicated Layer Combinations for each key scene. For instance:
-
Exterior Day Render: This one would hide all the interior furniture, detailed MEP systems, and any artificial light sources.
-
Interior Kitchen Render: Here, you'd only show the kitchen and any directly visible adjacent spaces. All the exterior landscaping or distant buildings can be turned off.
-
Night Scene: This combination would hide your 'Daylight' sun object and switch on the layers containing all your interior and exterior artificial lights.
By isolating only the geometry you absolutely need, you can slash render times by up to 50% or more, especially on larger projects. It’s a small change in habit that delivers a huge payoff.
The Art of a Good Model Cleanup
Ever run into weird rendering artifacts? Those strange black splotches, flickering surfaces, or light bleeds are almost always the result of messy geometry. Before you hit that render button, take a few minutes to do a quick digital cleanup.
Here is a quick checklist to help you organise your pre-render model preparation. Running through these steps can save you a world of headaches later on.
Model Preparation Checklist for Rendering
| Checklist Item | Action Required | Why It Matters |
|---|---|---|
| Overlapping Surfaces | Hunt down and eliminate any surfaces (walls, slabs, etc.) that occupy the exact same 3D space. | Prevents "z-fighting," which causes flickering textures and rendering errors. |
| Clean Intersections | Use ArchiCAD's Intersect tool to ensure walls, slabs, and roofs meet cleanly without overlap. | Creates crisp, realistic corners and stops light from leaking through improper junctions. |
| Purge Unused Elements | Delete any old, hidden, or unused objects from your file. Check your Embedded Library for bloat. | Reduces the overall file size and the amount of data the render engine has to load. |
| Proxy High-Poly Objects | Replace complex 3D objects like detailed trees or furniture with simpler placeholders if possible. | Drastically lowers the polygon count, leading to significantly faster render times. |
| Review Material Assignments | Double-check that all visible surfaces have the correct material assigned. | Avoids the surprise of seeing default grey or incorrectly textured objects in your final render. |
This small amount of prep work ensures your model behaves predictably when it's time to render.
A well-managed model is a predictable model. Taking twenty minutes to clean up geometry and organise layers will save you hours of troubleshooting failed or slow renders down the line. It's the best return on investment you can make in the rendering process.
The final piece of the puzzle is to link all this prep work to your saved Camera Paths. This creates a repeatable, one-click setup. You can have a "Kitchen Day" camera that automatically activates the correct layer combination and sun settings, and a "Living Room Night" camera that does the same for an evening shot. This is how you build an efficient, consistent, and professional workflow.
Mastering CineRender ArchiCAD’s Built-In Engine
While there's a whole world of third-party plugins out there, don't overlook the powerful engine living right inside ArchiCAD. CineRender is far more than a simple preview tool; it's a robust engine that can produce incredible visuals without you ever having to leave your project. The secret is knowing how to move beyond the basic presets and take control of your ArchiCAD rendering workflow.
This is where you start to really craft the final image. Forget the generic, one-click settings. We're getting into the nitty-gritty details that elevate a render from just "good" to truly photorealistic. It's always a balancing act—a constant negotiation between visual quality and render time—but that's where the real skill comes in.
Fine-Tuning Your Core Render Settings
The soul of a realistic render is found in three specific areas of the detailed settings: Global Illumination, Anti-Aliasing, and the Environment. Nailing these three provides the foundation for a believable image.
-
Global Illumination (GI): This is the magic that simulates how light bounces and scatters in a space. For quick drafts, the old 'Irradiance Cache' (Legacy) method is surprisingly fast and effective. But for final, high-quality interiors, I often get cleaner results with less noise by setting the Primary Method to 'Irradiance Cache' and the Secondary Method to 'Light Mapping'.
-
Anti-Aliasing: Nothing screams "amateur render" like jagged, pixelated edges. This is controlled by the 'Geometry' setting. 'Low' is perfectly fine for quick test shots, but your final images absolutely need to be set to at least 'High'. You'll see a massive difference in the crispness of window frames, furniture edges, and other fine details. It’s a night-and-day improvement.
-
Physical Sky: For almost any exterior scene, the built-in Physical Sky is your best mate. It simulates the sun and atmosphere based on real-world time and location, giving you natural daylight and soft, realistic shadows that are a real pain to fake manually.
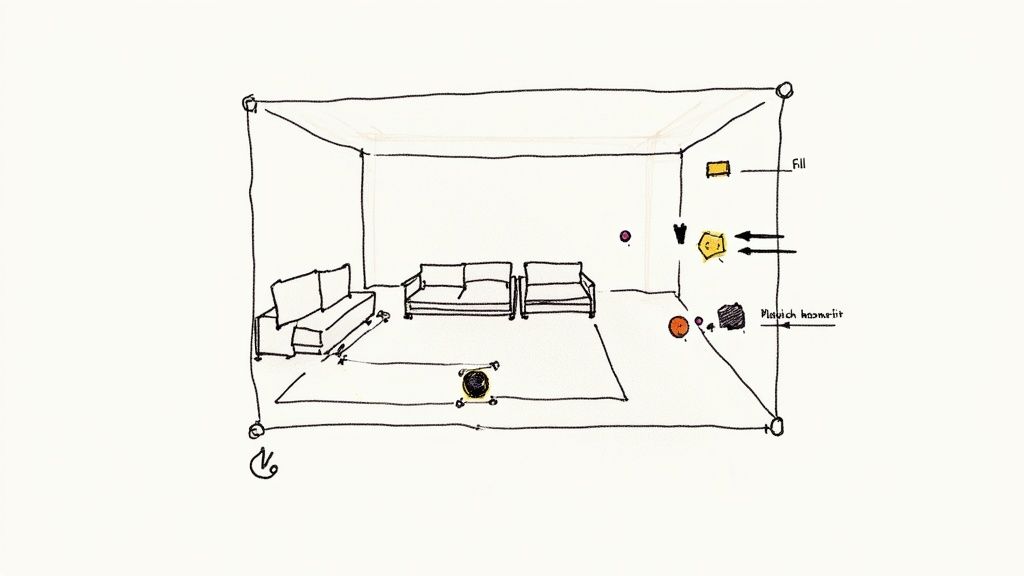
A Practical Interior Lighting Setup
Getting artificial lighting right can feel intimidating, but a straightforward three-point system is a brilliant starting point for most interior scenes. I always begin by turning off the main sun object. This forces me to focus on placing lights strategically to build depth and draw attention to the important parts of the design.
Think about a living room scene. I might start by placing a large, soft Area Light just outside a window to mimic the ambient glow from the sky. Then, I’ll add smaller General Lights inside any lamps or ceiling fixtures. To finish, a gentle Spot Light can be used to create a subtle focal point on a piece of artwork or a feature wall. Layering light like this creates a scene that feels far more dynamic and real than one blasted with a single, overpowering light source.
The real secret to mastering CineRender is iteration. Get comfortable using low-quality presets for quick, rough renders to check your lighting and composition. Only commit to the high-sample, time-consuming settings for the final shot once you know the scene is working.
Adopting this iterative mindset will save you countless hours of frustration. Of course, different projects demand different tools. Understanding the full landscape of available architectural rendering software is key to choosing the right solution, whether it's the convenience of CineRender or the specialised features of an external engine. But by getting comfortable with the built-in engine, you'll always have a powerful and seamlessly integrated option right at your fingertips.
Bringing Your Vision to Life with Surfaces and Textures
Materials and surfaces are what give an ArchiCAD rendering its soul. This is where you move beyond simple geometric forms and create believable objects with a sense of weight, texture, and history. To really craft a unique and compelling scene, you have to look past the default library, and the ArchiCAD Surface Editor is your main workshop for this job.
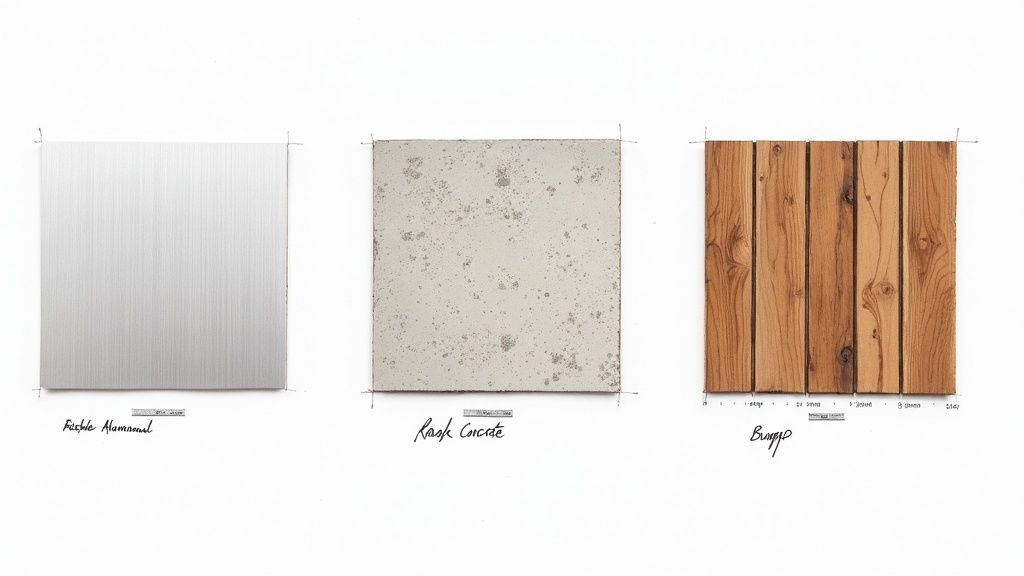
It’s easy to get lost in all its different channels and settings. But from my experience, realism usually boils down to getting just three key areas right: Colour, Reflectance, and Bump. These three elements work together to control how a surface reacts to light, which is the very essence of rendering.
Building Believable Materials from Scratch
Forget about using generic, flat surfaces. The real world is packed with imperfections and subtle details, and your materials need to reflect that.
Let's say you're creating a brushed aluminium surface. You wouldn't just pick a plain grey colour. Instead, you'd layer multiple reflectance types in the Reflectance channel. I usually start with a base metallic reflection, then add an anisotropic layer with a subtle procedural texture on top. This simulates those fine grooves left behind by the brushing process and immediately sells the effect.
The same logic applies to something like concrete. A convincing concrete texture is much more than just a grey image map.
-
Colour Channel: Start with a high-resolution, seamless concrete texture map. Don't skimp on quality here.
-
Reflectance Channel: Add a very subtle, blurry reflection to mimic a sealed concrete floor. You’ll want to keep the glossiness low for this.
-
Bump Channel: Use a procedural noise or a corresponding bump map to create the small pits and imperfections that give the surface its rough, tactile feeling.
The push for this level of quality is growing, especially in expanding markets. The architectural visualisation rendering software market in India, for example, was valued at USD 22.0 million in 2025 and is projected to hit USD 34.0 million by 2034. A lot of that growth is coming from firms using cloud-based rendering to create more efficient and realistic project presentations.
The secret to great materials is all in the subtlety. A tiny 5% change in glossiness or a small adjustment to a bump map's strength can be the difference between a surface that looks fake and one that feels completely real.
The Importance of High-Resolution Textures
Remember, your material is only as good as the textures you feed it. Always use high-resolution, seamless textures to avoid ugly tiling patterns or pixelation, particularly on big surfaces like walls, floors, or facades.
Once you apply a texture, pay close attention to its scale and projection method. An incorrectly scaled wood grain on a cabinet door can instantly shatter the illusion of reality you're trying to build. You can dive deeper into creating these convincing spaces in our detailed guide to interior rendering.
The final, and maybe most important, step is just to observe. Look at how light bounces off different surfaces in the room you're in right now. Notice the sharp, clear reflections in glass versus the soft, diffused highlights on wood. Bringing that real-world observation back into the ArchiCAD Surface Editor is the most powerful way to turn a lifeless model into a dynamic, realistic scene.
Expanding Your Horizons with External Renderers
While CineRender is a seriously powerful engine built right into ArchiCAD, some projects just demand a more specialised tool. Stepping outside the native environment can unlock new levels of speed, realism, and even client interaction. This is the point where you have to decide: do you need the instant feedback of real-time rendering, or are you chasing that last ounce of photorealism?
The choice isn't just about making things look prettier; it's about matching the right tool to the right phase of a project. Different engines are good at different things, and knowing their strengths will help you build a much more flexible and effective visualisation pipeline.
Real-Time Rendering for Instant Feedback
For those fast-paced design iterations and immersive client walkthroughs, nothing beats a real-time renderer. Tools like Enscape and Twinmotion have completely changed how we work, thanks to their live-sync plugins for ArchiCAD. This means you can move a wall, swap a material, or adjust a window in your model and see the fully rendered result update instantly. It's a game-changer.
This kind of workflow is perfect for:
-
Live design sessions: Make changes on the fly with clients looking over your shoulder.
-
Rapid prototyping: Test out different design ideas without sitting around waiting for renders to finish.
-
VR experiences: Let clients pop on a headset and walk through their new space with a single click.
The ability to send clients a standalone file they can explore on their own computer, without needing any special software, is a massive advantage. It transforms the review process from a static presentation into an interactive experience.
V-Ray for Uncompromising Quality
When absolute, pixel-perfect photorealism is the only thing that matters, V-Ray is the industry standard. It's the go-to for most top architecture firms for a reason. V-Ray for ArchiCAD gives you incredible control over every little detail—lighting, materials, render settings, you name it. This is the engine you fire up for those final marketing shots, competition entries, and hero images where everything has to be flawless.
Of course, all that power comes with a trade-off. V-Ray has a steeper learning curve and will take longer to render than the real-time options. For those pinnacle projects, though, the stunning quality is almost always worth the extra time and effort. It’s crucial to understand the nuances, which is why we’ve detailed more options in our guide to the /blog/best-architectural-rendering-software.
The Rise of Cloud and AI Rendering
A new wave of rendering solutions is taking the heavy lifting off your local machine and moving it to the cloud. Platforms like Vibe3D can take your ArchiCAD model and use powerful cloud servers to generate visuals, which frees up your own computer to keep working. This is a huge help for smaller firms or solo architects who might not have a dedicated render farm but still need to produce high-quality images.
And if you really want to push the creative boundaries, it's worth looking into modern AI Image Models that can transform your visual output in entirely new ways.
This shift is part of a much bigger digital movement. To give you some perspective, India's 3D rendering market was valued at USD 0.13 billion in 2021 and is projected to hit USD 0.30 billion by 2029, growing at 11.3% each year. This boom is being driven largely by the real estate sector embracing digital tools. Choosing the right renderer really comes down to what your specific project needs—it’s all about balancing your timeline, budget, and the quality you're aiming for.
ArchiCAD Rendering Engine Comparison
Choosing an external renderer can feel overwhelming, so I've put together this quick comparison to help you see where each tool shines. Think of it as a starting point to match the right engine to your project's needs.
| Rendering Engine | Best For | Speed | Learning Curve |
|---|---|---|---|
| Enscape | Real-time feedback & client walkthroughs | Very Fast | Low |
| Twinmotion | Animated scenes & large-scale environments | Very Fast | Low-Medium |
| V-Ray | Ultimate photorealism & final marketing images | Slow | High |
| Vibe3D | Offloading render jobs & team collaboration | Fast | Low |
Ultimately, the best tool is the one that fits seamlessly into your workflow and helps you communicate your design intent most effectively. Don't be afraid to experiment to find what works best for you and your clients.
Common ArchiCAD Rendering Questions Answered
https://www.youtube.com/embed/6ehuME7rnUg
Whether you're just starting out or have been using ArchiCAD for years, you’ll eventually run into a few common rendering roadblocks. These hurdles can be frustrating, but the fix is usually quite simple once you know where to look. Let's walk through some of the most frequent questions that come up during the visualisation process.
Getting these little details right can be the difference between a good render and a great one. The aim is always to hit that sweet spot: the best possible quality in the least amount of time.
Why Are My Renders Grainy or Noisy?
This is easily the most common complaint, especially when you're working with the built-in CineRender engine. Nine times out of ten, a grainy or noisy image comes down to your sampling settings, specifically with Global Illumination (GI) and Anti-Aliasing.
When you’re firing off quick draft renders, low sample counts are your friend—they save a ton of time. But for that final, high-resolution hero shot, you’ll need to crank them up.
Here are the key settings to check:
-
Physical Renderer Settings: The first place to look is the 'Sampling Quality'. Just switching this from 'Low' to 'Medium' or 'High' makes a world of difference.
-
Global Illumination (GI): This is a big one. For much cleaner results, I usually set the primary method to 'Irradiance Cache' and then bump up its 'Density' setting.
-
Light Source Samples: If you notice the noise is mostly in your shadows, it's a sign that your individual light sources need more samples. Just select the light object in your model and find its shadow quality setting to increase it.
It's a constant balancing act. Higher settings produce cleaner, crisper renders but will dramatically increase your processing time. Always use lower settings for test renders and reserve the high-quality profiles for the final output.
How Can I Create a Realistic Night Scene?
The secret to a believable night scene isn't about using one super-bright light. It’s all about layering different types of light to build mood and atmosphere.
First, you need to set the stage. Head over to the CineRender Environment settings and switch from 'Physical Sky' to 'HDRI Sky'. Find a good, high-quality night or dusk HDRI map and load it in. This will give you realistic ambient light and those subtle, beautiful reflections on surfaces like glass and metal.
With your base set, it's time to add the artificial lighting:
-
Use IES lights whenever you can. They create incredibly accurate light patterns for specific fixtures like downlights or wall sconces, which adds a huge dose of realism.
-
For lampshades, light strips, and other soft light sources, you can use Area lights or simply make the material itself glow by activating the 'Luminance' channel.
-
Whatever you do, avoid using a single, powerful light to illuminate the whole scene. A far more believable result comes from layering multiple, lower-intensity lights that each have a clear purpose.
Should I Use CineRender or an External Renderer?
Ah, the classic dilemma. The honest answer is: it really depends on what you need for that specific project. Each option has its own clear strengths.
CineRender is fantastic for its convenience. It’s built right into ArchiCAD and can produce stunning still images without ever leaving the application. It's my go-to for final design presentations where I need top-notch quality without the hassle of exporting my model.
On the other hand, external real-time renderers like Enscape or Twinmotion are absolute champions of speed and client interaction. Their live-sync feature is a genuine game-changer for design reviews. You can make changes in ArchiCAD and see them update instantly in a fully rendered, walkable environment.
And when nothing but absolute, pixel-perfect photorealism will do, V-Ray is still the industry benchmark. It gives you an incredible amount of control but be prepared for a steeper learning curve and longer render times. So, the rule of thumb is: Enscape for speed, CineRender for convenience, and V-Ray when only the best will suffice.
What Is the Quickest Way to Speed Up Render Times?
Slow renders can bring a project to a grinding halt. Thankfully, there are a few practical things you can do to claw back that precious time.
First, always start with an optimised model. Use dedicated Layer Combinations to make sure you're only rendering the geometry that the camera can actually see. There’s no point making the engine calculate things that are hidden behind a wall. Second, watch your texture sizes. Using massive 8K textures on small objects like door handles is a complete waste of resources and slows everything down.
Finally, get strategic with your CineRender settings. The 'Irradiance Cache' for GI is generally faster than the other methods. You can also try lowering the 'Ray Depth' setting. Unless your scene is full of complex, multi-layered glass or endless reflections, you can often get away with a lower value here without any noticeable drop in quality.
Ready to transform your ArchiCAD models into stunning, photorealistic visuals without the long wait times? At Vibe3D, we've built an AI-powered platform that delivers incredible renders in seconds, not hours. See how you can accelerate your workflow and impress your clients by visiting https://vibe3d.ai today.