Architectural rendering software has evolved dramatically in the past few years. In 2026, architects no longer choose tools based only on realism — speed, AI integration, hardware efficiency, and workflow compatibility now define the best architectural rendering software.
Before diving into rendering, architects and designers often utilise powerful architectural modeling and design software like Revit to create the foundational 3D models of their projects. Once that model is built, the rendering engine takes over to add light, texture, and atmosphere.
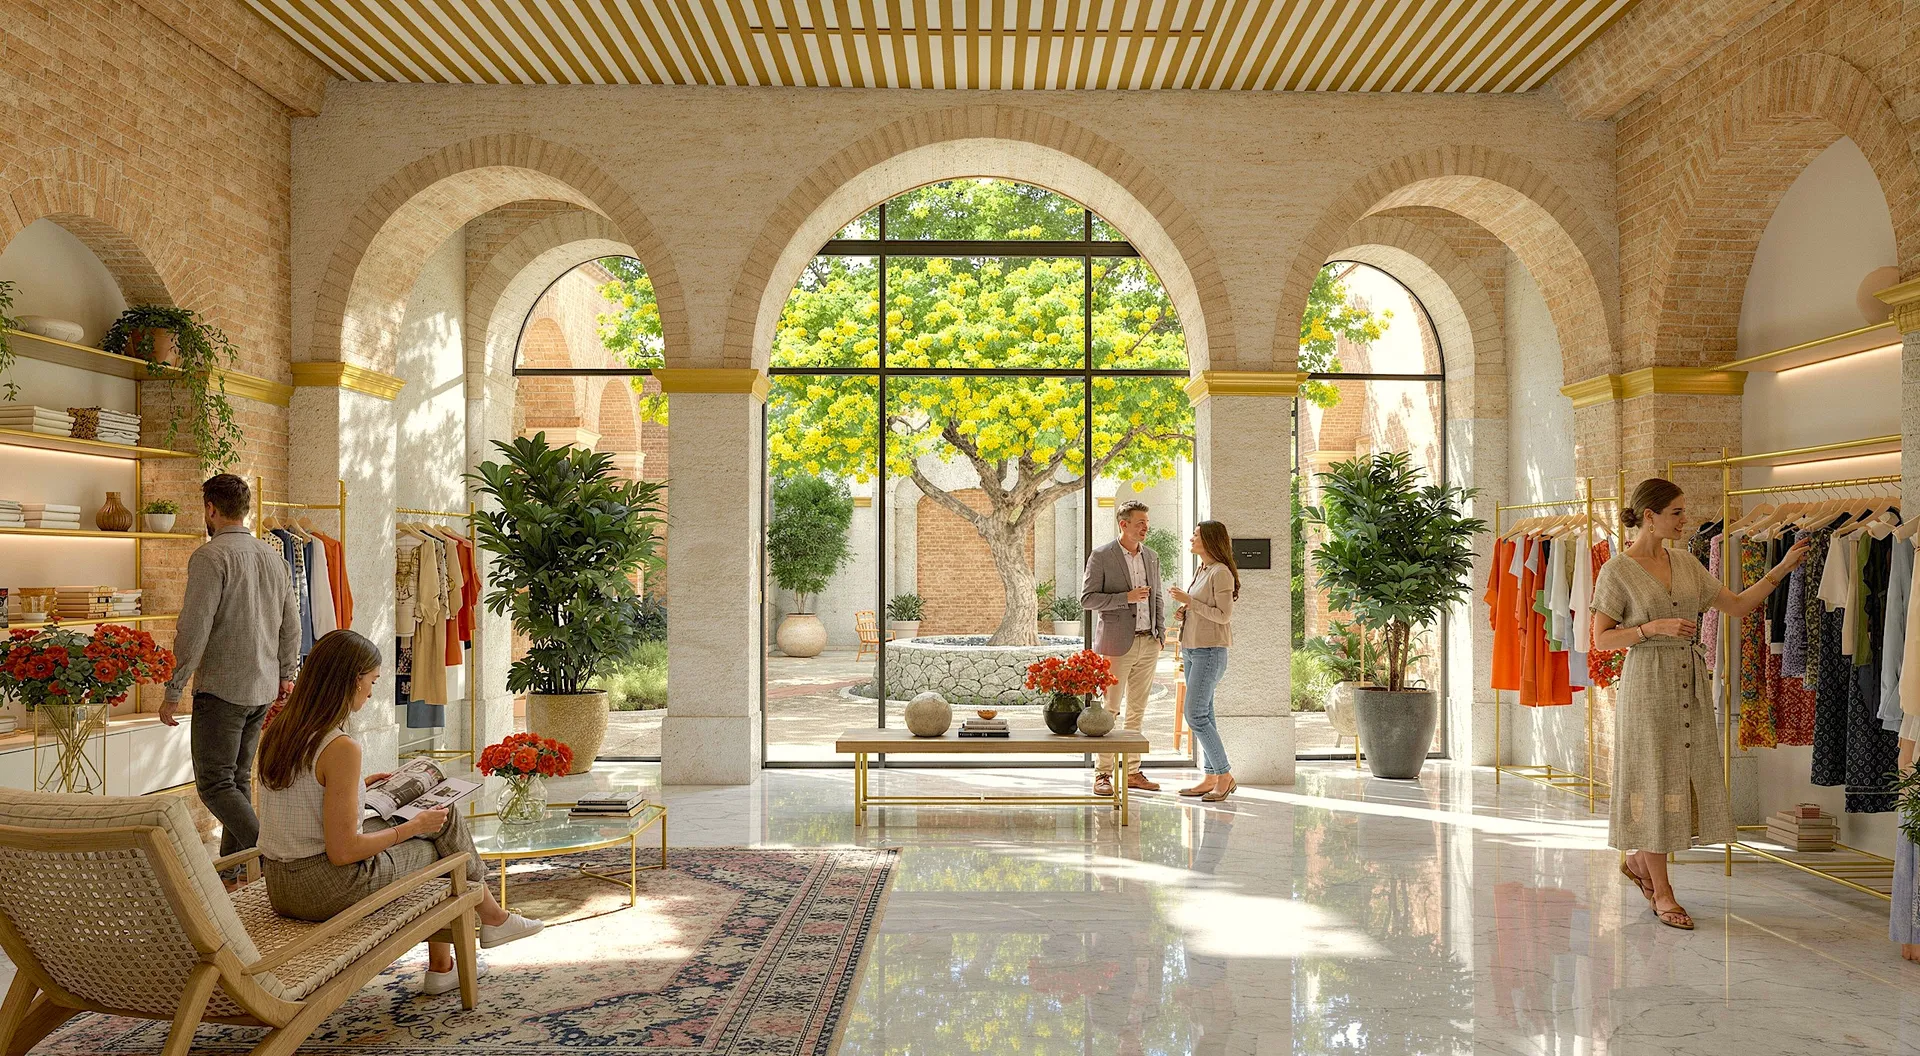
Architectural rendering software finds its application across a wide range of project types—residential, commercial, interior design, urban planning, and landscape architecture. These tools empower architects and designers to bring their ideas to life visually long before ground is broken or a single brick is laid. By producing realistic visuals, teams can communicate design intent, secure client approvals, and refine concepts with unprecedented clarity.
No matter if you're a solo architect needing quick client mock-ups, a student building a portfolio, or a large studio producing cinematic walkthroughs, the 'best' tool is the one that empowers you to create without friction.
Whether you use SketchUp, Revit, Rhino, or Archicad, the right rendering solution can reduce production time by 60–80% while improving visual quality. This guide compares the leading architectural rendering platforms in 2026 — including traditional engines, real-time tools, and AI-powered solutions.
What to Expect from Modern Rendering Software
Today’s architectural rendering tools are a far cry from the clunky engines of the past. Here’s what you should look for when evaluating modern options:
- True-to-life visuals: The best software harnesses advanced technology—think ray tracing and high-dynamic range imaging—to deliver images with depth, realism, and accurate lighting effects that mirror real-world conditions.
- Material flexibility: You’ll have access to huge material libraries and fine-grained controls, letting you mimic everything from polished marble to weathered wood, right down to the tiniest surface detail.
- Seamless workflow integration: Expect smooth compatibility with major modeling programs such as Revit, SketchUp, Rhino, and Archicad. Direct integrations minimize duplicate work, making it easy to go from sketch to render.
- Animation and interactivity: Modern platforms make it simple to generate animations, fly-throughs, and interactive walkthroughs—perfect for breathing life into a static model or winning over clients with immersive presentations.
- Performance and scalability: Whether you’re rendering a cozy loft or a sprawling master plan, current software adapts to the scale. Many offer cloud-based rendering, drastically speeding up processing times and freeing up your local hardware.
- Intuitive user experiences: Toolsets are designed for everyone—from beginners to seasoned pros. Expect helpful tutorials, responsive interfaces, and streamlined workflows, allowing you to focus on creativity rather than troubleshooting.
- Sustainable design features: Some platforms go a step further with built-in tools for daylight analysis, energy efficiency simulation, and environmental impact assessments—helping architects design better, greener buildings from the outset.
Armed with these capabilities, today’s top rendering software empowers architects and designers to translate their visions into compelling, persuasive visuals—often in a fraction of the time it once took.
How Architectural Rendering Software Elevates Visualization and Presentation
Gone are the days when stacks of blueprints and rough sketches did all the talking. Today’s architectural rendering software transforms basic 3D models into compelling visuals, infusing designs with lighting, textures, and environmental context that bring the architectural story to life.
Here’s how these tools make a difference:
-
Transforming Concepts into Ready-to-Share Images With rendering software, it’s easy to turn a wireframe or a basic CAD model into a visually rich depiction of your design. Stakeholders—from clients and contractors to city officials—quickly “get” the intent before ground is ever broken.
-
Making Presentations Pop Need to wow your clients or committee? The right rendering tool lets you showcase your design under different lighting, times of day, or even changing seasons. Walkthroughs, flyovers, and animated sequences make even the densest project details more engaging and persuasive.
-
Ensuring Design Clarity and Accuracy Realistic renders do more than look good—they help you spot issues before they become expensive mistakes. See how natural light streams through a curtain wall in Revit or how material finishes interact within a space, and tweak accordingly—long before your team hits the construction phase.
-
Fostering Smoother Collaboration Sharing a 3D model gives everyone—from fellow architects to engineers and clients—a crystal-clear sense of scale, flow, and spatial relationships. Feedback cycles get faster, revisions become less painful, and everyone’s (almost) on the same page.
-
Cutting Down Costly Surprises Catching design snags early with detailed visuals helps avoid the dreaded “change order” during construction, saving both time and budget.
-
Pushing Creative Boundaries Integration with VR and immersive tech lets you take visualization to the next level. Virtually walk clients through spaces, test layouts, and experiment with lighting on the fly—no hard hats required.
In short, architectural rendering software transforms raw models into persuasive, polished presentations that bridge the gap between imagination and reality.
How Rendering Software Drives Efficiency and Sustainability
Architectural rendering software isn't just about creating good-looking visuals—it’s a powerful tool for advancing efficiency and green practices in today’s building projects.
By enabling designers to visualize every detail before a single brick is laid, rendering platforms help reduce costly mistakes and minimize material waste. Fine-tuning layouts in 3D makes it easy to optimize space, lighting, and energy flow long before construction crews arrive on site. Iterating digitally also means teams can spot design conflicts early, keeping change orders—and unnecessary resource usage—to a minimum.
On the sustainability front, early visualization supports smarter decisions about materials and building orientation, often leading to better energy performance and lower environmental impact over the life of a project. And as technologies like virtual reality become increasingly integrated, teams and clients can "walk through" a design to test accessibility, daylight, and even visitor flow—helping create buildings that are not just beautiful, but also efficient and sustainable at their core.
Data Security and Intellectual Property Protection Matter More Than Ever
As architectural workflows move increasingly into the digital realm, safeguarding your designs takes on new urgency. 3D models, renderings, and project files often represent months of intellectual labor and creative investment. In today's collaborative environments—where teams share assets across platforms like Revit, SketchUp, and cloud-based project managers—unauthorized access or data breaches can spell disaster.
Why is this crucial?
- Client Confidentiality: Sensitive details, from floor plans to material specs, are often governed by strict NDAs. A security lapse could compromise a client relationship or expose proprietary information.
- Safeguarding Your Creative Edge: Your unique designs and render-ready models are valuable intellectual property—if they're leaked or stolen, you risk losing your competitive advantage.
- Seamless Collaboration Without Compromise: Modern rendering software must allow multiple contributors to work together without making security an afterthought. Whether collaborating with structural engineers, interior designers, or external consultants, robust encryption and permission controls are essential.
In short, protecting your work isn’t optional—it’s a core requirement for any professional workflow today.
Top Architectural Rendering Software in 2026
Below is a breakdown of the leading platforms architects are using today.
1. Vibe3D (AI-Powered Rendering)
Vibe3D positions itself as a revolutionary force in the rendering landscape, leveraging AI to deliver photorealistic visuals in seconds. It's a standout choice for professionals who need to produce high-quality interior and architectural imagery without the steep learning curve or time investment of traditional rendering engines. This platform is expertly tailored for interior designers, architects, and visualisation specialists who prioritise speed and ease of use.
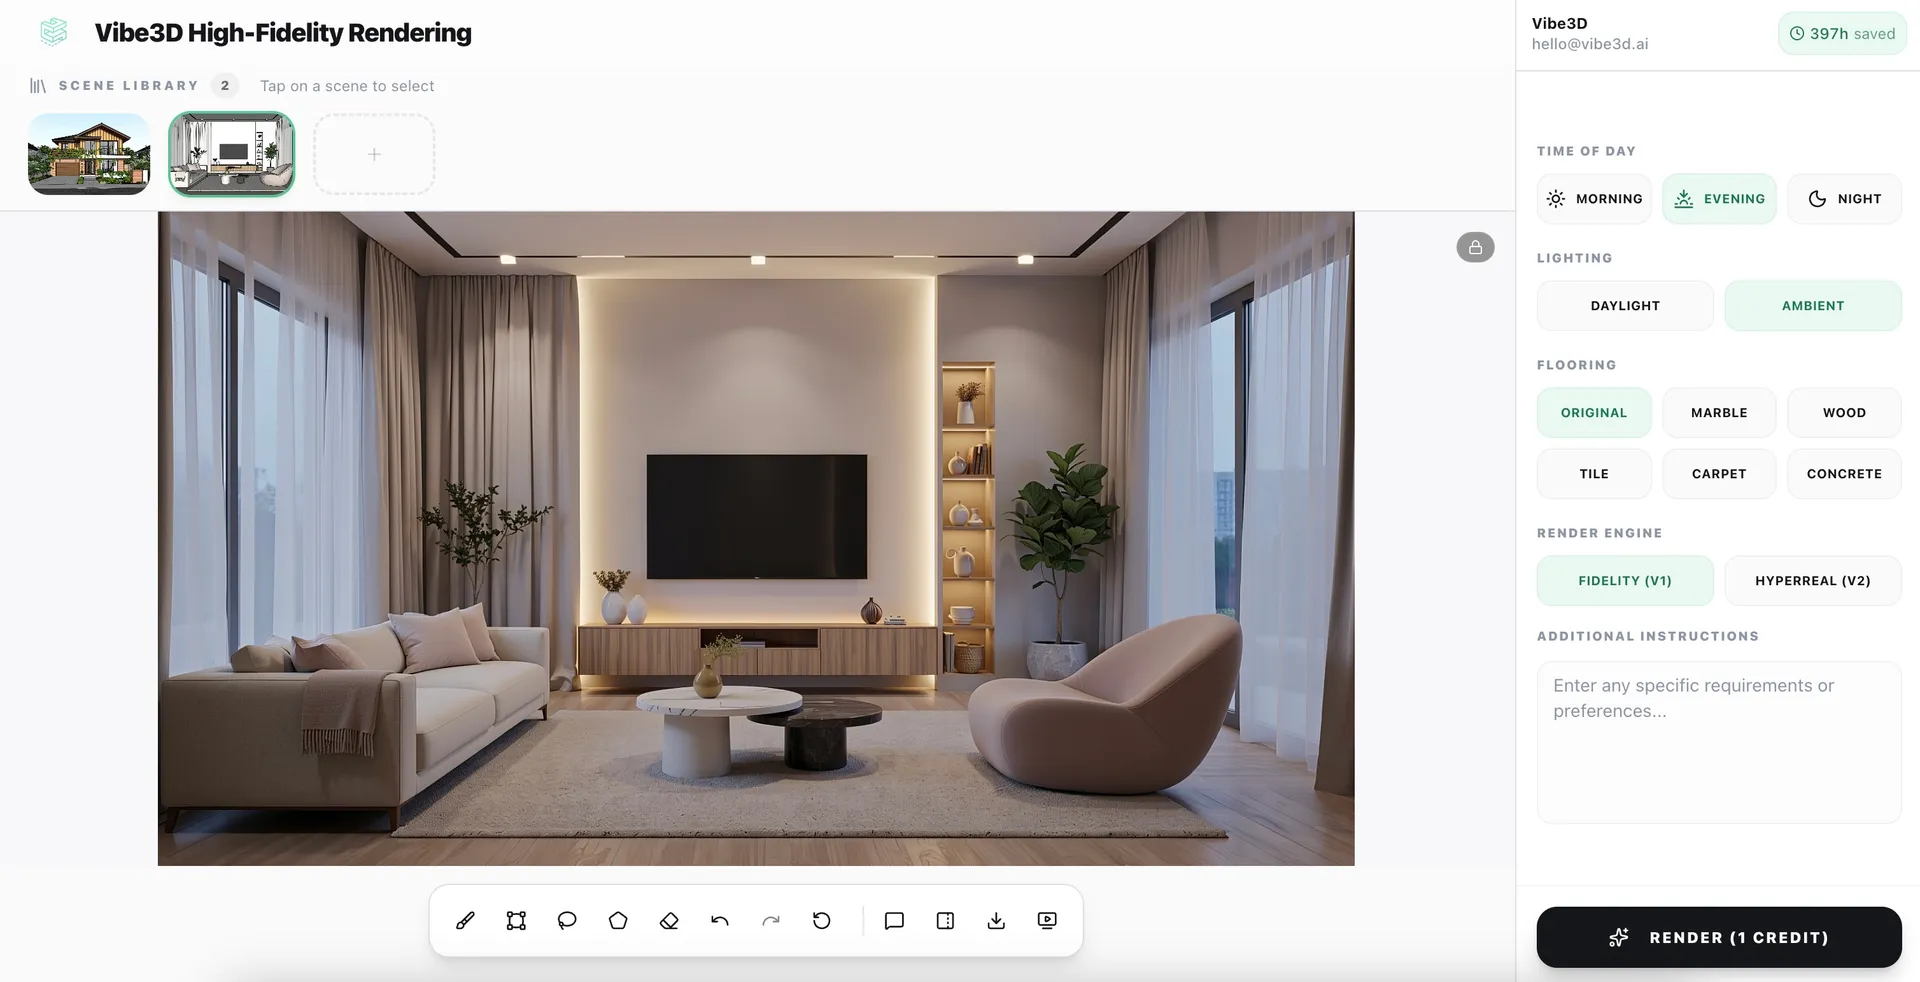
What sets Vibe3D apart is its intelligent approach to the creative process. It doesn't just render, it understands. The platform accurately preserves complex geometry, materials, and textures from your source models, ensuring your design intent is translated perfectly into stunning, ultra-realistic outputs up to 4K resolution. This makes it one of the best architectural rendering software options for producing client-ready visuals straight out of the box.
Key Features & User Experience
Vibe3D’s workflow is designed for rapid iteration. Its most impressive feature is the intuitive, one-click editing powered by natural language. Instead of tweaking complex settings, you can simply tell the AI what to change, like "make the walls a warmer white" or "add more natural light from the window".
- Smart Prompt Suggestions: The system offers contextual prompts to guide you, removing the guesswork from achieving the perfect look.
- Seamless Integration: It connects directly with popular tools like SketchUp and 3ds Max, making it a frictionless addition to your existing workflow.
- Cloud-Based Processing: Heavy lifting is done on the cloud, freeing up your local machine and ensuring fast turnaround times regardless of your hardware.
Pricing and Access
Vibe3D operates on a flexible pay-as-you-go model, which is great for freelancers and studios with fluctuating project loads. Plans are based on the number of renders, scaling from 100 to 1000, with a free trial available to test the platform. Higher-tier Pro and Studio plans unlock 4K rendering, priority support, and other smart features.
Who is it Best For?
This tool is an indispensable asset for design professionals who need to quickly visualise and communicate ideas. Freelancers, design studios, and even students can produce sharp, consistent visuals that impress clients and accelerate project timelines. Its clean setup and responsive support remove technical barriers, making high-end rendering accessible to everyone.
Pros:
- Ultra-realistic 4K renders that preserve all model details
- Intuitive natural language editing and Smart Prompts streamline iterations
- Seamless integration with SketchUp and 3ds Max
- Flexible pay-as-you-go pricing with a free trial
Cons:
- Advanced features like 4K rendering are locked behind higher-tier plans
- Requires a stable internet connection for cloud processing
Visit Website: https://vibe3d.ai
2. Chaos – V-Ray
V-Ray, by Chaos, isn't just a piece of software; it's an industry titan. For decades, it has set the benchmark for photorealistic rendering, becoming the go-to choice for high-end architectural visualisation studios and VFX houses. Its power lies in its incredible versatility and mature, physically-based rendering engine that produces stunningly realistic images. If you've seen an architectural fly-through that made you question if it was real, there's a good chance V-Ray was behind it.
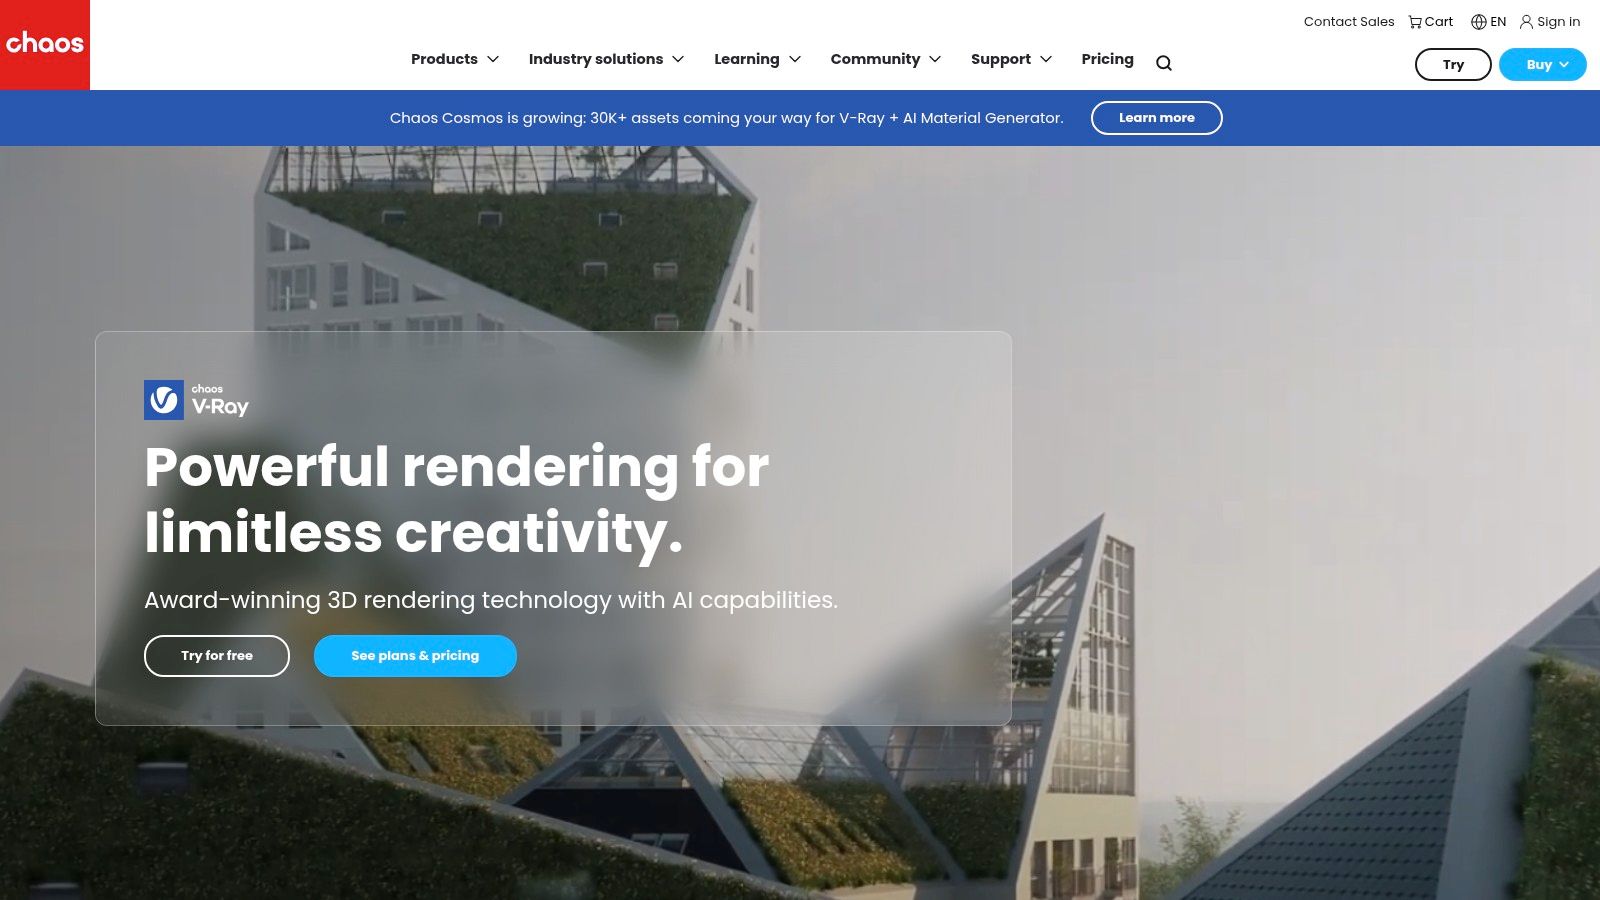
What makes it a top contender in the list of the best architectural rendering software is its vast ecosystem. A single Chaos V-Ray Premium subscription gives you access to V-Ray for multiple host applications like 3ds Max, SketchUp, Rhino, and Revit, which is a massive win for multidisciplinary firms. The subscription also bundles in the Chaos Cosmos asset library, cloud rendering credits, and other powerful tools like Chaos Phoenix for fluid simulations.
Key Details & Considerations
The platform's strength is also its biggest hurdle for newcomers: the learning curve. V-Ray is incredibly deep, with settings that offer granular control over every aspect of your render, from global illumination to material shaders. This complexity can be intimidating, but mastering it unlocks unparalleled artistic control.
- Best For: Professionals and studios demanding the highest level of photorealism and control.
- Pricing: Subscription-based. The V-Ray Premium plan offers access to all integrations. Note that Chaos has announced pricing changes for 2025, including an increase for its Solo plan.
- Unique Feature: The unified license model (Premium plan) is a game-changer, providing access across a wide range of DCC and BIM applications without separate purchases.
- Pros: Unmatched photorealism, extensive third-party support and resources, and a comprehensive ecosystem with the Premium subscription.
- Cons: Can have a steep learning curve for beginners compared to more streamlined renderers.
For a deeper dive into how it compares with other tools, you can explore more about Chaos – V-Ray and its place in the industry.
3. Chaos – Corona Renderer
If V-Ray is the venerable master of rendering, Corona Renderer is its incredibly talented and approachable sibling. Also from Chaos, Corona has rapidly gained a devoted following in the architectural visualisation community for one primary reason: its remarkable ease of use without sacrificing quality. It strips away much of the intimidating complexity associated with high-end renderers, focusing on a streamlined, artist-friendly workflow that delivers beautiful, photorealistic results with fewer tweaks and settings.
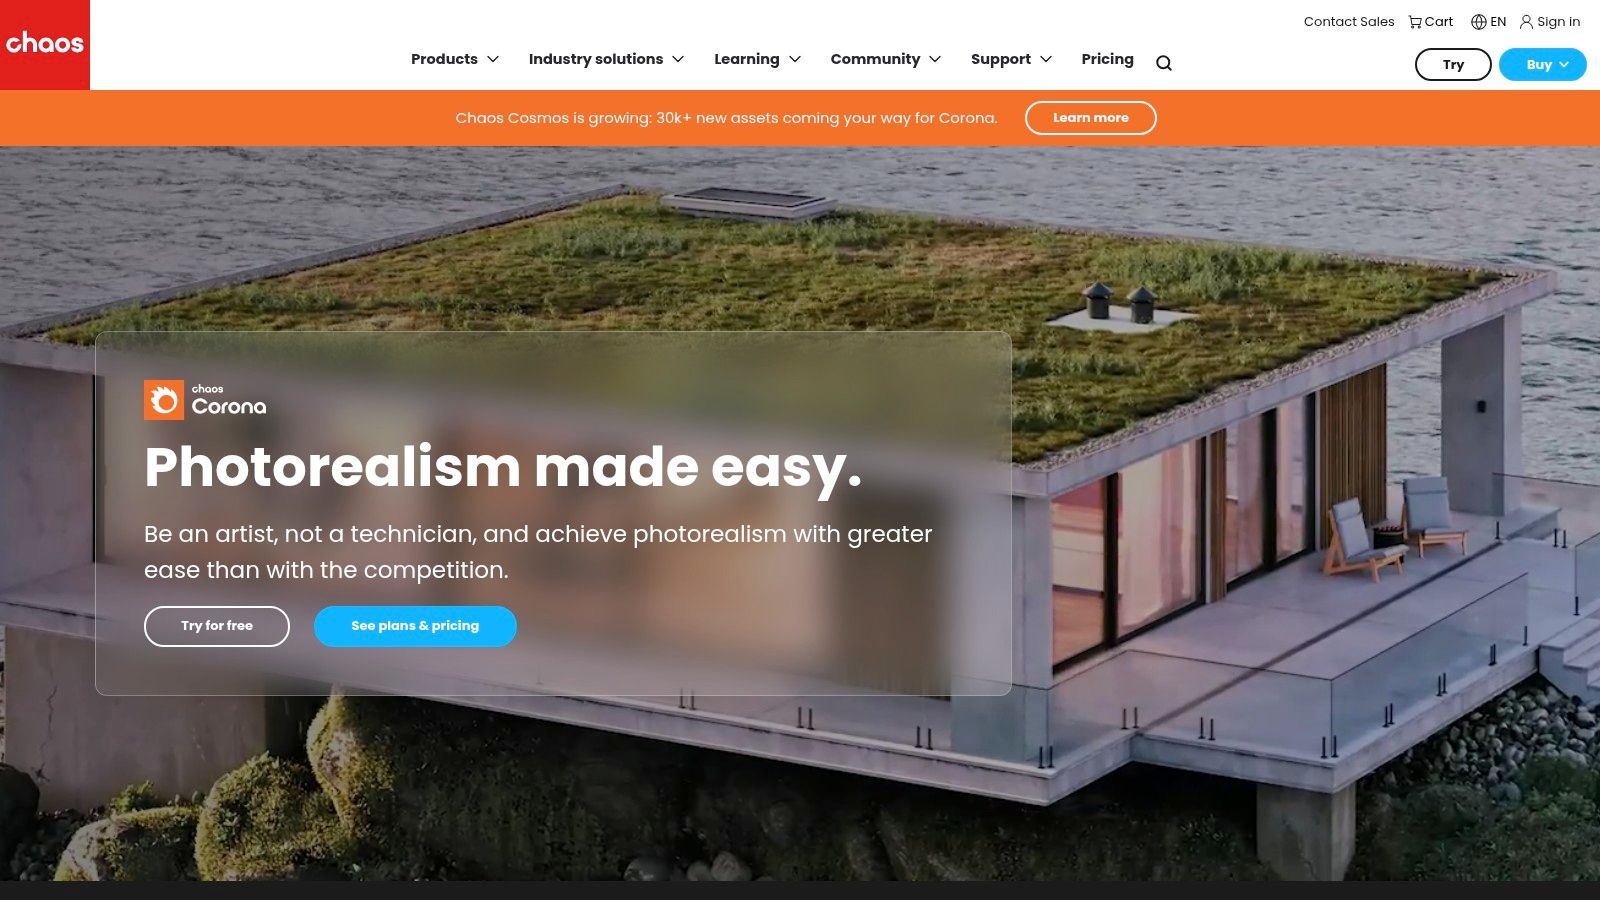
Corona excels at creating realistic lighting and materials with minimal effort, making it one of the best architectural rendering software choices for artists who want to focus more on creativity and less on technical settings. It’s primarily integrated with 3ds Max and Cinema 4D. Like V-Ray, it is available via subscription, with the Premium plan bundling valuable Chaos assets like Scans and Phoenix, plus floating licenses which are perfect for collaborative studio environments.
Key Details & Considerations
The platform’s major strength is its gentle learning curve. Artists can often get stunning results "out of the box", which significantly speeds up project timelines. While it is CPU-focused, its performance is highly optimised, and the interactive renderer provides near-instant feedback on changes to lighting, materials, and geometry, making the design process feel fluid and intuitive.
- Best For: Archviz artists, interior designers, and small to mid-sized studios who prioritise workflow speed and ease of use.
- Pricing: Available through Solo and Premium subscription plans. The Premium tier includes the full Chaos ecosystem and team-friendly floating licenses.
- Unique Feature: Its interactive LightMix feature is a standout, allowing users to adjust the colour and intensity of lights during or after the render has finished.
- Pros: Extremely user-friendly and fast to learn, outstanding interactive rendering performance, and a very supportive community.
- Cons: Limited to fewer host applications compared to V-Ray and is primarily a CPU-based renderer, which may not suit all hardware setups.
4. Enscape (by Chaos)
Enscape has carved out a unique space in the architectural visualisation world by focusing on one thing: speed. It’s a real-time rendering engine that plugs directly into your favourite BIM and CAD programmes like Revit, SketchUp, and Archicad. This tight integration means you can launch a fully explorable, high-quality render of your project with a single click, allowing for instant design reviews and immersive client presentations without ever leaving your modelling software.
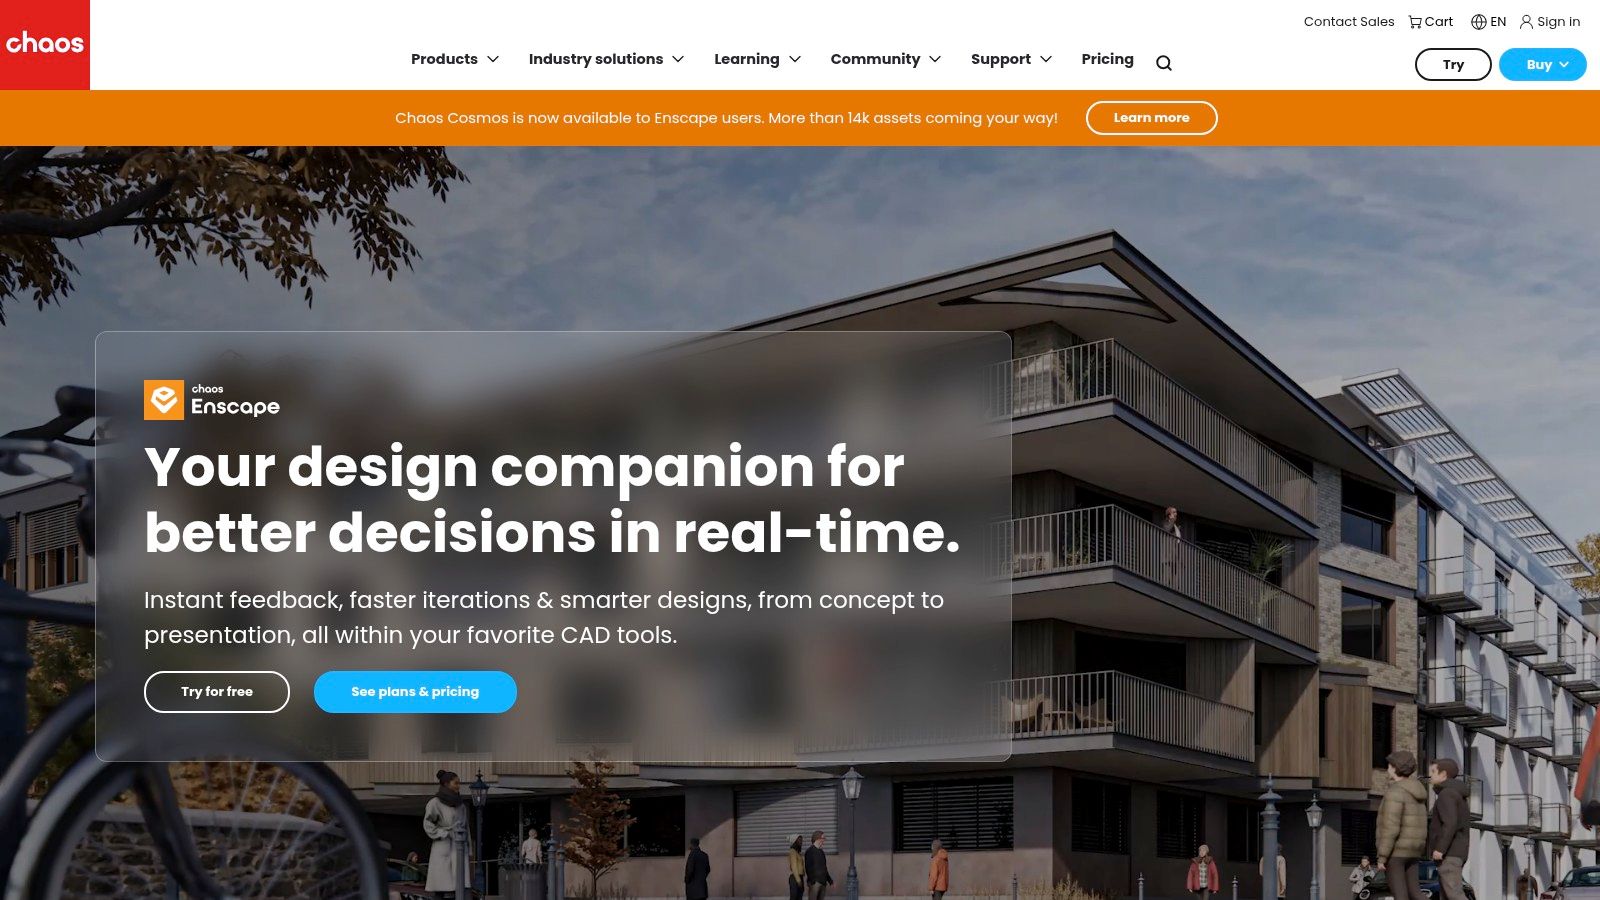
What solidifies Enscape’s position as one of the best architectural rendering software options is its accessibility. It bridges the gap between technical 3D modelling and compelling visualisation, empowering architects and designers to create stunning walkthroughs themselves. With its acquisition by Chaos, Enscape is now part of a larger ecosystem, offered in standalone plans or bundled in suites like the ArchDesign Collection, which includes other valuable tools.
Key Details & Considerations
The platform’s greatest strength is its simplicity and real-time link. Any changes you make in your CAD or BIM model are reflected instantly in the Enscape window. This live-sync capability is revolutionary for design iteration, helping you make better decisions faster. While it may not offer the granular, hyper-realistic control of V-Ray, its output is more than sufficient for most architectural needs.
- Best For: Architects and designers who need fast, high-quality visualisations and walkthroughs for internal reviews and client presentations.
- Pricing: Available through subscription plans like Solo and Premium, or as part of the Chaos ArchDesign Collection suite.
- Unique Feature: Its direct, real-time integration into host applications like Revit and SketchUp is its defining characteristic, enabling a seamless design-to-visualisation workflow.
- Pros: Extremely easy to learn and use, incredible rendering speed, and strong integration with major BIM/CAD platforms.
- Cons: Mac feature parity is still developing, and recent licensing changes announced for 2025 have caused some friction among its user base.
5. Lumion
Lumion has carved out a unique space in the architectural visualisation world by prioritising speed and ease of use. It’s a GPU-accelerated rendering software designed to turn complex models into stunning videos, images, and 360-degree panoramas in record time. Its primary appeal is for architects and designers who need to produce high-quality visuals quickly, without getting bogged down in the technical minutiae of traditional rendering engines. The workflow is about building a living, breathing scene around your model.
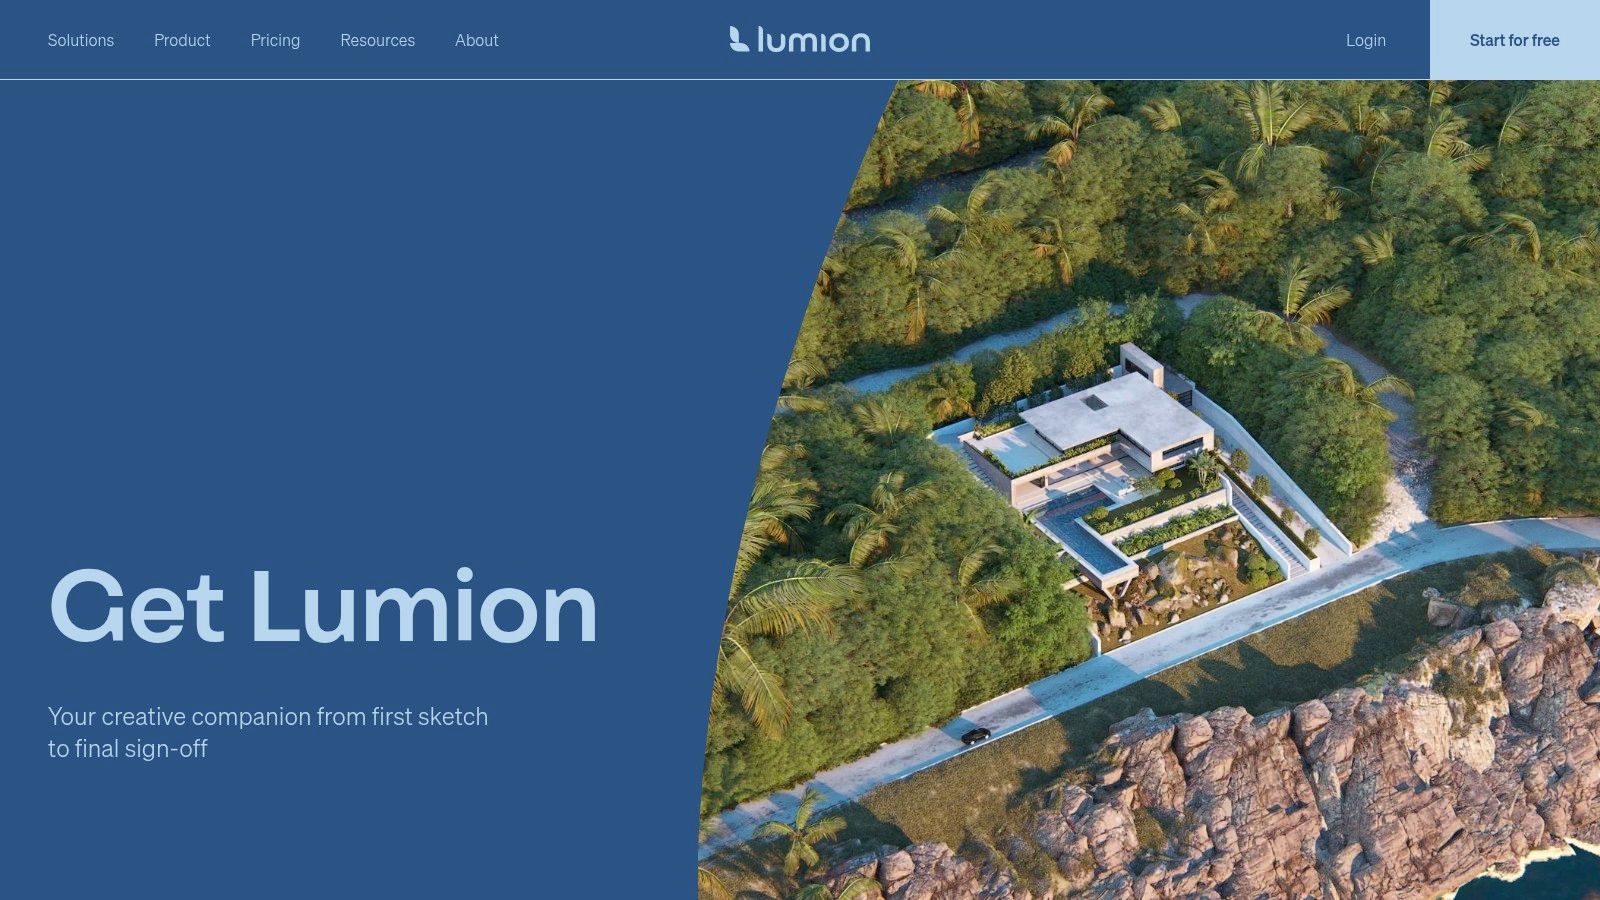
What makes Lumion one of the best architectural rendering software options is its vast, integrated content library and intuitive effects system. You can populate your designs with thousands of high-quality models, from detailed vegetation to animated people and vehicles, and apply realistic weather effects with just a few clicks. This allows for rapid iteration and helps clients truly understand the feel of a space, making it a powerful tool for design presentations and client communication.
Key Details & Considerations
The platform is built for a specific workflow: import your model, dress the scene, apply effects, and render. This streamlined process is incredibly efficient but comes with trade-offs in terms of granular control compared to more complex renderers. It requires a powerful graphics card to run smoothly, which is a key hardware consideration for any potential user.
- Best For: Architects and designers who need to create compelling visualisations quickly for client presentations and design iterations.
- Pricing: Subscription-based, with Lumion Pro and Lumion Standard tiers. A 14-day free trial is available, as well as educational licenses for students and faculty.
- Unique Feature: The massive, fully integrated asset library and one-click special effects (like rain, snow, and animated foliage) enable users to create rich, atmospheric scenes with minimal effort.
- Pros: Extremely fast rendering workflow, an extensive built-in library of assets and effects, and an intuitive, easy-to-learn interface.
- Cons: Windows-only and highly dependent on a high-end GPU for good performance; regional pricing variations can be confusing.
6. Twinmotion (Epic Games)
Twinmotion, from the gaming powerhouse Epic Games, has completely changed the game for real-time architectural visualisation. Leveraging the formidable Unreal Engine, it focuses on speed, ease of use, and instant feedback. It allows architects and designers to quickly transform their BIM or CAD models into living, breathing environments, complete with animated people, dynamic weather, and lush vegetation, making it perfect for immersive client presentations and design reviews.
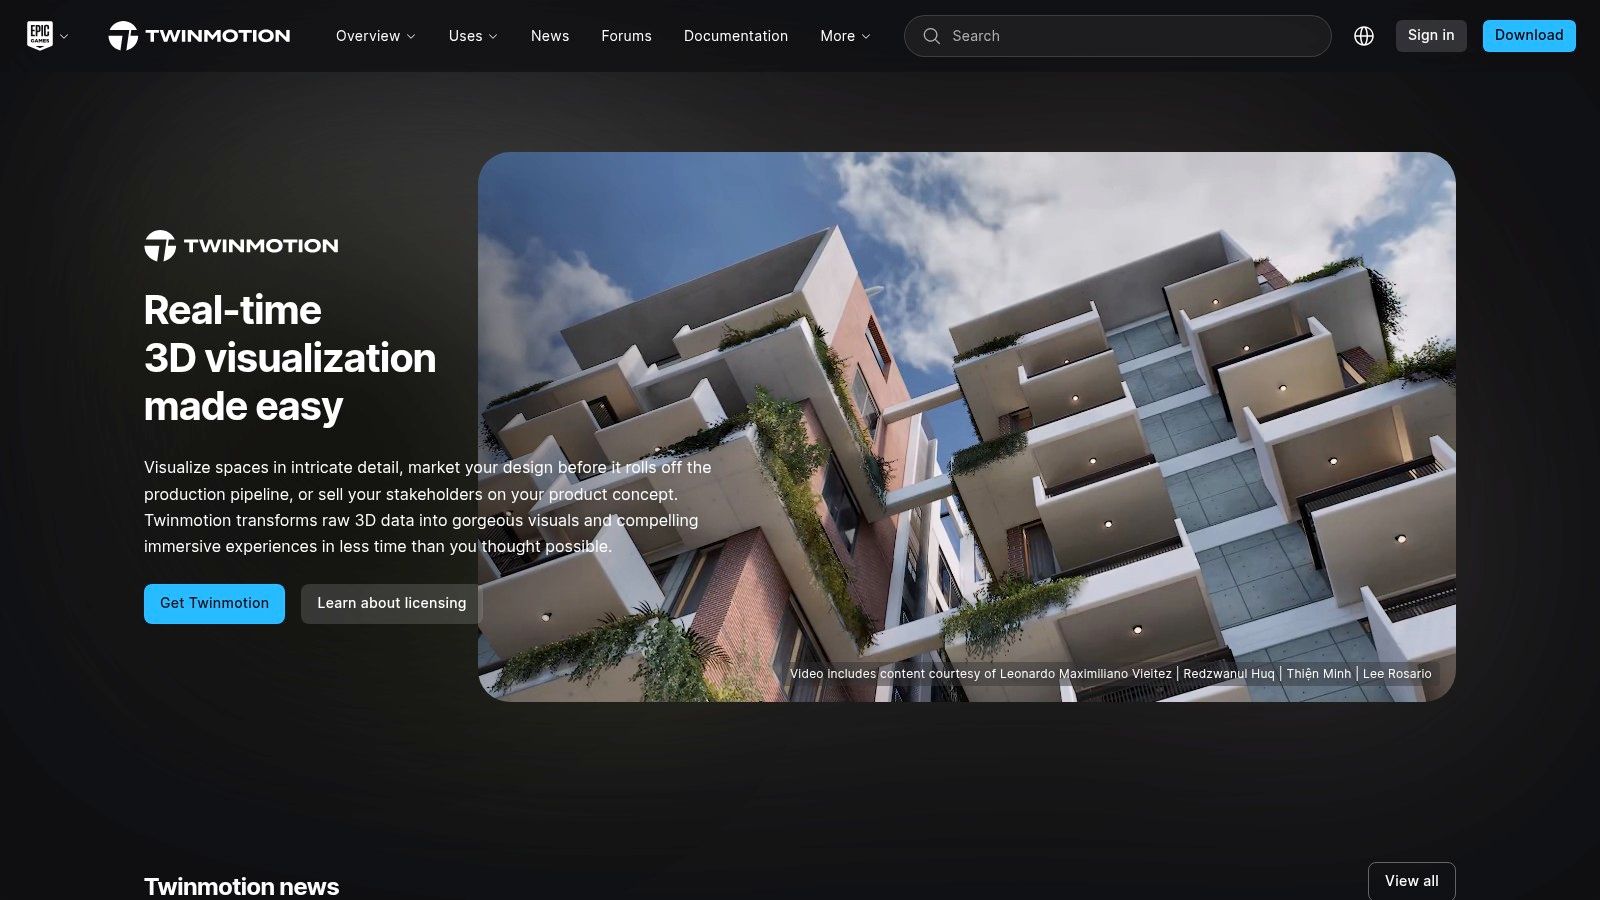
What makes Twinmotion one of the best architectural rendering software options, especially for smaller firms and students, is its incredibly generous licensing model. It’s completely free for individuals and companies earning under $1 million USD in annual gross revenue. Its direct integration with popular modelling software like Revit, SketchUp Pro, and Rhino, along with vast asset libraries from Quixel Megascans and Sketchfab, enables a seamless and creative workflow from concept to final visualisation.
Key Details & Considerations
The platform's main appeal is its intuitive, non-technical interface, which drastically lowers the barrier to entry for creating high-quality animations and VR experiences. While it may not offer the same granular, photorealistic control as a ray-tracing engine like V-Ray, its speed is unmatched for iterating on design ideas and producing compelling presentations in a fraction of the time.
- Best For: Architects, students, and small-to-medium studios needing a fast, easy-to-use tool for real-time visualisation and client presentations.
- Pricing: Free for commercial use for companies with less than $1M annual revenue. Paid seat subscriptions are required for larger organisations, unlocking features like Twinmotion Cloud.
- Unique Feature: The free-for-most-users model is unparalleled, democratising access to powerful real-time rendering technology.
- Pros: Extremely fast and intuitive workflow, rich built-in asset libraries, excellent VR capabilities, and an unbeatable price point for most users.
- Cons: Twinmotion Cloud for easy online sharing requires a paid subscription, and major version upgrades can sometimes introduce compatibility issues with older projects.
Visit Twinmotion
7. D5 Render
D5 Render has rapidly emerged as a powerful contender in the real-time rendering space, celebrated for its stunning visual quality, speed, and surprisingly accessible user interface. It leverages real-time ray tracing technology, allowing architects and designers to produce photorealistic images and animations in a fraction of the time required by traditional offline renderers. This speed makes it an excellent tool for iterative design, client presentations, and creating immersive experiences without a long wait.
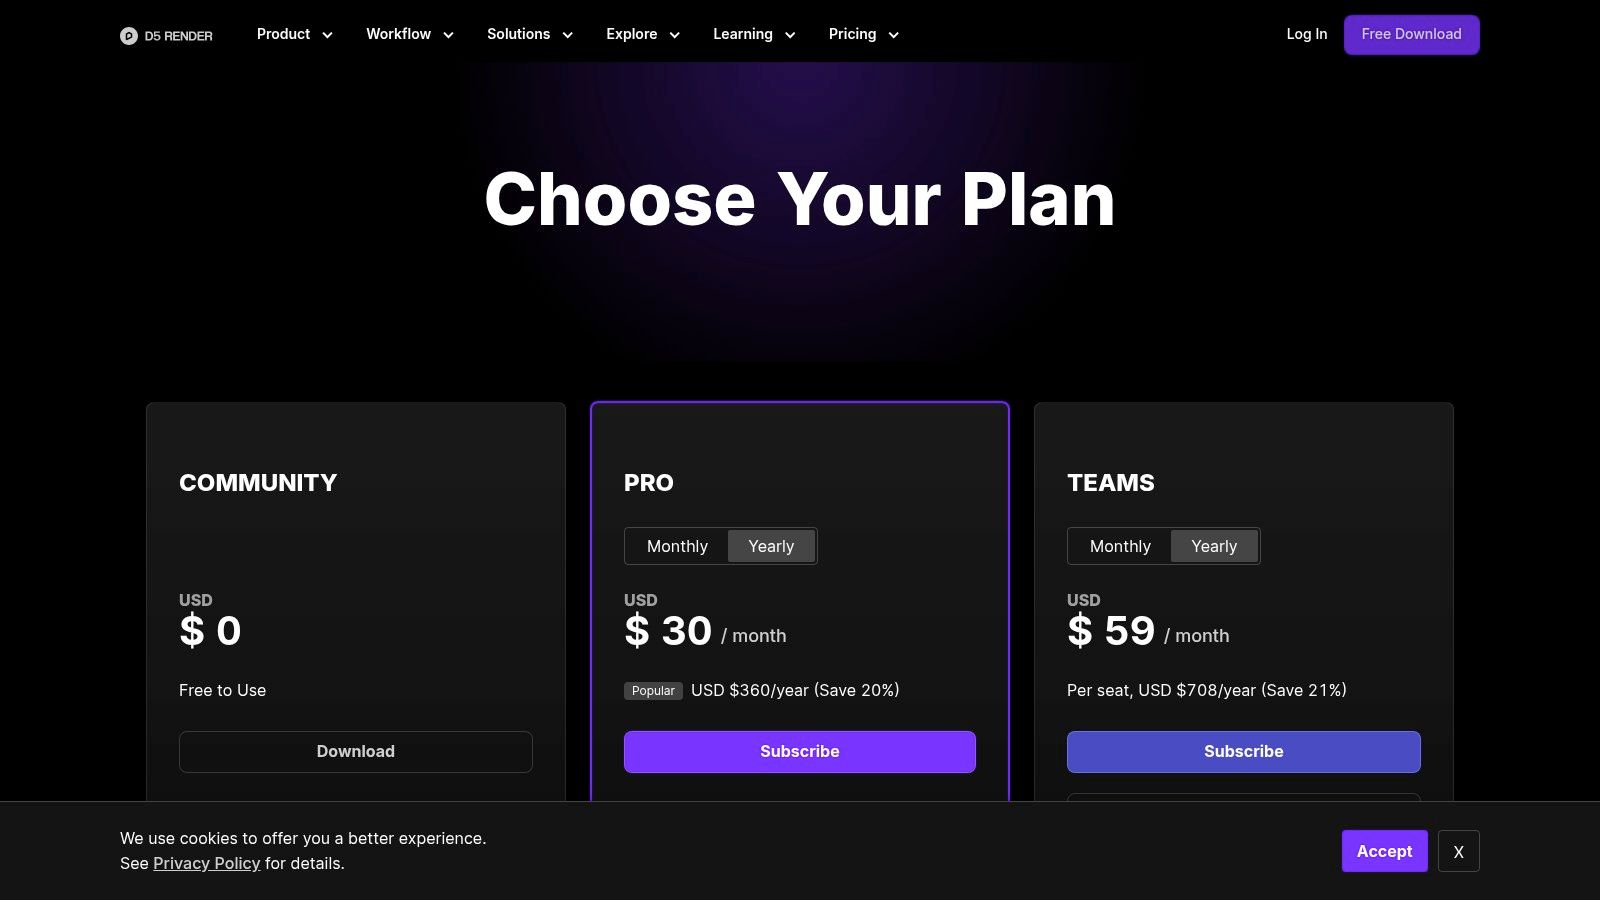
What truly sets D5 Render apart is its brilliant balance of power and simplicity, making it one of the best architectural rendering software choices for those who want high-end results without a punishing learning curve. It offers a generous free Community version, while its Pro subscription unlocks a massive library of over 13,000 high-quality assets and materials. Live-sync integration with popular modelling software like SketchUp, 3ds Max, and Revit streamlines the workflow, letting you see changes in real-time.
Key Details & Considerations
The platform's strength lies in its speed and ease of use, powered by modern GPU hardware. Its AI-driven features, like upscaling for high-resolution stills up to 16K and other intelligent enhancements, save significant time. While it's incredibly powerful, users should note that it is a Windows-centric platform, and achieving smooth performance on very large, complex scenes may require some model optimisation.
- Best For: Individuals and small to medium-sized studios needing fast, high-quality results with an intuitive workflow.
- Pricing: A free Community tier is available. Paid plans include Pro and Teams subscriptions, which are very competitively priced.
- Unique Feature: The combination of a high-quality real-time ray tracing engine with a vast, integrated asset library at an affordable price point is a major differentiator.
- Pros: Extremely fast rendering times, low barrier to entry with a free version, and an intuitive user interface.
- Cons: Primarily a Windows-only platform, and project files have limited portability to other rendering ecosystems.
8. Autodesk 3ds Max (with Arnold)
Autodesk 3ds Max is more than just a rendering tool; it’s a complete 3D modelling, animation, and rendering powerhouse that has been a cornerstone of the architectural visualisation industry for decades. While often used with third-party renderers like V-Ray or Corona, its integrated Arnold renderer is an incredibly powerful, production-proven engine capable of producing stunning, photorealistic results right out of the box. Its deep and mature toolset gives artists total control over every aspect of a scene.
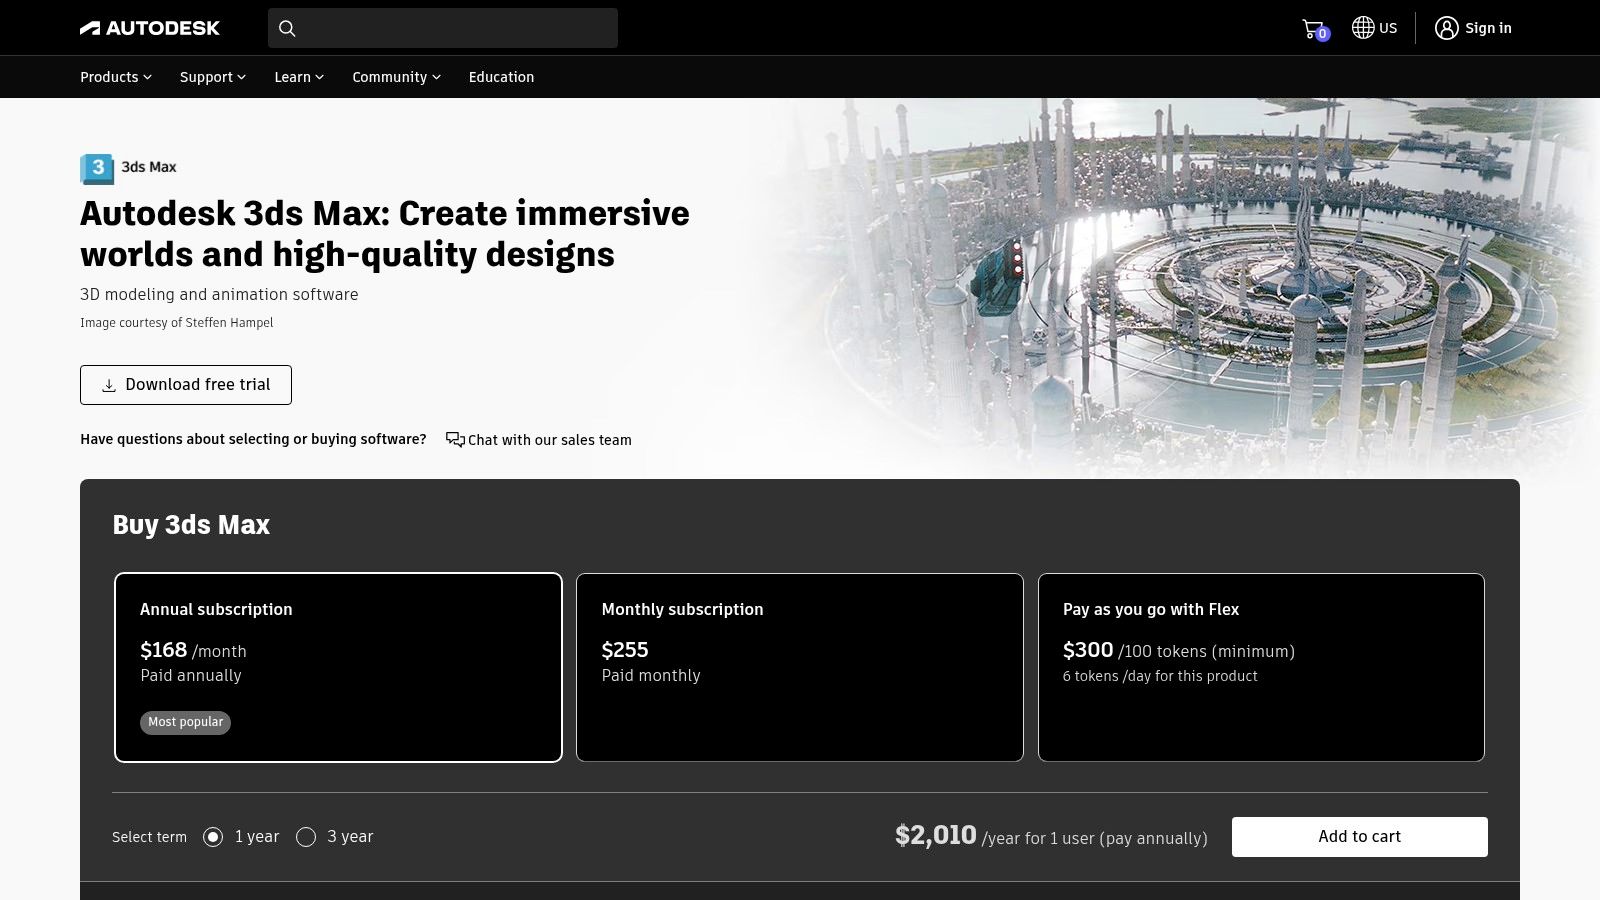
What solidifies its position as one of the best architectural rendering software options is its unparalleled flexibility and ecosystem. No other platform has such extensive support for plug-ins, scripts, and third-party assets like Forest Pack and RailClone, which have become standard tools in many archviz studios. Autodesk also offers flexible licensing, including subscriptions and pay-as-you-go Flex tokens, allowing studios to scale access based on project demand.
Key Details & Considerations
The primary challenge with 3ds Max is its notorious learning curve. It's a complex, professional-grade digital content creation tool, not a simple design-to-render application. However, for those who invest the time, it offers a level of customisation and power that is difficult to match, making it a highly valuable skill for any serious visualisation artist.
- Best For: Archviz professionals and studios that need a robust, all-in-one modelling and rendering solution with extensive customisation options.
- Pricing: Available via monthly and annual subscriptions. Autodesk also offers a "Flex" pay-as-you-go model using tokens for occasional use.
- Unique Feature: The vast and mature plug-in ecosystem allows for a highly customised and efficient workflow that is difficult to replicate in other software.
- Pros: Deep modelling and modifier tools, industry-standard in many top studios, and a massive ecosystem of plug-ins and learning resources.
- Cons: Has a very steep learning curve for newcomers and can be more expensive than real-time focused alternatives.
You can explore how 3ds Max is used for creating stunning interiors to see its capabilities in action.
9. SketchUp (Trimble) + V-Ray in Studio
SketchUp is legendary in the architectural world for its intuitive push-pull modeling, making it one of the fastest ways to go from a 2D plan to a 3D concept. While its native renderer is basic, the SketchUp Studio plan transforms it into a full-fledged visualisation powerhouse. This bundle cleverly packages the core modeling software with the professional-grade V-Ray rendering engine, creating a seamless workflow from initial design to final photorealistic image.
The combination of SketchUp's ease of use and V-Ray's rendering prowess makes this one of the best architectural rendering software packages for designers who want to stay within a single ecosystem. The Studio plan also includes valuable tools like a Revit Importer and point cloud visualisation capabilities, expanding its utility for more complex, data-rich projects. Access to the massive 3D Warehouse and Extension Warehouse further enhances its functionality, offering countless pre-made models and plugins to speed up any project.
Key Details & Considerations
The primary appeal is getting a top-tier renderer perfectly integrated into an industry-standard modeling tool. This eliminates the often-clunky process of exporting models to different programs. The subscription model is clear, with Go, Pro, and Studio tiers, but it's important to note the Studio plan's best features are currently Windows-only, which is a key consideration for Mac-based studios.
- Best For: Architects and designers who primarily use SketchUp for modeling and want a powerful, integrated rendering solution.
- Pricing: Tiered subscription model (Go, Pro, Studio). The Studio plan includes V-Ray and other professional tools. Pricing was recently updated, so it's wise to verify current costs.
- Unique Feature: The tight integration of Chaos V-Ray directly within the SketchUp interface, providing a streamlined modeling-to-rendering workflow.
- Pros: Extremely intuitive and fast for conceptual modeling, vast library of assets and extensions, and an all-in-one professional solution with the Studio plan.
- Cons: Key components of the top-tier Studio plan are exclusive to Windows, potentially alienating Mac users.
If you're looking to master this powerful combination, you can get started with this tutorial on SketchUp and its rendering capabilities.
10. Unreal Engine (for archviz)
Once exclusively the domain of video game developers, Unreal Engine has erupted onto the architectural visualisation scene as a powerhouse for real-time rendering. It’s less of a traditional renderer and more of a complete creation environment where you can build fully interactive experiences. The introduction of technologies like Lumen for dynamic global illumination and Nanite for virtualised geometry in UE5 has pushed its visual quality into the realm of high-end offline renderers, but with the massive benefit of real-time feedback.
What makes it one of the best architectural rendering software choices is its unparalleled potential for interactivity and its pricing model. You can create not just static images or animations, but fully explorable virtual reality walkthroughs and dynamic presentations where clients can change materials or lighting on the fly. Best of all, for most architectural projects that don't involve selling a commercial product, Unreal Engine is completely free to use, including access to the vast Quixel Megascans library.
Key Details & Considerations
The primary challenge with Unreal Engine is its complexity; it's a deep platform designed for game development, so architects will face a steeper learning curve compared to dedicated archviz tools. However, the payoff is a level of creative freedom and immersion that is difficult to match. The engine's ability to handle massive, detailed scenes makes it ideal for large-scale projects.
- Best For: Studios and professionals creating interactive walkthroughs, VR experiences, and large-scale real-time visualisations.
- Pricing: Free for most architectural and non-game linear content. A royalty or subscription may apply for commercial games or certain large-scale non-game projects.
- Unique Feature: The combination of Lumen and Nanite in UE5 allows for photorealistic, real-time global illumination and lighting on scenes with immense geometric complexity, without traditional baking.
- Pros: Incredible real-time visual quality, no upfront cost for most archviz use cases, and a massive ecosystem of assets and learning resources.
- Cons: Has a significant learning curve compared to simpler, dedicated rendering software.
You can get a clearer picture by exploring more about architectural visualisation software and its evolution.
Visit Unreal Engine
11. Blender (free, open source)
Blender is the undisputed champion of the open-source world and a formidable powerhouse in the 3D industry. Initially known for animation and VFX, its architectural visualisation capabilities have grown exponentially, making it a serious contender against paid software. It's a complete 3D creation suite, allowing you to model, texture, animate, and render your projects all within a single, unified environment, which is a massive workflow advantage.
What solidifies Blender's spot as one of the best architectural rendering software options is its dual-renderer approach. It includes Cycles, a production-ready path-tracing engine for breathtaking photorealism, and Eevee, a real-time renderer perfect for rapid previews and stylised visuals. This flexibility, combined with a vast ecosystem of free and paid add-ons, allows users to customise their workflow to an incredible degree without ever paying a subscription fee.
Key Details & Considerations
Blender's biggest selling point is its price tag: zero. This makes it incredibly accessible for students, freelancers, and small studios. The trade-off is that achieving the streamlined, archviz-specific workflows of competitors might require installing several add-ons and a bit of custom setup. However, the vibrant and supportive community provides an endless supply of tutorials and resources to overcome any challenge.
- Best For: Freelancers, students, and studios looking for a powerful, no-cost, all-in-one 3D solution.
- Pricing: Completely free and open-source for both personal and commercial use.
- Unique Feature: The inclusion of two powerful, native render engines (Cycles for ray-tracing and Eevee for real-time) within the same free package.
- Pros: Absolutely no cost, a massive and active user community, and an all-in-one modelling and rendering workflow.
- Cons: The interface can be complex for newcomers, and achieving top-tier results often requires add-ons and careful scene optimisation.
12. Next Limit – Maxwell Render
Maxwell Render holds a special place in the rendering world, known for its rigorous, "unbiased" approach to light simulation. It operates on the principle of physical accuracy above all else, calculating light, materials, and camera behaviour based on real-world physics. This commitment results in images with an almost tangible sense of realism, particularly in how light and shadow interact with complex materials, making it a favourite among purists seeking photographic perfection.
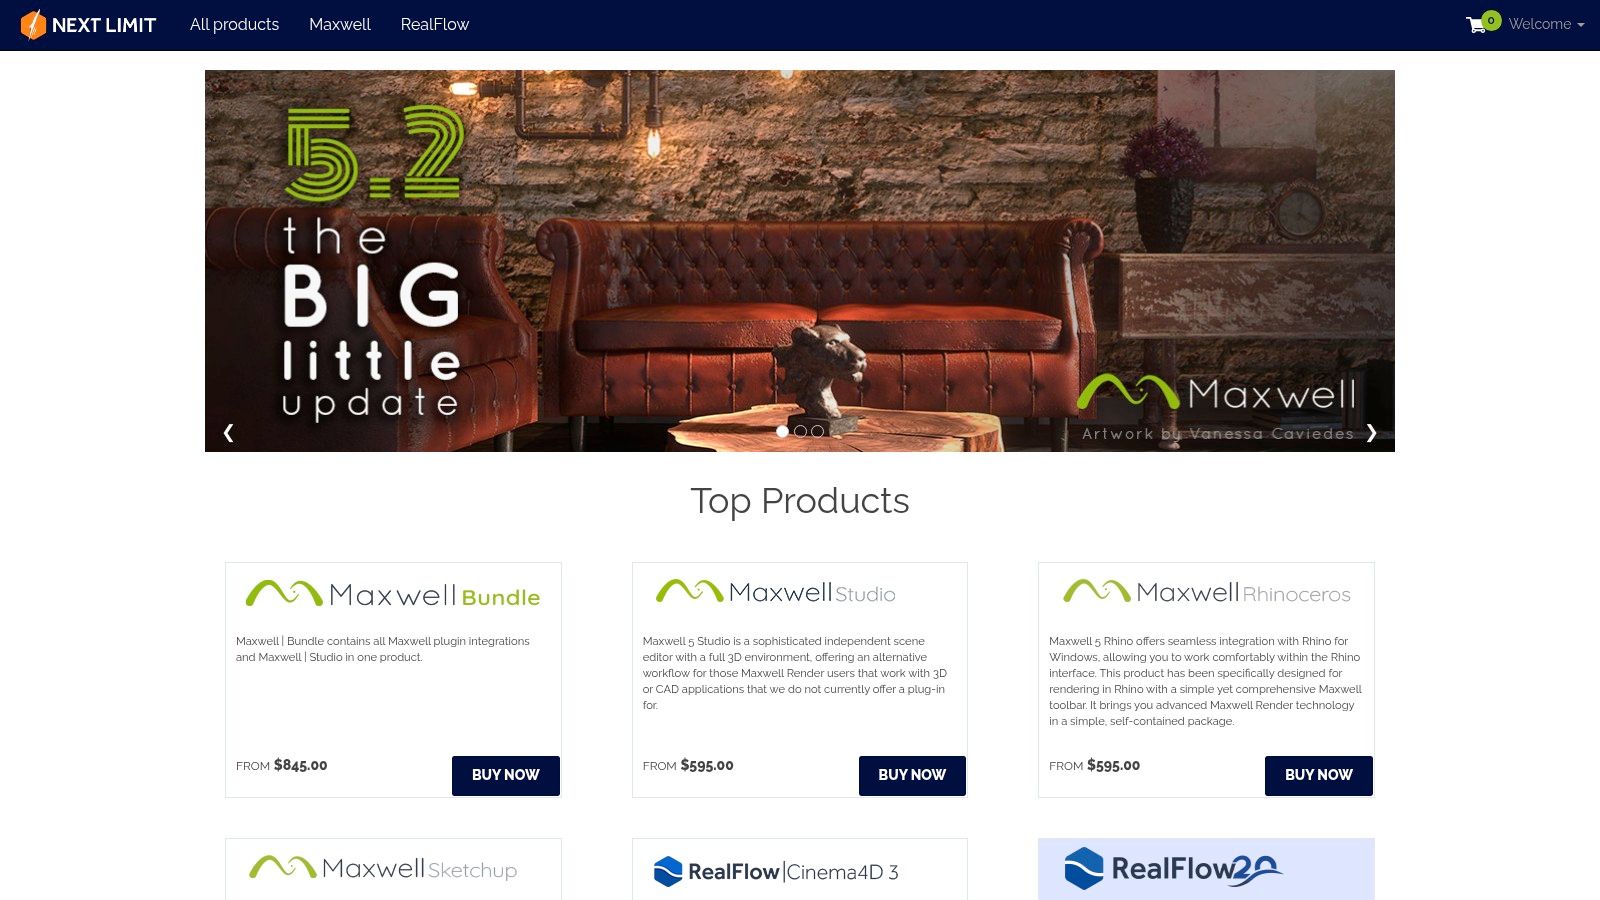
Unlike renderers that prioritise speed using approximations, Maxwell's strength is its uncompromising quality. It's an excellent choice for final marketing stills in architectural and product visualisation where every detail of light bounce and material texture must be flawless. While it integrates with popular software like Rhino and 3ds Max, its standalone Maxwell Studio offers a complete environment for setting up and rendering scenes with unparalleled control.
Key Details & Considerations
The platform's dedication to physical accuracy means it's not the fastest engine on the block. The trade-off for its incredible realism is longer render times compared to biased or real-time GPU engines. However, its interactive 'FIRE' (Fast Interactive Rendering) mode provides a real-time preview to help you fine-tune lighting and materials before committing to a final, high-quality render.
- Best For: Professionals and studios prioritising physical accuracy and photographic realism over render speed.
- Pricing: Perpetual-style licences are available, offering a different model from the popular subscription trend. Educational discounts are also offered.
- Unique Feature: Its core unbiased rendering engine is its standout quality, simulating light transport with mathematical precision for hyper-realistic results.
- Pros: Produces some of the most physically accurate and realistic lighting available, and offers perpetual licensing.
- Cons: Can have significantly longer render times, and a smaller ecosystem compared to industry giants like Chaos or Epic Games.
Visit Next Limit – Maxwell Render
Top 12 Architectural Rendering Software Comparison
| Software | Core Features/Characteristics | User Experience & Quality ★★★★☆ | Value & Pricing 💰 | Target Audience 👥 | Unique Selling Points ✨ |
|---|---|---|---|---|---|
| 🏆 Vibe3D | AI-powered photorealistic 4K rendering, smart prompt edits | Fast cloud rendering, intuitive one-click natural language | Flexible pay-as-you-go, free trial & scalable | Designers, architects, studios, freelancers | Contextual Smart Prompts, version comparison, cloud |
| Chaos – V-Ray | Industry-standard, multi-host app license, extensive ecosystem | Mature photorealism, high quality | Premium licenses, add-on bundles | Professional archviz, large studios | Broad BIM/DCC support, Chaos Cloud & Cosmos assets |
| Chaos – Corona Renderer | CPU-focused, integrated with 3ds Max/Cinema 4D | Easy to use, realistic lighting | Solo & Premium subscriptions | Archviz artists, small to mid teams | User-friendly, floating licenses for teams |
| Enscape (by Chaos) | Real-time one-click rendering from BIM/CAD tools | Quick learning, real-time walkthroughs | Subscription plans & ArchDesign suite | Architects, BIM professionals | Strong BIM/CAD integration, instant client previews |
| Lumion | GPU accelerated, large content library | Fast workflow, rich effects | Named/floating licenses, regional pricing varies | Architects, designers needing fast visuals | Large built-in assets & effects |
| Twinmotion (Epic Games) | Real-time, Unreal Engine powered, VR support | Quick setup, free under $1M revenue | Free & subscription for cloud publishing | Small firms, freelancers, VR presentations | Free access, native Apple Silicon builds |
| D5 Render | Real-time, AI-assisted enhancements | Fast on modern GPUs, growing assets | Community free, affordable paid plans | Students, freelancers, studios | AI upscaling, 16K renders, VR walkthroughs |
| Autodesk 3ds Max (with Arnold) | Professional DCC, integrated Arnold renderer | Complex, steep learning curve | Monthly & Flex token subscriptions | Experienced 3D artists, large studios | Extensive modeling & plug-ins ecosystem |
| SketchUp + V-Ray Studio | Concept modeling + V-Ray rendering bundle | Intuitive modeling, cloud collaboration | Multiple plans: Go, Pro, Studio | Architects, modelers needing easy visualization | 3D Warehouse, Revit Importer, cloud services |
| Unreal Engine (archviz) | Real-time photoreal GI (Nanite/Lumen), VR & interactive support | Steeper learning curve, highly powerful | Free for most archviz projects | Advanced archviz studios, VR devs | UE5 tech, royalty-free, huge asset ecosystem |
| Blender (free, open source) | Cycles & Eevee renderers, cross-platform | Free, active community, extensive add-ons | Completely free | Hobbyists, freelancers, studios | Free & open source, wide compatibility |
| Next Limit – Maxwell Render | Physically-based unbiased renderer | Highly realistic lighting but slower renders | Perpetual licenses & cloud rendering credits | Professionals valuing photorealism | Fire preview mode, educational discounts |
How Rendering Tools Embrace New Tech
The landscape of architectural visualization moves at breakneck speed, especially as fresh technologies like VR, AI, and machine learning burst onto the scene. Leading software players—think Epic Games’ Twinmotion, Chaos, or Autodesk—aren’t just watching from the bleachers; they’re weaving these innovations right into the core of their products.
Here’s how the industry keeps ahead of the curve:
- Seamless VR Integration: Modern rendering engines now allow direct exports to virtual reality platforms, turning static designs into immersive walkthroughs. Instead of just orbiting a static render, clients can strap on a headset and stroll through the space—virtual hard hat optional.
- AI-Driven Automation: AI doesn’t just speed things up; it’s changing the game altogether. Tools with smart denoising, one-click scene relighting, auto-populating landscapes, or generating design variations with simple text prompts are no longer science fiction—they’re mainstays in the latest releases.
- Continuous User-Focused Updates: Balancing cutting-edge features with rock-solid reliability is crucial. Leading developers push out regular updates to ensure their tools play nicely with new hardware and workflows, while still keeping interfaces easy to pick up for both seasoned professionals and newcomers.
The result? Architectural rendering software stays nimble, ensuring that creatives can push boundaries with new tech—without sacrificing stability or usability.
Rendering Features for Realistic Weather, Environments, and Animation
When choosing architectural rendering software to create lifelike weather, detailed environments, and dynamic animated elements, there are a few standout features you’ll want to look for:
- Extensive Content Libraries: Access to a broad collection of built-in materials, objects, and preset environmental assets lets you populate your scenes with everything from lush greenery and atmospheric skies to moving people and vehicles.
- Real-Time and One-Click Effects: Modern tools often allow you to instantly apply weather conditions like rain, snow, or sun with minimal tweaking—no technical wizardry required.
- Animation Capabilities: The ability to animate not only objects (such as swaying trees or walking pedestrians) but also environmental effects greatly enhances realism.
- Intuitive Scene Enhancement: Drag-and-drop placement, easy-to-edit parameters, and real-time visualization help bring depth and authenticity to scenes without a steep learning curve.
- Integrated Lighting and Atmospheric Tools: Features like global illumination, volumetric lighting, and environmental fog help mimic the way light interacts with changing weather and complex surroundings.
Together, these qualities empower users to quickly craft immersive visualizations that tell a story—not just deliver a static snapshot.
Essential Post-Production Tools for Rendered Images & Animations
Once your rendering software has churned out those high-res beauties, the job’s not quite done. To give your visuals an extra dose of polish—whether it’s a still image or a moving walkthrough—there are a few industry-standard tools no visualization artist should be without.
- Adobe Photoshop: The go-to for image post-processing, Photoshop lets you tweak color, contrast, sharpness, and atmospheric effects. It’s ideal for adding backgrounds, manipulating light, and introducing details that push realism over the finish line. From minor touch-ups to major enhancements, Photoshop is the digital darkroom for still renders.
- Adobe Premiere Pro: When it comes to video sequences or animated walkthroughs, Premiere Pro steps in. It handles editing, transitions, color grading, and sound, helping you stitch together individual frames into smooth, professional presentations. Think of it as the editing suite for turning raw render exports into an engaging visual narrative.
Other popular options out there include tools like After Effects for motion graphics, DaVinci Resolve for advanced color grading, and even open-source alternatives for budget-conscious creators. But in most studios, Photoshop and Premiere Pro remain classics—giving you control over the final impression your visuals leave on clients and audiences alike.
Why Post-Production Matters in Archviz
After your rendering engine spits out those dazzling frames, the real magic often happens in post-production. This is the crucial stage where raw images and animations are thoughtfully polished, making them presentation-ready works of art.
Bringing Concepts to Life
Post-production tools—think Photoshop for stills and Premiere Pro for animations—let you dial in the finishing touches that can mean the difference between "good" and "WOW." This phase is all about:
- Tweaking colors and contrast for visual punch
- Adjusting lighting and atmosphere to set the mood
- Adding subtle background flourishes, sky swaps, or environmental elements to ground your design in reality
- Finessing reflections, shadows, or depth for extra realism
Cohesive Storytelling for Animations
When it comes to animated walkthroughs or video presentations, post-production is where everything comes together. Editing suites empower you to:
- Seamlessly stitch together rendered clips
- Add transitions, text overlays, and camera moves for narrative clarity
- Layer in sound design to elevate the emotional impact In short: post-production is where your design vision takes its final form—refined, convincing, and ready to impress clients or collaborators.
AI vs Traditional Rendering
Traditional engines require:
- Manual lighting setup
- Material tuning
- Render passes
- Post-production
AI-powered rendering platforms:
- Generate lighting automatically
- Create multiple design variations instantly
- Require minimal hardware
- Reduce render time from hours to seconds
Future of Architectural Rendering (2026 and Beyond)
We’re entering an AI-first era where:
- Iteration speed > manual perfection
- Concept generation > single final image
- Automation > hardware dependency
- Cloud workflows > local GPU rendering
Architectural visualization is shifting from technical rendering skills toward design intelligence. Today’s rendering software does more than just make pretty pictures—it serves as the backbone for how projects are designed, evaluated, and communicated from concept to completion.
The Expanding Role of Rendering Software
-
Visualizing Ideas 3D rendering tools now transform basic sketches and CAD models into immersive, detailed representations of entire buildings, interiors, and even cityscapes. This makes it possible for stakeholders to grasp the vision long before a shovel hits the ground.
-
Boosting Accuracy With real-time lighting, material controls, and precise spatial relationships, architects can see exactly how their choices will play out in the built environment—from how sunlight shifts through a room to the subtle textures of a façade.
-
Leveling Up Presentations Renderings aren’t just for impressing clients. By showcasing projects under different lighting, seasons, and angles, teams can tell a more compelling story and make their proposals truly stand out.
-
Streamlining Collaboration Shared 3D models bridge the communication gap between architects, engineers, clients, and authorities. This collaboration leads to faster revisions, fewer misunderstandings, and smoother approvals.
-
Saving Time (and Headaches) Early visualization helps spot design conflicts before they become expensive construction problems. Catching issues at the digital stage saves both time and budget down the road.
-
Driving Innovation The latest workflows pair rendering with virtual reality and immersive tech, letting users "walk through" spaces and make changes on the fly—turning design reviews into interactive experiences.
In short, rendering software today empowers architects and designers to think beyond the technical, and use visualization as a tool for smarter, faster, and more creative decision-making
Making Your Final Render: Which Software Wins?
We’ve navigated the bustling landscape of architectural visualisation tools, from industry-standard powerhouses to revolutionary real-time engines. After diving deep into a dozen options, one thing is crystal clear: the title of "best architectural rendering software" isn’t a one-size-fits-all award. The right choice is deeply personal and depends entirely on your workflow, project scale, and creative goals.
Think of it like choosing a vehicle. You wouldn't use a sports car to haul construction materials, nor would you use a massive lorry for a quick trip to the shops. Your software choice follows the same logic. It’s about finding the tool that feels less like a hurdle and more like a natural extension of your design process.
Your Workflow, Your Winner
Let’s break down the decision-making process into core user needs. This will help you map your specific situation to the tools we've discussed.
- Speed-Focused Professional: If your main priority is delivering stunning, photorealistic visuals to clients without spending days on render settings, a tool like Vibe3D is a game-changer. Its AI-driven, natural language interface slashes production time, making it ideal for fast-paced studios and client-facing iterations where quick turnarounds are non-negotiable. Similarly, real-time engines like Enscape and Lumion excel at providing instant visual feedback, perfect for iterative design and live presentations.
- Technical Artist and High-End Studio: If you crave absolute control over every pixel and need to produce cinematic-quality, hyper-realistic animations and stills, the titans of the industry are your best bet. Chaos V-Ray and Autodesk 3ds Max (with Arnold) offer unparalleled depth and customisation. They demand more technical expertise and longer render times, but the results are the gold standard for high-fidelity architectural visualisation.
- BIM-Centric Architect: When your workflow is deeply integrated with BIM software like Revit or Archicad, you need a rendering engine that plays well with others. Enscape and Twinmotion are champions here, offering seamless, live-link integrations. This allows you to visualise design changes in real-time without ever leaving your primary modelling environment, making them indispensable for design development and internal reviews.
- Budget-Conscious Student or Freelancer: Starting out shouldn't mean compromising on quality. Blender with Cycles stands as a powerful testament to the open-source community, offering a complete 3D pipeline from modelling to rendering for free. While it has a notable learning curve, its capabilities rival many premium options, making it the undeniable king for anyone on a tight budget or committed to open-source software.
Whether you want an all-in-one powerhouse like Blender + Cycles, the straightforward approach of pairing SketchUp with V-Ray or Enscape, or the visual flair of Twinmotion, there’s a beginner-friendly tool for every need and budget.
The Final Verdict: It’s About Your Vision
Ultimately, the best architectural rendering software is the one that empowers you to bring your vision to life most effectively. Don't get swayed by what's popular; focus on what solves your specific problems. Ask yourself: Does this tool speed up my workflow? Does it integrate with my existing software? Does it allow me to achieve the artistic style I'm aiming for?
Your final choice should reduce friction, not add to it. Whether it's the instant gratification of a real-time engine, the deep control of a traditional renderer, or the intelligent speed of an AI platform, the goal is the same: to create compelling, emotive spaces that tell a story. Choose the software that helps you tell your story best.
Tired of slow render times and complex settings holding back your creative vision? See how Vibe3D is revolutionising the industry by using AI to turn your models into photorealistic masterpieces in seconds. Explore the future of architectural visualisation and start rendering smarter, not harder, at Vibe3D.